Choosing a rich, deep color can elevate the look of your flat-pack items and enhance your interior aesthetics. I recommend starting with a wood conditioner, which ensures even absorption of the pigment, preventing unsightly blotches.
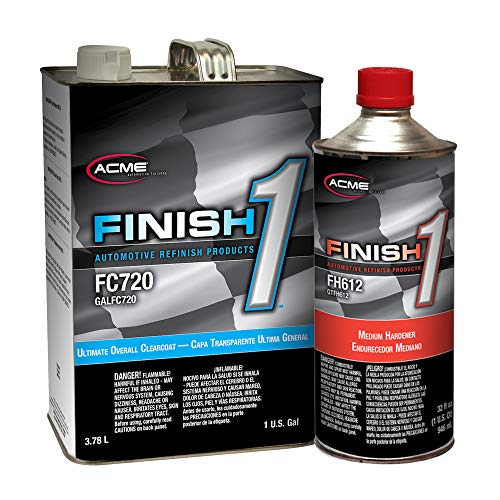
Next, select a high-quality wood stain. Oil-based options tend to yield a more pronounced color payoff but require longer drying times. Water-based stains dry quickly and are low in odor, making them ideal for indoor projects. Apply the stain with a clean cloth or brush, following the wood grain, and be mindful of overlapping to maintain a consistent finish.
After applying the first coat, wait for the recommended drying time before deciding if a second coat is necessary. For a more uniform look, lightly sand the surface between coats to achieve a smooth finish. Seal the stained wood with a clear topcoat to protect it from wear and tear, ensuring your refreshed piece remains stunning for years to come.
Staining IKEA Hemnes Furniture
Thoroughly clean the surface with a damp cloth to remove dust and grease. Allow it to dry completely.
Choose a wood tint that suits your space. Water-based products are easier to work with and dry faster than oil-based options. Test the color on an inconspicuous area first.
Gather materials:
- Sandpaper (220 grit)
- Lint-free cloths
- Brush or foam applicator
- Wood conditioner (if necessary)
Sand the piece lightly to prepare it for the application. Focus on smoothening any rough spots without altering the overall finish. Wipe down after sanding to eliminate dust.
If the wood is porous, apply a wood conditioner before the color. This helps achieve an even tone and prevents blotchiness.
Using a brush or foam applicator, apply the wood tint evenly. Work in sections to avoid overlap marks. Allow it to sit for a few minutes before wiping off excess with a lint-free cloth, following the wood grain.
For a deeper hue, apply multiple coats. Allow each coat to dry as per manufacturer instructions between applications.
Once satisfied with the color, seal it with a clear topcoat to enhance durability. Choose between matte, satin, or gloss finishes based on your preference, applying it in thin, even layers.
After completing the sealing process, let it cure for the recommended time. Keep the piece in a well-ventilated area while it dries fully.
Following these steps will help achieve a beautiful, custom finish on the selected items, refreshing their appearance and fitting your style seamlessly.
Choosing the Right Stain for Hemnes Furniture
I prefer water-based options that provide ease of use and quick drying times. They tend to have lower odor and are more environmentally friendly. Look for a product labeled as non-toxic and safe for indoor use.
If you’re aiming for a rich color, oil-based formulations often deliver deeper hues and more durability. Ensure to read the label for compatibility with the material of your piece. Popular colors like walnut or mahogany can enhance the natural grain beautifully.
Before settling on a shade, testing is crucial. I apply a small amount of the chosen hue to an inconspicuous area. This way, I can see how it interacts with the wood and other finishes. Allow sufficient drying time to get an accurate representation of the final look.
Consider the finish as well. A matte finish will yield a more rustic appearance, while a gloss or satin will offer a more polished effect. Each type affects the overall look significantly, so I recommend aligning the finish with my desired style.
Lastly, always have adequate ventilation in my workspace, especially with stronger products. Ensuring safety comes first enables me to focus on achieving the desired results without concerns.
Preparing the Surface for Staining
Begin with a thorough cleaning using a damp cloth. This removes dust and grease, ensuring a smooth application. Once dry, focus on sanding. Use fine-grit sandpaper (220 grit) to gently scuff the surface, which enhances adhesion. Sand in the direction of the wood grain to avoid scratches.
After sanding, vacuum the particles or use a tack cloth to capture fine dust. Inspect the piece for imperfections like dents or scratches; fill them with wood filler to create a uniform surface. Once the filler dries, sand the repaired areas for a seamless finish.
Sealing the Grain
Applying a wood conditioner is crucial, particularly for softwoods. This product prepares the wood by sealing the grain and allowing for even absorption of the product. Follow the manufacturer’s instructions, applying it with a clean rag and allowing it to set as recommended.
Final Check
Before proceeding, ensure the surface is completely dry and free of dust. Run your hand over the surface to check for smoothness. If necessary, perform a light sanding again to achieve a flawless base for staining.
Step-by-Step Guide to Applying Wood Stain
Prepare your work area by ensuring it’s well-ventilated and protected from dust and debris. Cover the floor and nearby items with drop cloths to catch any spills.
Choose the appropriate applicator based on the type of finish you prefer. A foam brush or a clean cotton cloth works best for even application, while a bristle brush can reach intricate details.
Open the product container and stir the liquid gently to ensure uniform consistency. Do not shake the can, as this can create bubbles that affect the finish.
Using your chosen applicator, apply a thin layer of the solution in the direction of the wood grain. Avoid applying too thick of a layer to prevent drips and uneven appearance.
Allow the first coat to sit for approximately 5 to 15 minutes, depending on the manufacturer’s instructions. This period lets the surface absorb the product.
After the specified time, use a clean cloth to wipe away any excess. This step ensures a smooth finish and allows you to control the depth of color.
Let the first coat dry completely, generally for 8 hours or as recommended. Make sure to check for any uneven spots and address them if necessary.
For a deeper hue, apply one or two additional coats following the same method. Remember to sand lightly with fine-grit sandpaper between coats for optimal adhesion and smoothness.
Once satisfied with the color and finish, allow the final coat to cure as instructed. Ensure adequate time before using the item to prevent damage to the new surface.
Tips for Achieving an Even Stain Application
Begin with a high-quality applicator, such as a foam brush or lint-free cloth. This ensures that the liquid is evenly distributed without leaving streaks or marks.
Preparation Techniques
- Ensure the surface is clean and free of dust or debris. A tack cloth works well for this purpose.
- Apply a pre-stain conditioner to minimize blotching, especially on softwoods.
- Choose a well-ventilated area to work in; airflow aids the drying process and helps with even application.
Application Method
- Use long, smooth strokes when applying; this helps avoid puddles in the corners or seams.
- Work in small sections and wipe off any excess promptly. This gives consistent color depth across the surface.
- Consider using a circular motion for intricate areas but revert to straight strokes on larger surfaces.
After the first coat dries, inspect for uneven areas and touch them up before proceeding to the next layer. This practice ensures a polished final look.
Drying and Curing Time for Stained Pieces
The drying and curing process for treated pieces is crucial to achieving a long-lasting finish. Typically, I allow a minimum of 24 hours for the surface to dry before touching it again or applying additional coats. However, full curing can take up to two weeks, depending on factors like humidity and temperature.
Drying Times
Here’s a summary of the recommended drying times for various products:
| Product Type | Initial Dry Time | Full Cure Time |
|---|---|---|
| Water-Based Finish | 1-2 hours | 1 week |
| Oil-Based Finish | 6-8 hours | 2 weeks |
| Gel Finish | 2-4 hours | 1-2 weeks |
Tips for Optimal Drying
For the best results, I suggest placing treated pieces in a well-ventilated area. This promotes faster evaporation of solvents. Avoid direct sunlight during the drying phase as it can lead to uneven curing. If humidity is high, consider using a dehumidifier to aid the drying process.
Always check the manufacturer’s instructions for precise timing and additional recommendations tailored to specific products. This ensures a durable, rich finish that stands the test of time. Patience during drying and curing is key to achieving a professional look in your projects.
Finishing Touches: Sealing and Protecting the Stain
Apply a quality clear coat to safeguard the color and ensure longevity. Choose between polyurethane, acrylic, or lacquer based on your preference for finish and durability. For a natural appearance, opt for water-based polyurethane as it dries clear and is less odorous.
Application Process
After the stain is completely dry, lightly sand the surface with fine-grit sandpaper to achieve a smooth texture. Clean off any dust before applying the sealant. Use a high-quality brush or foam applicator to ensure an even coat. Apply thin layers, allowing each to dry thoroughly before adding another. Typically, two to three coats are recommended for optimal protection.
Maintenance Tips
Regularly clean the surface using a soft, damp cloth to preserve the finish. Avoid harsh chemicals that can damage the protective layer. If scratches or wear occur, a light buffing with fine sandpaper followed by a touch-up coat can restore the appearance.
Maintaining Stained IKEA Hemnes Furniture
To preserve the allure of your newly enhanced pieces, regular care is key. I recommend dusting surfaces weekly with a soft, lint-free cloth to avoid scratching. For deeper cleaning, use a damp cloth with a mild soap solution, ensuring no excess moisture sits on the wood, as this can cause damage.
Routine Care and Protection
Apply a protective layer of furniture polish every few months. This not only enhances shine but also adds an extra barrier against spills and scratches. Always choose a polish suitable for the type of finish you have applied.
Dealing with Damage
If you notice minor scratches or stains, a touch-up can often do the trick. Use a matching wood filler or crayon to blend imperfections. For deeper scratches, lightly sand the area with fine-grit paper and reapply your finish carefully. Regular checks ensure your items remain in top condition, making maintenance less daunting.


