Begin with a thorough cleaning using a mixture of mild soap and warm water applied with a soft cloth or sponge. Gently scrub the surfaces to remove dirt, grime, and any stubborn stains. Rinse carefully with a damp cloth to avoid leaving any soap residue.
Once clean, inspect for any damage. Repair loose strands or breaks by weaving in additional twine or replacing broken sections. For more extensive damage, consider consulting a skilled artisan experienced in restoring intricate weavings.
To enhance the appearance and protect, apply a coat of furniture oil or a suitable wood conditioner. This not only nourishes the fibers but also helps to prevent dryness and cracking. Allow the product to penetrate before wiping away excess.
In addition to these steps, placing your items in a shaded area can prevent sun exposure from causing fading and weakening. Regularly rotating the location of your pieces can also help maintain even wear and ensure that they look their best for years to come.
Restoration Techniques for Wicker Pieces
Begin with a thorough cleaning. Mix warm water with a few drops of mild dish soap and gently scrub the surface with a soft cloth or sponge. Ensure to get into crevices where dirt may accumulate.
Next, address any discoloration. For light damage, consider using a mixture of equal parts vinegar and water. Apply it with a cloth and wipe down the surfaces. For deeper stains, a solution of baking soda and water can help gently lift the marks without causing damage.
Repairing Structural Issues
Inspect for loose or broken strands. Use a strong adhesive specifically designed for natural materials to secure loose pieces back in place. If a strand has broken, carefully reweave it if possible, or replace it with a similar material to maintain the original look.
Updating Appearance
- Consider refreshing the color with a wood stain or furniture paint. Choose non-toxic options suited for natural fibers.
- Apply a clear sealant to protect the surface from moisture and UV damage.
- If the original finish is too weathered, stripping it down and reapplying a protective coating can make a dramatic difference.
Finally, accessorize with cushions or throws for a modern touch, enhancing both comfort and style. Regular maintenance, like dusting and avoiding direct sunlight, will help in prolonging the life of these pieces.

Assessing the Condition of Your Rattan Furniture
I begin by examining for any visible damage such as cracks, breaks, or loose weaves. A magnifying glass may help to spot finer issues. It’s crucial to run my hands over the surface to identify rough spots or deteriorating fibers.
<p Next, I inspect the joints where different components meet. A common point of failure in a woven piece can be a loose or broken connection. If tightness is lost, I consider options for repairs to restore strength.
I pay close attention to discoloration. Fading can indicate prolonged exposure to sunlight. To address this, I evaluate the potential for refinishing or treating with a fabric protector. It’s important to check for stains or mold as well, which can stem from moisture retention.
Next, I consider the stability of the structure. A gentle shake can reveal any wobbling or weakness. If the base feels unsteady, it’s essential to determine whether legs or components need realignment or replacement.
Lastly, evaluating the overall comfort is key. A sagging seat may indicate worn-out fibers that require reweaving for optimal support. Once I identify all issues, I create a comprehensive plan for restoration tailored to each specific problem.
Cleaning Techniques for Rattan Surfaces
I recommend starting with a gentle approach. Dust the woven parts with a soft, dry cloth or a feather duster to remove surface debris. For deeper cleaning, mix a solution of warm water and a small amount of mild dish soap. Dampen a cloth in the solution, wringing it out to avoid excess moisture, then wipe the surface carefully. Avoid soaking the material, as excess water can weaken the fibers.
Alternative Cleaning Solutions
If stains persist, consider using white vinegar diluted with water (1:1 ratio) as a natural cleaner. Apply it with a soft cloth, then rinse with a clean damp cloth and dry immediately to prevent moisture damage. For mildew, a mixture of baking soda and water forms a paste that can be applied to the affected areas. Let it sit for a few minutes, then scrub gently with a soft brush and rinse.
Final Touches
<p.To protect and maintain the integrity of the weaving, regularly apply a light coat of furniture wax or a specialized rattan protector after thorough cleaning. This step helps to seal the fibers, providing additional protection against the elements and enhancing the natural beauty of the material.
Repairing Damaged Strands and Weaves
I recommend inspecting each strand for breaks or fraying. For minor damages, I use clear adhesive to bond the strands. Applying a small amount with a toothpick ensures precision. After adhering, I hold the strands in place until the glue sets, typically around 30 minutes.
Replacing Severely Damaged Sections
If a strand is beyond repair, I’ll cut it out using sharp scissors. I then take a new piece of similar material, cutting it to size. Using a needle and a sturdy thread, I weave the new strand into the existing pattern, ensuring it matches the surrounding design for a seamless look.
Reinforcing Weaves
<p.To reinforce loose weaves, I carefully pull the strands tighter and use a small amount of glue at the connection points. This helps prevent further loosening. For added durability, I sometimes wrap a thin twine around the weave before applying the adhesive. This technique not only strengthens the weave but also adds an aesthetically pleasing detail to the piece.
Choosing the Right Finish for Restoration
For rejuvenating woven pieces, selecting the appropriate finish significantly influences the final appearance and durability. I prefer using natural oils, such as linseed or tung oil, which penetrate deeply and enhance the wood’s inherent beauty while providing moisture resistance.
Before application, I ensure the surface is clean and dry, allowing the finish to adhere properly. Applying one or two coats, followed by a light sanding in between, helps achieve a smooth, even surface. This method enriches the fibers and provides a subtle sheen.
If opting for a protective sealant, I choose water-based polyurethane for its clarity and ease of application. It forms a protective barrier without altering the piece’s natural color. One coat on a clean surface is usually sufficient, but I recommend checking for compatibility with the underlying materials first.
For outdoor use, a marine varnish works effectively as it withstands moisture and UV damage. I apply this in thin layers, ensuring ample drying time in between to prevent peeling or bubbling.
Always test any finish on an inconspicuous area before full application, confirming it meets my expectations for aesthetics and durability. This final step prevents unexpected results and ensures the longevity of my cherished items.
Methods for Reinforcing Structural Integrity
To enhance stability, I often reinforce weakened joints with wood glue. By applying it to the connection points, I ensure a stronger bond. Clamping the glued areas until dry provides optimal results.
Adding Support with Inserts
In cases of significant damage, I utilize wooden or metal inserts. These can be placed inside hollow sections or at joint failures, offering additional strength and preventing further issues. Properly measuring and cutting the insert allows for a snug fit, ensuring it doesn’t disrupt the aesthetics.

Reinforcing Edges and Corners
To address concerns along edges and corners, I recommend using corner brackets. These metal pieces can be attached discreetly, ensuring structural resilience. Additionally, I reinforce the undercarriage with extra cross supports if necessary. This method not only fortifies the piece but also maintains its design integrity.
Tips for Preventing Future Damage to Rattan
Regular maintenance is key to preserving your pieces. I recommend creating a cleaning schedule to prevent dust and dirt buildup. A simple wipe-down with a damp cloth weekly can go a long way.
Utilize coasters and placemats to shield surfaces from heat and moisture. This can stop the material from warping or discoloring.
Store items away from direct sunlight to prevent fading and cracking. Utilize curtains or UV-protective films on windows to limit exposure.
Maintain humidity levels between 40% and 60% in your environment. Use a humidifier in dry conditions to prevent brittleness.
Keep away from high-traffic areas and heavy furnishings pressing against your pieces. Allow space for airflow and circulation.
- Rotate cushions periodically to promote even wear.
- Inspect for loose strands regularly and fix them promptly to prevent further damage.
- Avoid exposing to extreme temperatures or humidity changes.
Incorporate protective finishes periodically to enhance durability. A light application of suitable oil or varnish every couple of years can help maintain a barrier against elements.
Be cautious with cleaning products. Use only pH-balanced solutions and avoid harsh chemicals that can compromise integrity.
Implementing these strategies will create a sustainable environment for your woven treasures, helping to extend their lifespan significantly.
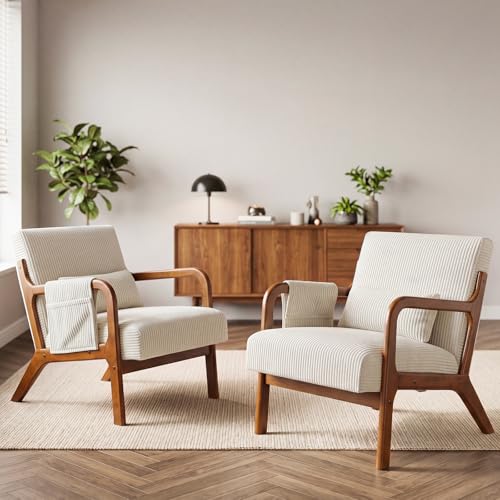
Styling Your Revived Rattan for Modern Spaces
Integrating beautifully restored woven pieces into contemporary settings can create a timeless appeal. I recommend choosing neutral or pastel upholstery to complement the natural tones of the weaves, providing warmth and a sophisticated touch.
Utilize bold, geometric patterns in throw pillows or accent rugs to create visual interest. This contrast not only enhances the textural elements of the wicker but also aligns with modern design aesthetics.
Mix materials for a layered look; couple the wicker with metals such as brass or matte black steel to create dynamic contrasts. For instance, pairing a sleek metal coffee table with a creatively updated seat can elevate the entire arrangement.
Natural elements like plants serve as a perfect companion. Positioning greenery around your refurbished items adds life and a fresh ambiance. Choose plant stands made from similar materials for cohesiveness.
For lighting, opt for pendant fixtures or floor lamps with a minimalist design. These lights can spotlight the intricacies of your woven pieces while maintaining a streamlined look throughout the environment.
| Styling Tips | Description |
|---|---|
| Neutral upholstery | Creates a harmonious backdrop for the rustic look. |
| Bold patterns | Brings dynamic elements that contrast beautifully with natural materials. |
| Mixing materials | Combining wicker with metals enhances visual appeal. |
| Incorporating greenery | Adds freshness and a lively atmosphere. |
| Minimalist lighting | Highlights the craftsmanship while ensuring a modern feel. |
Consider creating vignettes with your updated pieces, allowing them to be the focal point in specific areas of your space. This approach provides an inviting environment while showcasing the craftsmanship behind each item.