Begin with a thorough cleaning. Use a mixture of warm water and mild soap along with a soft-bristle brush to remove dirt and grime. For stubborn rust, a wire brush or sandpaper may be necessary; this will help expose the raw surface for the next steps.
After cleaning, dry the pieces completely. Any moisture left can lead to further oxidation, so take the time to ensure everything is thoroughly dried using a lint-free cloth. Next, apply a primer specifically designed for metal surfaces. This step creates a barrier against the elements and promotes better adhesion of the paint.
Select a high-quality outdoor paint formulated for metal finishes. A spray application usually provides even coverage. Be sure to paint in light coats, allowing each layer to dry before applying the next. This technique prevents drips and ensures a uniform appearance.
Finally, consider applying a clear protective sealant to enhance durability. This added layer will safeguard against future wear and tear, allowing your outdoor seating to maintain its charm for years to come.
How to Restore Cast Iron Garden Furniture
I recommend beginning by removing any loose dirt or debris using a stiff brush or a vacuum cleaner with a brush attachment. This ensures that the underlying surface is clean for the next steps.
Next, apply a fine-grade sandpaper or a wire brush to eliminate rust and flaking paint. Pay attention to corners and intricate details where grime tends to accumulate. It’s a good practice to wear a mask and goggles to protect from dust and debris.
After sanding, thoroughly wash the item with soapy water to remove any remaining particles. Rinse with clean water and allow it to dry completely before proceeding.
For a smooth finish, consider using a metal primer specifically designed for outdoor use. Apply the primer evenly with a brush or spray can, making sure to cover all surfaces, including hard-to-reach areas. This step enhances adhesion and longevity of the paint.
Once the primer dries, choose a high-quality exterior paint in your preferred color. A spray paint designed for metal can yield a professional-looking result without brush marks. Apply several light coats, allowing adequate drying time between applications.
To protect your item from future moisture and chipping, finish with a clear protective sealant. Choose a sealant that is compatible with the paint you’ve selected for optimal results.
Finally, allow everything to cure as per manufacturer instructions before placing the item back outdoors. Regular maintenance, including periodic cleaning and inspections for rust or wear, will prolong its life for years to come.
Assessing the Condition of Your Cast Iron Furniture
First, inspect for rust. Use a wire brush or sandpaper to gently remove any flaking areas. This will reveal whether the oxidation is superficial or if deeper damage exists.
Next, check for structural integrity. Ensure that all joints and connections are secure. Gently shake or push the pieces to identify any wobbling or instability that may indicate weak spots.
Look for signs of cracks or chips. These imperfections can affect both safety and aesthetics. Use a magnifying glass to spot any small hairline fractures that might be less obvious.
Evaluate the finish by rubbing a small area with a damp cloth. If the paint comes off easily, a strip and repaint may be necessary to restore that protective coating.
Assess the seating and tabletop surfaces. Test for smoothness and any sharp edges that could result from wear. A smooth consistency is key to comfort and safety.
Finally, consider the overall appearance. A piece that looks scratched or faded may require different treatment than one showcasing minimal wear. Take photographs to document before beginning any work.
Cleaning Techniques for Rust Removal
To effectively tackle rust, I prefer using a combination of mechanical and chemical methods. For minor corrosion, I utilize fine steel wool or a wire brush, gently scrubbing the affected area. This method allows me to remove loose rust without damaging the underlying surface.
When the rust is more stubborn, I turn to a vinegar soak. I submerge the rusty parts in white vinegar for several hours or overnight. The acetic acid helps dissolve the rust. After soaking, I scrub the surface with a brush, rinsing with water and drying thoroughly.
For larger areas or severe corrosion, I apply a commercial rust remover. I carefully follow the manufacturer’s instructions, ensuring that I use gloves and work in a well-ventilated area. This approach is effective for deep rust, often penetrating the surface for better results.
After applying any rust removal method, I wash the surface with soap and water to eliminate any residue, then dry it completely to prevent new rust from forming.
To provide an additional layer of protection, I apply a rust-inhibiting primer and finish with a paint suitable for metal surfaces. This step not only enhances the appearance but also safeguards against future corrosion.
Choosing the Right Paint for Metal Surfaces
Select a paint specifically designed for metal applications. Look for products labeled as rust-inhibiting or anti-corrosive, as these will provide a protective barrier against moisture and oxidation.
Types of Paint
Acrylic enamel is a popular choice due to its durability and ease of application. It provides a hard finish that withstands weather elements. Oil-based paints also offer excellent adhesion and a smooth finish but take longer to dry. Primer is essential; choose a rust-inhibiting primer to enhance paint adhesion and longevity.
Finish Considerations
Opt for a finish that suits your aesthetic preferences. Glossy finishes are easier to clean but may show imperfections, while satin and matte finishes provide a more subtle look but can be harder to maintain. Check that the paint has UV resistance to prevent fading.
Preparing the Surface for Painting
Begin by thoroughly inspecting the surface for any remaining imperfections that need attention. Use a wire brush or a grinder to eliminate rust and flaky paint. Ensure the area is smooth to promote a better adhesion of new coatings.
Steps to Achieve a Clean Surface
- Remove loose particles: Scrap off any peeling paint with a scraper, then sand the surface to remove rust and debris.
- Wash with a solvent: Clean the entire piece with a degreaser or vinegar solution to eliminate oils and dirt.
- Rinse well: Use clean water to wash off any remaining cleaning agents and ensure the surface is completely clean.
- Dry completely: Allow the metal to dry thoroughly to prevent moisture from interfering with the paint application.
Additional Preparations
- Apply a primer: Select a metal primer suitable for the type of paint you intend to use. This will improve paint adhesion and longevity.
- Sand primer layer: Once dry, lightly sand the primer to ensure a smooth finish before applying the final coat.
- Inspect for perfection: Conduct a final check for any missed spots or imperfections that need correction before moving forward.
Caring for these details will ensure a long-lasting, aesthetically pleasing finish on your pieces, enhancing their appearance and durability.
Applying Primer to Enhance Durability
Before jumping to the final coat, applying a quality primer is crucial for longevity. I always select a rust-inhibiting primer specifically designed for metal surfaces. This step not only improves adhesion but also forms a barrier against moisture and rust.
Steps for Priming
- Ensure the surface is clean and dry; dust or debris can compromise the primer’s effectiveness.
- Using a brush or sprayer, apply an even coat of primer. Aim for complete coverage without drips or pools.
- Allow the primer to cure as per manufacturer instructions; this typically takes several hours to fully set.
- After drying, lightly sand the primed surface to promote better adhesion for the final paint layer.
Considerations for Selecting Primer
- Choose a primer that is compatible with your selected paint, ensuring both products adhere well.
- Look for a formulation that offers corrosion resistance, especially if the pieces will be exposed to the elements.
- Consider using a spray primer for intricate designs; it can reach into crevices that brushes may miss.
By taking the time to apply primer correctly, I can significantly enhance the durability and appearance of my outdoor pieces, ensuring they withstand the test of time.
Painting Methods for a Smooth Finish
For a flawless surface, I recommend using spray paint for an even coat. Choose a high-quality, rust-resistant product to prevent future deterioration. Apply light layers instead of one heavy coat to avoid drips and runs.
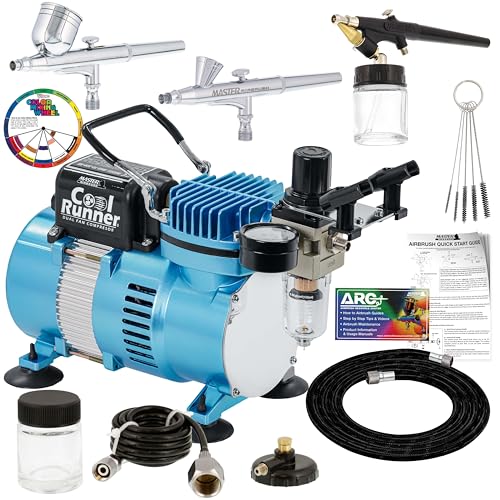
An airbrush system offers another excellent option, allowing for precision and control. This method is ideal for intricate designs, ensuring every detail gets adequate coverage without excess paint pooling.
Using a foam roller can also provide a smooth application, especially for larger pieces. Select a roller with short nap to minimize texture. I ensure the paint is adequately thinned for optimal flow.
For touch-ups and hard-to-reach areas, a fine brush works well. I prefer rounded tips for better maneuverability, which helps eliminate brush strokes for a polished finish.
Regardless of the method chosen, maintaining a consistent speed and distance from the surface is key. I keep the nozzle about 12 inches away while spraying and move steadily to avoid uneven patches.
After painting, I allow ample drying time before handling the item. A final clear coat enhances durability and gives the piece a lasting sheen.
Sealing and Protecting Your Restored Outdoor Pieces
After completing the transformation, applying a high-quality sealant is crucial for longevity. This step ensures that the surface remains resistant to moisture and UV damage. Choose a clear acrylic or polyurethane formula designed for outdoor use. Apply it evenly with a brush or sprayer, following the manufacturer’s instructions for drying time and recommended number of coats.
Choosing the Right Sealant
When selecting a sealant, consider the following attributes:
| Attribute | Description |
|---|---|
| Water Resistance | Must repel water to prevent rust formation. |
| UV Protection | Should protect against fading and discoloration from sunlight. |
| Flexibility | Must accommodate expansion and contraction due to temperature changes. |
| Durability | Should withstand scratches, impacts, and harsh weather conditions. |
Maintenance Tips
Routine maintenance will prolong the lifespan of your pieces. Wipe them down with a damp cloth regularly to remove dirt and debris. Inspect for any signs of wear or peeling sealant periodically. If you notice any issues, gently sand the affected area and reapply the sealant. Storing items indoors during harsh weather can also significantly extend their durability.
Maintaining Your Furniture Post-Restoration
Regular maintenance is crucial for keeping the newly enhanced exterior in prime condition. I recommend inspecting the pieces every few months for any signs of wear or damage.
Routine Cleaning
Use a soft cloth or sponge with mild soap and water to clean the surface. Avoid abrasive cleaners that can scratch the finish. Rinse thoroughly to remove any soap residue and dry completely to prevent moisture buildup.
Periodic Touch-Ups
Check for chips or scratches in the paint. If necessary, apply a small amount of touch-up paint to any damaged areas. This helps maintain the protective layer and keeps the visual appeal intact. Be sure to match the color accurately for a seamless look.
Store items under protective covers during harsh weather to minimize exposure to the elements. Using furniture covers will help prevent rust and fading, prolonging the life of the pieces.
For long-term preservation, consider applying a clear sealant annually. This additional barrier enhances protection against moisture and UV rays, ensuring your pieces remain attractive over time.


