Begin with a thorough inspection of the piece, paying close attention to any areas showing wear or damage. Look for scratches, dents, and signs of moisture damage. These details will guide your approach as you bring new life to this timeless creation.
Next, I prefer to gently clean the surface using a mix of mild soap and water. A soft cloth works best to avoid further scratches. Once the surface is clean, allow it to dry completely before moving on to the next steps.
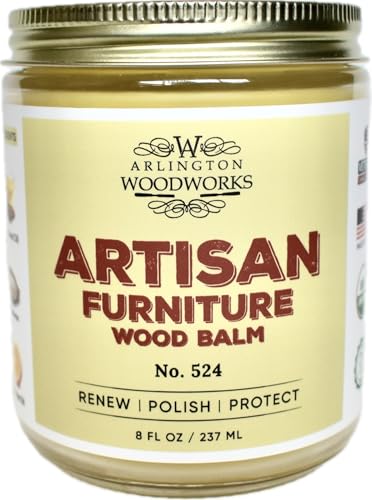
The application of appropriate finishes is key. Depending on the piece’s original sealing, I often use natural oils or waxes to nourish the wood and enhance its appearance. Make sure to test any product on a small, inconspicuous area first, ensuring compatibility with the existing finish.
For deeper blemishes, sanding may be required. I recommend using fine-grit sandpaper, starting gently, and working with the wood grain. This minimizes the risk of excessive damage. After sanding, reapply your chosen finish to restore the natural luster.
Lastly, consider the hardware and joints. Tightening screws and replacing missing parts can greatly improve both aesthetics and functionality. With patience and careful attention to these steps, the enduring charm of the piece will shine through.
Steps to Make Old Wood Shine Again
Begin with a thorough cleaning using a solution of mild soap and warm water. Wipe down the surface with a soft cloth to remove dust and grime, ensuring not to saturate the wood.
Next, inspect for scratches and dents. Use a mixture of beeswax and lemon oil to fill small imperfections. Apply gently with a soft cloth, allowing it to penetrate before buffing to a shine.
For deeper blemishes, consider using a wood filler that matches the grain. After drying, sand the area lightly with fine-grit sandpaper, following the wood’s natural pattern.
If the original finish is damaged, stripping may be necessary. Use a chemical stripper in a well-ventilated area, following the manufacturer’s instructions carefully. Once the old finish is removed, clean again to prepare for refinishing.
Apply a new protective finish using a quality varnish or polyurethane. Brush on an even layer, avoiding thick coats that can lead to drips. Allow adequate drying time between coats, usually at least four to six hours.
Finally, polish the surface with a soft lint-free cloth. This will help to enhance the grain and provide a beautiful luster, ensuring the piece looks exceptional in any setting.
Assessing the Condition of Your Antique Oak Furniture
Examine the piece closely for any signs of damage or wear. Focus on joints, surfaces, and structural integrity. Look for loose parts, cracks, or areas where the wood has split.
Surface Inspection
Check for scratches, dents, or discoloration. Gently run your hand over the surface to assess smoothness. Use a soft cloth to remove dust and debris, revealing any deeper flaws.
Wood Condition
Identify any signs of insect infestation, such as tiny holes or frass. Inspect the grain for signs of rot or soft spots. Pay attention to areas near moisture exposure, which can lead to significant degradation.
Document your findings with notes or photographs, as this will help track any changes throughout the treatment process. Understanding these aspects provides clarity on what specific maintenance steps are needed.
Gathering Necessary Tools and Materials for Restoration
For successful refurbishment of classic wooden pieces, collecting proper tools and supplies is fundamental. Here’s a list of what I find indispensable:
- Sanding Block or Orbital Sander: To smooth out imperfections and prepare surfaces.
- Variety of Sandpaper: Use grits from coarse (60) to fine (220) for different stages of the process.
- Wood Glue: Select high-quality adhesive for any necessary repairs or reassembly.
- Clamps: Essential for holding components firmly during drying.
- Wood Filler: Useful for filling cracks or holes in the surface.
- Repair Sticks or Markers: For touching up minor scratches or blemishes.
- Finishing Products: Choose between wax, oil, or varnish depending on the desired look.
- Brushes and Rags: For applying finishes smoothly and wiping off excess.
- Putty Knife: Useful for applying wood filler and smoothing it over.
- Screwdrivers: Make sure to have a set for any required hardware adjustments.
- Mallet: A rubber or wooden mallet can help with assembly without damaging surfaces.
Assembling these items will facilitate a seamless experience throughout the refurbishment process. Prioritize quality over quantity, as the right tools will yield the best results.
Cleaning Techniques for Vintage Wooden Objects
Use a soft, lint-free cloth for basic dusting. This prevents scratches on the surface while removing dirt and debris. For stubborn grime, a slightly damp cloth with water works effectively.
Natural Cleaning Solutions
Combination of vinegar and olive oil is especially beneficial. Mix one part vinegar with two parts olive oil. Apply the mixture sparingly with a cloth, then buff to shine.
Commercial Products
- Choose a pH-neutral wood cleaner, ensuring it is safe for old finishes.
- Test the cleaner on a hidden area to verify compatibility.
- Apply with a cloth in the direction of the grain to prevent streaking.
Avoid abrasive materials, as they can damage the surface. For intricate carvings or hard-to-reach areas, use a soft-bristled brush to carefully clean without harming details.
Rinse any cloths or sponges used for cleaning, ensuring no residue is left behind. After cleaning, allow the surface to dry completely before applying any polish or conditioner.
Regular Maintenance
- Dust weekly to prevent buildup.
- Apply a thin layer of wax or beeswax every few months to enhance protection.
- Avoid placing items in direct sunlight to mitigate fading.
This approach not only preserves integrity but also maintains the beauty of these cherished pieces for years to come.
Repairing Scratches and Dents on Oak Surfaces
To effectively address scratches and dents on wooden surfaces, I prefer using a combination of heat and moisture. For minor scratches, I rub a cloth dampened with water over the area, then place a heated iron on the cloth for a few seconds. This method helps raise the wood fibers back to their original position.
If the scratch is deeper, I use a wood filler that matches the finish. I apply a small amount of filler with a putty knife, ensuring it’s level with the surrounding area, and allow it to dry completely. Once dry, I sand it lightly and finish with a matching stain or varnish.
For dents, I often use a similar technique. Placing a wet cloth over the dent and applying heat with an iron can sometimes lift the dent. If this approach isn’t sufficient, I resort to filling it as described, ensuring a smooth transition to the original surface.
After repairs, buffing with a soft cloth and applying a quality polish will help blend the repaired areas with the rest of the piece, restoring its overall luster. Regular maintenance is key to preventing future damage.
Stripping Old Finish Without Damaging the Wood
To effectively remove the existing finish, I opt for a chemical stripper that is suitable for delicate surfaces. I apply a generous layer using a brush, ensuring that I cover all areas evenly.
After letting the stripper sit according to the manufacturer’s instructions, I gently scrape the softened finish with a plastic scraper. This avoids scratching the wood underneath. For intricate designs or hard-to-reach places, I use a fine brass brush, which is gentle yet effective.
Once the majority of the finish is removed, I wipe the surface with a clean cloth dampened in mineral spirits to remove remnants of the stripper and finish. This step also helps in revealing any imperfections that need addressing later.
After cleaning, I thoroughly wash the piece with water and a mild soap to neutralize any chemicals left behind, followed by drying it completely. Ensuring that the wood is free of moisture is vital for subsequent treatments or finishes.
Patience is key. I often repeat the process if traces of old finish remain, taking care to inspect the wood for any signs of damage or wear during each phase. Maintaining the integrity of the surface is my priority throughout this process.
Finally, after achieving a clean and raw wood surface, I allow it to acclimate before applying any new treatment, ensuring optimal adhesion and longevity of the next finish.
Applying Stain to Enhance the Natural Beauty of Oak
Before applying any color, I clean the surface thoroughly to remove any dust or residue. I prefer oil-based stains for their deep penetration and durability. Using a clean cloth, I apply the stain evenly, working in small sections. It’s crucial to follow the wood grain to achieve a uniform look.
I let the stain sit for a few minutes, then wipe away any excess with a clean cloth to avoid blotches. For a richer tone, I sometimes apply a second coat after the first one dries completely. Always check the manufacturer’s instructions for drying times, as they can vary significantly.
Once I’m satisfied with the color, I let it cure properly before proceeding with a protective finish. I usually choose a polyurethane or varnish for durability, ensuring it complements the chosen stain shade. Applying the finish with a high-quality brush helps create a smooth, professional appearance.
After finishing, patience is key. I allow the piece to cure for several days to ensure longevity and strength in the surface. Regular maintenance, like gentle cleaning and periodic reapplication of topcoats, will keep the beauty intact for years to come.
Selecting the Right Finish for Protection and Appearance
I recommend considering several types of finishes to protect wood while enhancing its natural beauty. The options available can greatly impact both the aesthetics and longevity of the piece. Here are some common finishes to evaluate:
Oil-Based Finishes
These finishes penetrate deeply into the grain, providing excellent protection against moisture. Additionally, they enrich the wood color. Linseed oil and tung oil are popular choices; both require periodic reapplication for maintenance.
Water-Based Finishes
These deliver a clear coat that dries quickly and emits fewer fumes compared to oil-based products. They are less likely to yellow over time, making them ideal for maintaining the original tone of the wood. Polyurethane is a widely used option due to its durability and ease of use.
| Finish Type | Pros | Cons |
|---|---|---|
| Oil-Based | Deep penetration, enhances color | Long drying time, yellowing over time |
| Water-Based | Quick drying, low odor, non-yellowing | May require more coats for durability |
Choosing the right finish involves assessing the condition of the wood and the desired look. Consider sample application on an inconspicuous area to view the result before full application. The finish selection will crucially affect both protection against wear and overall appearance.
Reassembling and Securing Loose Joints in Furniture
Begin by identifying any loose or weakened joints. Carefully disassemble the sections, noting their arrangement. Use wood glue specifically designed for furniture repair. Apply a thin layer to the joint surfaces, ensuring coverage without excess squeeze-out.
Reassemble by pressing the pieces together firmly, aligning them accurately. For added stability, use clamps to hold the joint in place while the adhesive cures. Wood glue typically sets within a few hours, but it’s wise to wait a full day before applying any stress to the joint.
If a joint remains loose after gluing, consider adding wooden dowels or screws for reinforcement. Drill precise holes at an angle through the joint, ensuring not to penetrate through the outer surface. Insert dowels coated in glue and tap them in gently, or drive screws to secure the connection.
For visible joints, carefully sand any excess adhesive after it dries. Use fine-grit sandpaper to smooth the surface, followed by a touch of matching stain if necessary. Ensure that the joint remains undetectable, preserving the piece’s aesthetic.
Finally, inspect nearby joints for any instability and address them proactively. This approach safeguards against future issues and maintains the integrity of the entire structure.
Maintaining Restored Antique Oak Furniture for Longevity
Regular dusting with a soft, lint-free cloth prevents accumulation of particles that can cause scratches. I use a microfiber cloth, as it captures dust effectively without scratching surfaces.
Polishing with a high-quality furniture polish specifically designed for wood helps enhance the finish. I apply it sparingly, following the manufacturer’s instructions, and buff with a clean cloth to achieve a shine.
Controlling humidity levels in the environment protects against warping or cracking. I aim to keep the relative humidity between 40% and 60%, using a humidifier or dehumidifier as necessary.
Avoid exposing pieces to direct sunlight, which can fade the wood and damage the finish. When positioning, I keep them away from windows or cover them with fabric if exposure is unavoidable.
Using coasters and placemats prevents moisture rings and heat damage from beverages or hot items. I always place them under glassware or dishes to safeguard surfaces.
Raised surfaces should be cleaned gently using a damp cloth, avoiding excess moisture that can seep into joints. I wring out the cloth thoroughly before wiping, ensuring no liquid pools.
Annual inspections of joints and hardware are essential. I tighten any loose screws or nails and apply a small amount of wax to squeaky hinges to maintain functionality.
If any peeling or damage to the finish occurs, I address it promptly to prevent further deterioration. Spot repairing with appropriate products can maintain the integrity of the piece.
Lastly, understanding each piece’s unique history influences its care. I document any changes or repairs for future reference, promoting awareness of how best to maintain these items.


