Begin with a thorough cleaning of the surfaces. Use a mixture of water and mild detergent, scrubbing away dirt and mildew. Rinse well and allow the pieces to dry completely before proceeding. This step ensures a clean foundation for the application of any new finish.
Once dry, inspect for any damages. Repair any cracks or loose joints to avoid complications later. A wood filler can be an excellent choice for small imperfections, while larger repairs may necessitate more extensive work. Proper preparation is key to achieving a long-lasting finish.
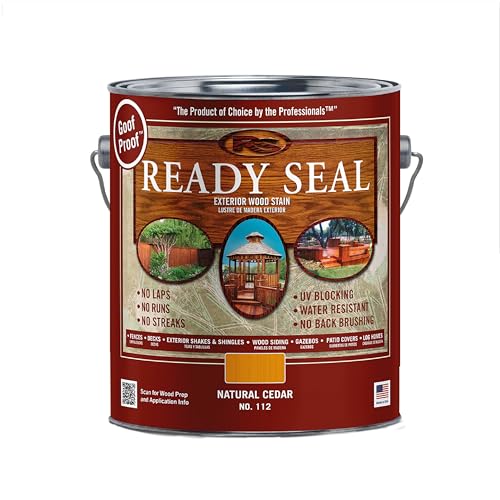
Next, choose a suitable stain that matches your aesthetic preferences. Oil-based stains generally provide better penetration and longevity, while water-based options dry faster and have lower VOC emissions. Apply the chosen product using a high-quality brush or a sprayer for an even application. Follow the manufacturer’s instructions regarding drying times and additional coats.
Finally, seal your work with a protective topcoat, particularly for outdoor items. A good polyurethane or spar varnish will safeguard against the elements, prolonging the lifespan of your newly refreshed pieces. With these detailed steps, you’ll restore your outdoor seating, ensuring it looks great for years to come.
Restaining Your Outdoor Seating
Begin with a deep clean using a power washer or a stiff-bristled brush with soap and water to eliminate dirt and mildew. Allow it to dry completely, ideally for 24 hours, to ensure a solid base for your new stain.
Opt for a high-quality wood stain suitable for outdoor conditions. Transparent or semi-transparent options enhance the wood grain while providing protection. Avoid thick coatings that can peel or crack over time.
Application Process
Use a brush designed for exterior use or a foam applicator for a smooth finish. Apply the stain evenly and follow the wood’s grain. Focus on one section at a time, allowing the stain to soak in for a few minutes before wiping off excess with a clean cloth.
For added durability, consider applying a sealant after the stain dries. This additional layer offers protection against moisture and UV damage, extending the lifespan of your seating.
Maintenance Tips
Regular maintenance extends the longevity of your outdoor pieces. Inspect for wear every season, and reapply stain every couple of years or as needed based on exposure to elements. Simple cleaning with mild soap and water helps maintain appearance and integrity.
Choosing the Right Stain for Your Outdoor Seating
Selecting the appropriate color and type of stain is critical for enhancing the appearance and durability of your outdoor seating. I always consider the wood species and the existing color of the furniture when making my choice. It’s important to match the stain to the material to ensure optimal adhesion and longevity.
Factors to Consider
The following aspects help in determining the best stain:
| Factor | Recommendation |
|---|---|
| Wood Type | Use oil-based stains for hardwoods (like teak) and water-based for softwoods (like pine). |
| Desired Look | Select between transparent, semi-transparent, or solid colors depending on whether you want to highlight the wood grain or achieve full coverage. |
| Weather Resistance | Choose UV-protective stains to prevent fading and wear from sunlight exposure. |
| Maintenance Frequency | |
| Low Maintenance | Opt for solid stains, which require less frequent reapplication. |
| Regular Maintenance | Choose transparent or semi-transparent stains, but expect to refresh them regularly. |
Test Before You Commit
I recommend testing the chosen stain on a small area first. This test allows me to see how the color interacts with the wood and how it looks in varying light conditions. Once satisfied with the outcome, I proceed with the full application.
Preparing the Surface Before Staining
Thoroughly clean the surface to remove dirt, mold, and old finishes. I recommend using a pressure washer for stubborn grime, ensuring to keep the nozzle at least 12 inches away to avoid damage. If you prefer manual methods, utilize a stiff-bristle brush and a wood cleaner to scrub the area.
After cleaning, rinse the surface well, allowing it to dry completely for at least 24 hours. This step is critical; staining on damp wood can lead to poor adhesion and an uneven finish.
Next, inspect for imperfections–cracks, splinters, or rough patches should be sanded down with medium-grit sandpaper. If the surface has significant damage, consider using wood filler to repair it. Once repairs are made, finish with fine-grit sandpaper to create a smooth base.
Finally, wipe away any dust or debris created from sanding with a damp cloth. This ensures that the new stain adheres properly without any contaminants affecting the application.
Step-by-Step Application of the Stain
I begin by choosing the right applicator. A high-quality brush or a foam pad works best for even coverage. I pour the stain into a paint tray, ensuring enough product is available for multiple strokes.
Next, I dip the brush into the stain, removing excess to prevent drips. I apply it in the direction of the wood grain, using smooth, consistent strokes. Working in small sections allows me to maintain control over the application and achieve an even finish.
For corners and crevices, I switch to a smaller brush to ensure complete coverage without leaving uncoated areas.
I monitor the surface closely, checking for any inconsistencies or missed spots. If I notice any, I go back over those areas immediately while the stain remains wet for a seamless look.
After applying the first coat, I allow it to dry completely as per the manufacturer’s instructions, typically 24 hours. Once dry, I lightly sand the surface with fine-grit sandpaper to enhance adhesion for the next coat.
Following the sanding, I clean the surface to remove any dust. Then, I proceed with a second coat using the same technique as before to deepen the color and durability.
Once satisfied with the coverage, I let the final application cure for the recommended time frame. This step is crucial for achieving a lasting finish, often ranging from several days to a week, depending on conditions.
I complete the process by cleaning my tools with the appropriate solvent, ensuring they remain in good condition for future use.
Proper Drying Techniques After Staining
Ensure adequate ventilation to facilitate drying. Ideally, set the furniture in an open area, away from direct sunlight or extreme temperatures. Proper airflow is critical for even drying.
Humidity Levels
Monitor humidity levels closely. High humidity can significantly increase drying time. Aim for a humidity level below 50% to achieve optimal results.
Drying Time Recommendations
- For oil-based stains, allow 24 to 48 hours before disturbing the surface.
- Water-based stains typically dry faster, usually within 4 to 6 hours, but full curing may take up to a week.
- Check the manufacturer’s instructions for specific drying time guidance.
Perform a touch test on a small, inconspicuous area to confirm dryness. If the surface feels tacky, additional time is needed. Avoid exposing the furniture to rain or dew until fully cured.
After drying, apply a sealant or protective topcoat as specified to enhance durability and longevity. This step will guard against moisture and UV damage, ensuring your outdoor pieces remain beautiful.
Maintaining Your Stained Outdoor Seating
I recommend regularly checking for signs of wear, such as fading or peeling, to ensure longevity. Keeping the surface clean is crucial; I use a gentle detergent and a soft brush to remove dirt and debris.
Here are some specific steps I follow for ongoing care:
- Wipe spills immediately to prevent staining or discoloration.
- Avoid placing hot items directly on the surface, which can damage the finish.
- Utilize coasters and mats to minimize scratches and moisture absorption.
Reapplication of the stain should be considered annually or biennially based on exposure to weather conditions. I test a small section first to confirm compatibility with the existing finish.
Use protective covers during extreme weather to enhance durability. I ensure to store and cover items during harsh climates, extending their life and maintaining aesthetic appeal.
Lastly, I conduct a thorough inspection at the beginning of each season. This helps to catch any issues early and make necessary repairs or touch-ups promptly.
Common Mistakes to Avoid When Restaining
Avoid skipping the cleaning step before applying the new finish. Residue from dirt or previous products can lead to poor adhesion, resulting in an uneven appearance. Ensure all surfaces are thoroughly washed and dried.
Don’t overlook the importance of testing the stain on a small area first. This practice reveals how the hue interacts with the surface and helps prevent unexpected results across larger sections.
Ignoring Weather Conditions
Weather conditions matter significantly. A sunny day can cause the product to dry too quickly, leading to streaks. Ideally, choose a mild, overcast day with minimal humidity for best results.
Applying Too Thick a Layer
Resist the temptation to apply an overly generous coat. Thicker applications can lead to peeling and bubbling as the finish dries. Instead, apply several thin layers for optimal coverage and longevity.
FAQ:
What materials do I need to restain my deck furniture?
To effectively restain your deck furniture, you’ll need several materials: high-quality wood stain, a paintbrush or roller for application, sandpaper (preferably between 80 and 120 grit) for surface preparation, a clean cloth or rag, and some paint thinner or mineral spirits if you’re using oil-based stain. Additionally, you may want to use a drop cloth to protect the area underneath your furniture from drips and spills.
How should I prepare my deck furniture before applying the stain?
Preparation is key to a successful staining job. First, clean your furniture thoroughly with soap and water to remove any dirt, grease, or old finish. After it dries, use sandpaper to smooth out the surface, which helps the stain adhere better. If your furniture has an old stain or finish, you may need to strip it before sanding. Make sure to wipe away any dust after sanding to ensure a smooth application surface.
What type of stain is best for deck furniture, and how do I choose?
When selecting a stain for deck furniture, consider whether you prefer a transparent, semi-transparent, or solid color stain. Transparent stains enhance the natural beauty of the wood while providing minimal color. Semi-transparent stains offer a balance between color and wood visibility. Solid stains provide full coverage but may obscure the wood grain. Look for a stain labeled as suitable for outdoor use, as these products are formulated to resist fading, mold, and moisture. You can also test samples on a small area to see how they look before fully applying them.
How can I ensure the stain dries properly?
To ensure proper drying of your stain, apply it in mild weather conditions, ideally when temperatures are between 50°F and 85°F, with low humidity. After applying the stain, allow adequate drying time as recommended on the product label, generally 2-6 hours for oil-based stains and 1-2 hours for water-based stains. It’s also wise to avoid placing furniture directly in sunlight while drying, as this can cause uneven drying and lead to a blotchy finish. Ensure good airflow around the furniture to help the drying process.
How often should I restain my deck furniture?
The frequency of restaining your deck furniture largely depends on several factors, including exposure to weather and the type of stain used. Generally, outdoor furniture should be restained every 1-3 years. If you notice the finish starting to fade, peel, or show signs of wear, it’s time to restain. Regular cleaning and maintenance can also extend the lifespan of the stain, reducing the need for frequent applications.
What materials do I need to restain my deck furniture?
To restain your deck furniture, you will need a few basic materials: a suitable stain or sealant that matches your desired finish, a wood cleaner or stripper for preparation, sandpaper or a sanding block for smoothing the surface, and a paintbrush or roller for application. Additionally, you may want to have gloves, a mask for protection, and drop cloths to protect the surrounding area during the process.
How do I prepare my deck furniture for re-staining?
Preparing your deck furniture properly is crucial for achieving a good finish. Start by cleaning the furniture thoroughly with a wood cleaner to remove dirt, grime, and any old finishes. If the wood appears weathered or worn, you may need to sand it down to create a smooth surface. This can be done using sandpaper, focusing on areas with peeling or rough spots. After sanding, make sure to wipe off any dust with a damp cloth, then allow the wood to dry completely before applying the new stain. This preparation step helps ensure better adhesion of the stain and enhances the overall appearance of the furniture.


