

The first step to refreshing your flooring while keeping your belongings in place is securing the necessary supplies: adhesive, a utility knife, and an underlayment. Gathering everything beforehand allows for a seamless process, keeping interruptions to a minimum.
Next, assess the area to determine how much material you require. Use a measuring tape to get precise dimensions and calculate the amount you need for your project. This ensures that there will be no unexpected delays halfway through.
Once the materials are at hand, focus on a single section at a time. Begin at a corner and gradually work your way outward. Carefully lift the existing material, ensuring not to disturb adjacent items. This method preserves your space and simplifies the transition.
With the old layer removed, lay down the new flooring. Ensure you align the edges accurately for a polished appearance. Smooth out any bubbles or imperfections as you go, allowing for a flawless finish.
By following these steps, I transformed my space efficiently, maintaining both style and functionality while keeping my décor intact.
Strategies for Flooring Renewal with Limited Space
For an efficient update to your flooring while keeping the objects in their place, I suggest several practical techniques.
- Sectional Replacement: Cut and remove only small sections of the flooring where feasible. This can be done in a staggered approach, allowing you to work around existing items.
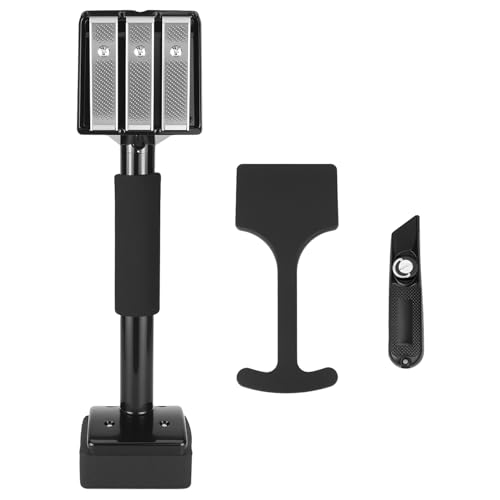
- Using a T-Bar: Invest in a T-bar to help shift the existing material gently. It can pry up areas without the need for a full overhaul, making it easier to insert new pieces.
- Furniture Sliders: Consider placing furniture sliders under the legs of heavy items. This allows you to glide them slightly, creating space to swap out the flooring sections.
- Adjusting Edges: Focus on the edges of the room first. Often, replacing the perimeter allows for a seamless integration without disturbing larger furnishings.
- Utilizing Ramps: Rather than removing everything, build ramps with the new material to blend seamlessly while keeping existing items intact.
Additionally, using tools like a utility knife, a carpet kicker, and double-sided tape will enhance the ease and precision of your work. Always measure carefully and plan the layout ahead of time to avoid unexpected disruptions.
Choosing the Right Carpet Material for Easy Replacement
I recommend opting for low-pile or looped materials. These types tend to be more manageable during transitions, allowing me to slide pieces more easily in place.
Popular Material Options
Consider synthetic fibers like nylon or polyester. They resist wear and tear, making them suitable for areas with high foot traffic. Additionally, these options are easier to handle when swapping them out.
Natural Fibers
If I prefer natural options, wool provides durability and a degree of resilience. However, it may require more careful handling. Choosing pre-cut sections can simplify the installation and removal, regardless of the material.
Overall, prioritizing ease of management in materials will streamline the entire process, allowing for quick updates without significant disruption in my living space.
Tools and Supplies Needed for Carpet Replacement
Prepare a utility knife for cutting the flooring material efficiently. Ensure you have extra blades on hand for clean cuts. A carpet stretcher is crucial for achieving a smooth finish; I recommend a power stretcher for larger areas.
Gather a knee kicker to position and stretch the flooring properly. This tool helps in adjusting the material along edges, especially in tight spaces. A pair of pliers will assist with grip during installation and securing seams.
Equip yourself with a staple gun for attaching the new material to the subfloor if necessary. Don’t forget the appropriate staples or adhesive specific to the type of new material selected.
Have a measuring tape and straight edge ready for precise measurements and cuts. These ensure that pieces fit perfectly in the designated spots. A carpenter’s square can help achieve right angles, especially in corners.
Stock up on safety gear: goggles and knee pads will protect you during the manual labor involved. Depending on how challenging the task appears, consider gloves for better grip and hand protection.
Finally, a dust mask will be handy if there’s any debris or particles during the removal of the existing flooring. Keeping the workspace cleared and clean will contribute to a smoother process.
Preparing the Existing Carpet for Removal
First, I ensure the area is clear of any loose items or debris. This makes the workspace safer and more manageable. Next, I make sure to inspect the edges of the flooring. If there are staples or tack strips, I’ll use pliers or a flathead screwdriver to carefully remove them, preventing any damage during the subsequent process.
Before starting the extraction, I often vacuum the surface thoroughly. This step minimizes dust and debris that can interfere with my work and ensure a cleaner environment once I lay the new covering. Once the surface is clean, I check for any stains or damage that might need treatment or repair before I proceed.
If the old material is secured with adhesive, I may need to soften the glue with a damp cloth or a steam cleaner, making it easier to lift the material. I also take care to cut the old floor covering into manageable strips using a utility knife, making removal less cumbersome.
| Step | Description |
|---|---|
| Clear Area | Remove loose items and debris from the workspace. |
| Inspect Edges | Check for staples and tack strips; remove as needed. |
| Vacuum Area | Ensure the surface is clean by vacuuming thoroughly. |
| Treat Stains | Address any stains or damages before removal. |
| Soften Adhesive | Use steam or damp cloth to loosen glue on the bottom. |
| Cut Material | Slice the old covering into strips for easier handling. |
Cutting and Lifting Material Around Objects
Begin by obtaining a utility knife for precise cutting. Identify the area needing alteration and gently slide the blade beneath the edge of the material, being cautious around any nearby items.

With a straight edge or ruler, mark a cutting line. Ensure I’m cutting a manageable section, allowing for easy handling. For corners and tight spaces, I often use a smaller snapshot cutter for better control.
Once cut, carefully pull up the newly severed section. Utilize a flathead screwdriver to assist in lifting if necessary, especially where it adheres to the tack strips below. Pull the material up at an angle to reduce stress on the surrounding area.
If multiple pieces are present, repeat this process for each, ensuring I maintain as much of the original structure intact. Mark where each piece originated from to facilitate reinstallation later.
Should any residue be left after lifting, I take extra care to clean the subfloor before placing the new covering, ensuring a smooth transition between sections.
Finally, double-check that the new covering aligns well with existing material to achieve a seamless look. This attention to detail ensures a polished finish in any space.
Installing the New Carpet in Tight Spaces
Begin by measuring the dimensions of the area where the new flooring will be laid. Accurate measurements prevent waste and ensure a snug fit around obstacles. Utilize a flexible tape measure to navigate corners and tight spots effectively.

When arriving at installation, lay the new flooring on a flat surface nearby to acclimate it to the room temperature. Assess the thickness of the material; thicker options may require adjustments in seams for a seamless appearance.
For applying the new flooring in confined areas, roll the material loosely and insert it into the space. Gradually unroll while pressing down to eliminate bubbles and ensure a tight fit along edges. Use a knee kicker tool to secure the new flooring against walls, particularly in hard-to-reach locations.
Pay special attention to corners and nooks. A utility knife will efficiently trim excess material, allowing for precise fitting around irregular shapes. Use straight edges as guides for clean cuts, ensuring no frayed edges remain.
Finally, use a roller to press down the edges for a polished look. This will also assist in adhering the new flooring more securely, especially in areas where installation involved overlapping existing materials. Conduct a final inspection to confirm everything is properly aligned and tightly fitted.
Finishing Touches and Cleaning After Installation
Immediately after laying down the new flooring, I focus on trimming and adjusting the edges. Ensuring a snug fit against baseboards prevents any gaps that could affect appearance and durability.
Next, I utilize a knee kicker to secure the vinyl or textile edges tightly into the seams. This tool helps eliminate ripples and provides a smooth finish, which is essential for aesthetics.
Once the installation is complete, I turn my attention to cleaning the area:
- Vacuum the newly installed surfaces thoroughly to remove any dust or debris that accumulated during the process.
- In areas that may have been scuffed during installation, a damp cloth can be used for gentle cleaning.
- A mild cleaning solution formulated for the specific material is great for deeper cleaning without causing damage.
- Allow the flooring to dry completely if any moisture was applied.
After cleanup, I take a moment to place any necessary transitions or trims between different types of flooring. This step provides a polished look and ensures smooth transitions from one area to another.
Lastly, I remind myself to check for any loose edges or areas that might need additional attention. Regular maintenance, such as vacuuming and occasional deep cleaning, will keep the new surface looking fresh and vibrant.


