Caleb Turner
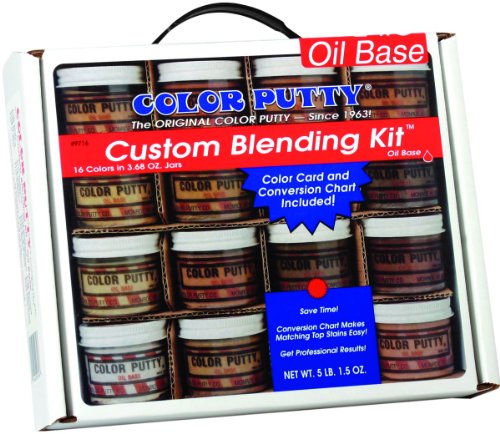
First, gather a few essential supplies: wood glue, veneer patching kit, matching paint or stain, and a fine-grit sandpaper. Having everything on hand will streamline the process and reduce the chances of mishaps.
Begin by cleaning the affected area. A gentle cleanser will remove dirt and debris, ensuring a smooth application of any repair materials. Once cleaned, inspect the damaged section closely. If the surface has lifted, carefully apply wood glue into the gap and press the laminate back into place. Secure it with clamps or heavy objects while it dries.



If the damage includes visible tears, a veneer patching kit can be a lifesaver. Choose a patch that matches the existing design and color for seamless blending. Cut the patch slightly larger than the hole, and apply adhesive before pressing it firmly into the space. Allow adequate time for drying, then sand gently until it’s flush with the surrounding surface.
For minor scratches and blemishes, consider matching paint or stain. Apply a small amount with a soft cloth, feathering the edges to create a smoother transition. Finish by waxing the area for added protection and shine, enhancing the overall appearance of your piece.
Effective Solutions for Fixing Furniture Damage
I recommend using a color-matched repair marker or touch-up paint to conceal the damaged area. First, choose a marker or paint that closely matches the color of your piece. Apply it carefully, using light strokes to fill in the cracks and ensure a smooth finish.
If the damage is more pronounced, consider using a filler specifically designed for surface imperfections. After cleaning the area, apply the filler with a putty knife, smoothing it out to match the surrounding texture. Let it dry completely before sanding lightly for an even appearance.
An additional option is to use adhesive strips or edge banding, available in various colors and finishes. Cut the strip to size, peel off the backing, and adhere it to the affected edge. This method provides a seamless look while also protecting the surface from future wear.
For minor scratches, a simple solution is to rub a walnut or almond over the area. The natural oils can help diminish the appearance of the scratch effectively. Wipe off any excess with a soft cloth.
If your item features a high-gloss finish, consider using a furniture polish to restore shine and minimize visibility of the damaged area. Choose a product compatible with your furniture material for the best results.
Assessing the Damage to Your Laminate Furniture
I recommend examining the affected area closely. Look for size, depth, and location of the imperfections to determine the best approach. A magnifying glass is useful for identifying small cracks or separations.
Use the following table to categorize the level of damage:
| Damage Level | Description | Suggested Action |
|---|---|---|
| Minor | Light scuffs or small surface cracks | Apply a wood marker or touch-up pen |
| Moderate | Visible chips or deeper gouges | Use filler or putty; sand and paint |
| Severe | Large sections missing or extensive peeling | Consider laminate sheets or professional restoration |
Once I’ve categorized the damage, I analyze surrounding areas for any related issues that may require attention. This ensures a comprehensive approach to restoration. Checking for water damage or deterioration helps inform whether additional measures are needed.
Taking photographs of the defects can aid in tracking progress throughout the fixing process. This visual documentation also assists in selecting matching colors or materials, ensuring a consistent look after the modifications are complete.
Gathering Necessary Tools and Materials
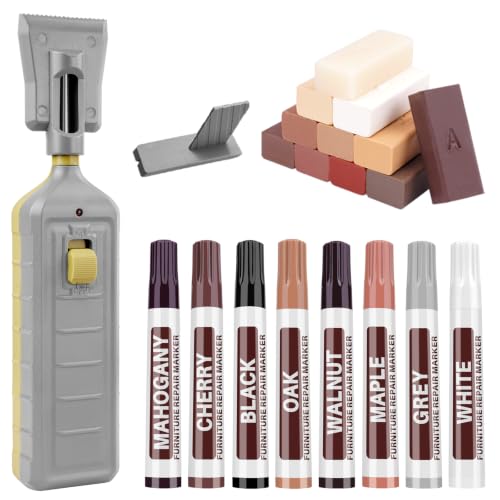
For a successful restoration, I ensure that I have the following items on hand: a laminate repair kit, which usually includes colored wax fillers, adhesive, and a smoothing tool; fine-grit sandpaper for surface prep; a clean cloth for wiping away dust and debris; a putty knife for applying fillers; and a heat gun or hairdryer for speeding up the curing process.
Additional Items to Consider
If I encounter deeper imperfections, I keep wood glue and clamps ready for reinforcement. A touch-up marker that matches the finish can be useful for blending in discrepancies with surrounding areas. Having a ruler or measuring tape allows me to assess any specific dimensions that might need addressing.
Preparation Steps
Before starting, I gather all materials in a well-lit workspace to ensure visibility during the process. I lay down newspaper or a protective cover to catch any excess materials that might spill during the project. This organization helps streamline my work and keeps everything within easy reach.
Cleaning the Chipped Area for Repair
I clean the damaged section thoroughly using a mild detergent mixed with warm water. I apply the solution with a soft cloth, ensuring I remove any dust, grease, or residue that might interfere with adhesives or fillers.
After wiping the area, I rinse the cloth with clean water and go over the surface again to eliminate any soap traces. It’s crucial to ensure the area is completely dry before moving on to the next steps. I use a hairdryer on a low setting to speed up the drying process, carefully keeping it at a distance to prevent any damage.
If there are any jagged edges or loose fragments, I gently sand them down with fine-grit sandpaper. This provides a smooth surface, allowing for better adhesion of the repair materials. Once I finish sanding, I wipe the area once more with a clean, dry cloth to remove any dust generated during this process.
Selecting the Right Repair Filler or Kit
For a seamless fix, I prioritize a filler or kit that closely matches the color and texture of the surface. A common go-to for minor imperfections is a colored wax filler. It can be easily shaped and blended to suit various finishes. For deeper flaws, I opt for a liquid filler that hardens upon drying, offering a sturdy and long-lasting solution.
Many manufacturers provide repair kits specifically designed for this type of surface. These often include color-matching guides, multiple applicators, and even sanding pads for a polished outcome. I recommend checking the reviews to ensure effectiveness and ease of use.
Before making a choice, I consider the application method. Some products require heat for adhesion, while others are ready to use straight out of the package. Make sure to read instructions carefully to achieve the best results.
Finding the right shade can be challenging; I find it helpful to bring a sample of the damaged area to the store. This ensures a closer match and can save time on future corrections. Additionally, some brands offer tintable options, allowing for custom blending of colors.
Lastly, I take into account the drying time, especially if multiple layers are necessary. Quick-drying fillers can expedite the process, while others may require more patience for optimal results.
Applying the Filler to the Chip
First, ensure the repair substance is adequately mixed according to the instructions, if it’s a two-part formula. Use a clean putty knife to scoop a small amount of the filler.
Gently press the filler into the defect, ensuring it fills completely without air pockets. Smooth the surface level with the surrounding area, using the edge of the knife for a seamless application.
For deeper imperfections, it may require a second layer. Allow the first coat to dry as recommended before adding more product. After the filler has cured, sand it lightly with fine-grit sandpaper for an even finish.
To achieve a flawless look, apply the final touches using a matching marker or touch-up pen, making sure to blend it with the existing pattern or color.
- Ensure the filler is the right color that matches the original surface.
- Work quickly to avoid the filler setting before you finish smoothing it out.
- Consider using a damp cloth to wipe away excess filler before it hardens.
Once complete, let the area cure fully as per the manufacturer’s guidelines before using the surface again.
Smoothing the Repaired Area for a Seamless Finish
I begin by allowing the filler to completely cure as per the manufacturer’s instructions. Once cured, I gather the following materials for smoothing:
- Fine-grit sandpaper (220-grit is ideal)
- Soft cloth
- Touch-up paint that matches the surface color
- Polishing compound (optional for added shine)
Using the fine-grit sandpaper, I gently sand the repaired spot, moving in a circular motion. I ensure to blend the edges with the surrounding area, applying light pressure to avoid damaging adjacent surfaces. Regularly checking my progress helps to maintain an even level.
After achieving a smooth surface, I wipe away dust with a soft cloth. If necessary, I repeat the sanding process until satisfied with the finish.
If the color mismatch is noticeable, I apply a small amount of touch-up paint over the smoothed area. Once the paint dries, I can assess whether additional layers are needed for a better match.
For a glossy result, a thin layer of polishing compound can be used to enhance the shine and blend the repair with the rest of the surface. After application, I buff the area gently with a clean cloth.
Finally, I inspect the area to ensure everything is even and visually cohesive. This method helps create an almost invisible repair, restoring the appearance of the original design.
Choosing the Appropriate Touch-Up Paint
To achieve a seamless finish, I recommend selecting a paint that closely matches the color and texture of the surface you’re working on. Begin by taking a sample of the material or, if available, refer to the manufacturer’s color code for accuracy.
When shopping, it’s beneficial to choose paints specifically designed for furniture. These often provide better adhesion and durability, which is crucial for long-lasting results. Look for water-based options, as they are typically easier to work with and clean up.
Testing the paint on a small, inconspicuous area can prevent unexpected color mismatches. Allow it to dry completely to see how it interacts with light, as this can affect the final appearance.
Consider purchasing touch-up pens or markers if the damage is minor. These tools allow for precision application and often come in various shades to match different finishes.
In situations with larger areas to cover, opt for a small can of paint. Ensure it can be applied smoothly using a fine brush or foam applicator for an even coat. If texture is important, look for paint lines that offer texture-matching additives to replicate the original surface feel.
Lastly, pay attention to the finish type of the paint. Gloss, satin, and matte finishes all affect the final outcome. Choose a finish that aligns with the existing surface for a more coherent look.
Applying Touch-Up Paint to Blend with Laminate
After the filler has dried and been smoothed, the next step is to apply touch-up paint that matches the finish of the surface. First, select a paint color that closely resembles the original hue. Many manufacturers provide touch-up paint specifically designed for their products, which can simplify this process.
Testing the Color Match
Before applying paint directly to the repair, test the color on a small inconspicuous area or a scrap piece. Allow it to dry to see if the shade aligns with your furniture. Adjustments may be necessary; adding a drop of white or black paint can help achieve the desired tone.
Application Technique
Using a fine brush or a cotton swab, gently apply the touch-up paint to the repaired area. It’s best to use thin layers to avoid clumping. Allow each layer to dry completely before assessing if additional coats are required. Once satisfied with the coverage, use a soft cloth to buff the area lightly, enhancing the shine and blending it with the surrounding surface.
Sealing the Repair for Longevity
After applying the filler and achieving a smooth finish, sealing the area will greatly enhance durability. I recommend using a polyurethane or clear acrylic sealant to protect against moisture and wear.
Begin by choosing a water-based sealant for easy application and quick drying. With a fine brush or a foam applicator, apply a thin layer over the repaired section, ensuring even coverage. Avoid over-saturating to prevent pooling.
Allow the first coat to dry completely, typically taking around two hours, depending on humidity and temperature. Once dry, gently sand the surface with a fine-grit sandpaper, this step promotes adhesion of subsequent coats.
Apply an additional coat of sealant, repeating the drying and sanding process as necessary. For optimal protection, aim for at least two to three coats, especially in high-traffic or moisture-prone areas.
Finally, when completely dried, buff the surface lightly with a soft cloth to restore its original sheen. This not only enhances the aesthetic but also provides an additional protective barrier.