To tackle stubborn adhesive marks on surfaces, I recommend using a solution of equal parts vinegar and water. Apply this mixture to a cloth and gently rub the affected area until the residue lifts away.
If vinegar does not do the trick, consider utilizing rubbing alcohol or nail polish remover. Dab a small amount onto a cotton ball and gently blot the adhesive. Always test in an inconspicuous area first to ensure no damage occurs.
For more stubborn spots, a commercial adhesive remover can be effective. Follow the manufacturer’s instructions and make sure to ventilate the area well. After application, wipe the surface clean with a damp cloth.
Techniques for Extracting Designs from Surfaces
Begin with a heat source, such as a hairdryer or heat gun. Apply heat directly to the area where the design is located, keeping the nozzle a few inches away to avoid damage. The heat softens the adhesive, making it easier to lift.
Use a plastic scraper or an old credit card to gently pry the design off the surface. Start at one edge and work your way across, being cautious not to scratch the material beneath.

For stubborn residues, a combination of warm soapy water and a sponge can be effective. Soak the area, allowing the moisture to penetrate the adhesive. Scrub gently until it begins to come off.
In case of persistent residue, consider using rubbing alcohol or adhesive remover. Soak a cloth in the solution and place it over the residue for several minutes. This will help break down the adhesive, facilitating easier removal.
Avoid using metal scrapers or abrasive pads, as these may damage the finish of the surface beneath.
Once complete, wash the area with soap and water to remove any remaining residue from cleaning agents.
- Test any solvent on a hidden area first to ensure it won’t harm the surface.
- Work in small sections for better control and results.
- After achieving a clean surface, consider applying a protective finish, if necessary.
Identifying the Type of Furniture Transfer
To effectively handle the situation, the first step is to determine the specific kind of graphic or image that has been applied. Different techniques yield varying results and require tailored approaches.
Decals vs. Transfers
If the design feels like a raised surface and adheres to the piece, it’s characterized as a decal. These can often be lifted in segments, beginning at one corner and gently peeling away. If the image appears flat and is fused into the material, you’re likely facing a transfer. This type may need additional solvents for effective elimination.
Painted Transfers
In some cases, designs are hand-painted, which complicates matters. If you observe brush strokes or any texture matching the wood’s finish, it suggests a painted image. For this, sandpaper with a fine grit may be beneficial to carefully abrade the area and gradually blend it with the surrounding surface.
Identifying the type allows for selecting the most appropriate method to tackle the challenge. Always proceed with caution to preserve the integrity of the underlying material.
Gathering Necessary Supplies for Removal
I recommend collecting specific items to ensure an efficient process. The required tools and materials will significantly impact the overall outcome. Here are the supplies you should gather:
Tools
| Item | Purpose |
|---|---|
| Heat Gun or Hair Dryer | Softens adhesive for easier lifting. |
| Plastic Scraper | Prevents damage to the surface while removing. |
| Rubbing Alcohol or Adhesive Remover | Helps dissolve residues and sticky areas. |
| Cloth or Sponge | For applying solvents and wiping surfaces clean. |
| Protective Gloves | Protects hands from solvents and adhesives. |
Safety Equipment
| Item | Purpose |
|---|---|
| Face Mask | Reduces inhalation of fumes from solvents. |
| Goggles | Protects eyes from splashes and debris. |
Once these items are on hand, I can proceed confidently with the task at hand, ensuring a smoother experience with optimal results.
Step-by-Step Guide for Water-Soluble Transfers
Begin with wetting a clean cloth or sponge in warm water. Ensure that the cloth is damp but not dripping. This initial step helps break down the adhesive binding the graphic to the surface.
Next, gently press the damp cloth against the design, holding it in place for approximately 30 seconds to one minute. This soaking process softens the transfer’s material, making it easier to lift.
After the waiting period, cautiously lift a corner of the design using your fingernail or a plastic scraper. Avoid using sharp tools to prevent damaging the underlying surface. If the material starts to peel away smoothly, continue pulling at a slow, steady angle.
If any resistance is felt, apply more water to the cloth and re-soak that area for a few moments. This will help detach areas that remain stuck. Be patient and work slowly to ensure you don’t accidentally tear the design or damage the surface underneath.
Once the entire transfer is off, there may be some residue left behind. Dampen a new cloth with soapy water (using a mild dish soap) and wipe over the area to remove any lingering bits. Rinse the cloth with clean water and wipe again to remove soap traces.
Finally, dry the surface thoroughly with a soft, dry cloth. Inspect the area to ensure no bits of the transfer are left and that the surface is clean.
Techniques for Removing Oil-Based Transfers
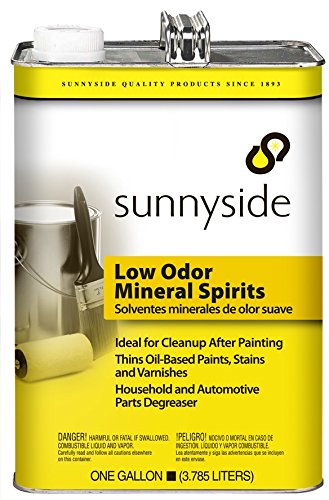
I find that addressing oil-based marks effectively requires specific techniques. First, I recommend using a solvent specifically designed for oil-based products like mineral spirits or paint thinner. Applying a small amount to a clean cloth, I gently dab the area without saturating it. This method helps to break down the transfer materials without damaging the surface underneath.
Using Heat
Another approach I often utilize is heat application. A hairdryer set to a low temperature can gently warm the affected area. I keep the dryer moving to avoid overheating any one spot. As the transfer warms up, I use a soft plastic scraper to lift it away, taking care not to scratch the finish.
Utilizing Chemical Cleaners
If the above methods don’t work, I consider a chemical cleaner like adhesive remover. Following the manufacturer’s instructions, I apply a small quantity to the transfer, waiting a few minutes for it to penetrate. I then gently scrape and wipe using a microfiber cloth. Afterward, I ensure I clean the area with soap and water to remove any remaining residue.
Preventing Damage to Furniture Finish
Maintaining the integrity of the surface is crucial when handling decorative elements. Here are some practical steps I recommend to safeguard the finish:
- Avoid excessive moisture. Always use a damp cloth rather than soaking it, as prolonged exposure can lead to bubbling or peeling.
- Employ a protective barrier. Consider using a clear coat or sealant after the application process to shield against potential wear and tear.
- Store items properly. Keep them away from direct sunlight or extreme temperatures to prevent fading or warping over time.
- Test surfaces first. Before applying any cleaning solutions, conduct a patch test on an inconspicuous area to assess potential reactions with the finish.
- Regularly inspect the surface. Look for signs of damage or deterioration to address issues before they escalate.
By following these guidelines, the surface can remain in pristine condition for years to come.
Maintaining Furniture After Transfer Removal
After dealing with transfer issues, ensuring the durability of your piece is paramount. First, clean the surface with a mild soap and water solution using a soft cloth to eliminate any residues. This will also help restore the natural shine.
Applying a Protective Finish
Consider applying a furniture polish or wax specifically designed for the material. This adds a layer of protection and enhances the grain. Choose a product compatible with your item to avoid any adverse reactions. I typically use a microfiber cloth for application, which prevents scratches.
Regular Upkeep Practices
Consistent care requires routine dusting with a soft cloth to prevent grime buildup. Additionally, avoid placing hot items directly on the surface, as this can lead to damage. Instead, use coasters or mats to safeguard against heat and moisture. I also recommend keeping objects like lamps and vases away from direct sunlight, which helps prevent fading or discoloration.
Finally, periodically inspect for scratches or dents. If found, touch them up with matching stain or paint to maintain a cohesive appearance. This proactive approach keeps everything looking fresh and extends the longevity of the piece.


