

Begin with a thorough cleaning of the surface. Utilize a wire brush to eliminate rust and grime, ensuring a smooth base for new coatings. A mixture of mild detergent and water can effectively clean the furniture; rinse and dry it completely before proceeding.
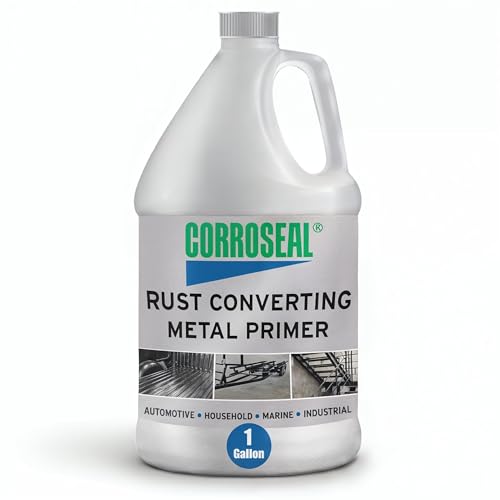
Next, apply a primer designed for metal surfaces. This step is integral for better adhesion and increased durability of the finish. Choose a rust-inhibiting primer to safeguard against future corrosion. A foam roller or a spray can work well for even application.
Once the primer has dried, select a high-quality paint specifically formulated for metal. Whether you prefer a matte or glossy finish, check the manufacturer’s instructions for optimal application methods and drying times. Multiple thin coats are preferable to a single thick layer, as they ensure a more durable and flawless surface.
After painting, allow sufficient drying time before applying a clear sealant for added protection. This final coat will enhance the appearance while offering resistance to chips and scratches. Regular maintenance will keep your metal pieces looking sharp and new for years to come.
How to Refinish Wrought Metal Pieces
I recommend starting with a thorough cleaning. Use a mixture of warm water and mild detergent to remove dirt and grease. A stiff brush helps to reach intricate designs and crevices. Rinse thoroughly and let the item dry completely before applying any treatments.
Next, inspect the surface for rust or damage. Any affected areas should be treated with a wire brush or sandpaper to remove flaking paint and rust. For larger rust areas, consider using a rust converter to stop the deterioration and prepare the surface for the next steps.
Once the surface is smooth, applying a primer designed for metal enhances adhesion for paint. Opt for a spray primer for an even coat, ensuring to cover all angles, especially in crevices. Follow the manufacturer’s instructions for drying times before moving on to painting.
Select a high-quality exterior metal paint in your desired color. A spray application typically achieves a more uniform finish, but a paintbrush can also be used for touch-ups or detailed areas. Apply multiple thin layers, allowing adequate drying time between applications to prevent drips and runs.
Finally, seal the painted surface with a clear coat to provide additional protection against scratches and fading. A clear polyurethane or enamel spray works well for this. After the final coat dries, your restored piece will be ready for showcasing or regular use.
Choosing the Right Tools for Refinishing
Begin with a quality paint stripper designed for metal surfaces. This will efficiently remove old coatings without damaging the underlying material.
An angle grinder with a wire brush attachment is invaluable for tackling rust and surface deposits. It offers a powerful means to prepare the metal for new coating.
Invest in a high-grade sandpaper or sanding sponge, ranging from coarse to fine grit, for smoothing out scratches and imperfections. I typically use 80-grit for rough spots and finish with 220-grit for a polished touch.
When it comes to cleaning, a pressure washer can swiftly remove debris, especially from intricate designs. If a pressure washer is unavailable, a simple sponge and soapy water can suffice.
For applying primer and paint, select a quality spray gun or a high-density roller. A spray gun provides an even finish, especially for ornate pieces.
Don’t overlook safety gear. Gloves, goggles, and a respirator will protect you from dust and harmful chemicals throughout the process.
A good drop cloth will keep your workspace tidy, catching any drips and overspray during the project.
Lastly, a set of brushes and paint trays will assist with detailed work in tight spots where bigger tools can’t reach.
Preparing the Workspace for Safe Refinishing
I ensure the area is well-ventilated before commencing work. I open windows and use fans to create airflow. This minimizes the inhalation of fumes from paints or solvents.
I clear the workspace of any unnecessary items, creating a dedicated area for my project. This reduces the risk of accidents and helps me stay organized.
I cover the floors with drop cloths or old newspapers to catch drips and spills. This protects the surface and makes cleanup simpler.
I gather all necessary protective gear–gloves, goggles, and a mask–to safeguard myself from potential hazards during the process. This is non-negotiable for my safety.
Ensuring access to a power source is critical. I check that my tools can reach an outlet without causing hazards or tripping over cords.
<p I have a fire extinguisher nearby, especially when working with flammable materials. This provides peace of mind should an emergency arise.
<p I organize my tools and materials within reach but out of the way. I create a workstation that is both efficient and safe, enabling smooth operation.
With everything in place, I perform a final check to confirm that the environment is safe and conducive for my task. This attention to detail is key to a successful revival of my metal pieces.
Cleaning and Removing Old Finish from Metal Pieces
Begin the process by gathering key materials: a wire brush, paint stripper, and safety gear including gloves and goggles. These items are crucial for removing old coatings effectively while protecting yourself from dust and chemicals.
Method 1: Using a Wire Brush
If the existing finish is flaky or poorly adhered, a wire brush can be an efficient tool. Here’s what I do:
- Ensure the item is secure, either clamping it down or holding it firmly.
- Gently scrub the surface with the wire brush in a circular motion to lift off the loose coating.
- Pay attention to intricate designs, which may require more delicate handling.
Method 2: Applying Paint Stripper
For a more thorough job, I opt for a chemical paint stripper:
- Select a stripper that is suitable for metal. Ensure it’s non-toxic and safe for indoor use if applying inside.
- Apply a generous layer using a brush, covering all surfaces evenly.
- Let it sit for the time specified on the product instructions until the finish begins to bubble or peel away.
- Use a plastic scraper to gently remove the softened finish without scratching the underlying material.
- Wipe down the area with a rag soaked in mineral spirits to remove any residual stripper.
Ensure to ventilate your workspace well and dispose of any waste in accordance with local regulations. Regularly check for missed spots to avoid any leftover finish, which can affect the final outcome of your restoration project.
Inspecting for Damage and Making Repairs
Carefully examine each piece for any signs of wear, rust, or structural issues. Check joints and welds for stability; loose connections may need tightening or re-welding. Pay close attention to areas where moisture can accumulate, as these spots are more prone to corrosion.
For surface rust, use a wire brush or sandpaper to remove it gently. Afterward, apply a rust-inhibiting primer to prevent further deterioration. If you notice deep pitting or flaking, consider using a filler product designed for metals to restore the surface. Follow the manufacturer’s instructions for curing and smoothing out any repairs.
Should you find cracks or breaks, assess if they can be repaired with metal epoxy or if they require welding. If welding is necessary, ensure you’ve the right equipment and protective gear. If uncertain, consulting with a professional can save time and ensure lasting repairs.
Once repairs are complete and any fillers have cured, sand the entire surface smoothly for optimal adherence of new finishes. Make sure to clean off any dust or debris before proceeding to the next steps in your reconditioning project.
Selecting the Appropriate Paint or Finish
Choosing the right coating is essential for achieving durability and aesthetic appeal. Here are key factors to consider:
Types of Coatings
- Oil-Based Paints: Highly durable and moisture-resistant, great for outdoor pieces. They take longer to dry, so plan for extended application time.
- Water-Based Paints: Faster drying and easier cleanup with soap and water. They emit fewer fumes, making them suitable for indoor use.
- Spray Paint: Ideal for intricate designs and hard-to-reach areas. Choose products specifically formulated for metal.
- Powder Coating: Provides a tough, even finish that is highly resistant to scratches. This requires special equipment and processes but offers industrial-grade durability.
Finish Options
- Glossy: Offers a reflective quality, enhancing color vibrancy but can highlight imperfections.
- Satin: A balanced finish that provides a slight sheen while effectively hiding flaws.
- Matte: Reduces glare but may not be as durable as glossier options. It’s suitable for a more understated appearance.
Once you choose a type of coating, consider the color that harmonizes with your space. Test samples on a small area to visualize the final effect before proceeding. Make certain any chosen product is specified for metal surfaces to ensure optimal adhesion and longevity.
Applying Primer for Iron Pieces
Choosing a suitable primer is critical before painting. I recommend using a rust-inhibiting metal primer designed for outdoor applications, as it provides long-lasting protection.
Here’s a step-by-step approach to applying primer:
- Ensure the metal surface is clean and free of dust, grease, and moisture.
- Shake the primer can thoroughly to mix the contents and achieve an even consistency.
- Using a high-quality brush or spray can, apply an even coat of primer, ensuring no missed spots.
- Focus on hard-to-reach areas and intricate details to ensure complete coverage.
- Allow the primer to cure as per the manufacturer’s instructions, typically 1-2 hours for most products, before applying a second coat if necessary.
Applying primer in a well-ventilated area helps the drying process and minimizes odor. I always check the manufacturer’s guidelines for recommended drying times between coats.
For best results, aim for a smooth finish–this will enhance the final paint layer’s appearance and durability. Sand lightly with fine-grit sandpaper between primer coats for optimal adhesion.
Techniques for Painting Rod Iron Evenly
For achieving a smooth finish, I recommend using a high-quality spray paint instead of a brush. This allows for even coverage without streaks or brush marks. Hold the spray can approximately 12 inches away from the surface to avoid pooling. Use a sweeping motion while spraying, overlapping each pass by about 50%.
Before coating, ensure the primer has fully dried. This can take anywhere from 30 minutes to several hours depending on humidity and temperature. Test a small area if unsure; it should not feel tacky.
In cases where you prefer a brush, a synthetic bristle brush is ideal. Use light, even strokes and don’t overload the brush with paint to maintain control. Start at one end and work your way across progressively, ensuring minimal pressure to avoid drips.
Use a roller for larger surfaces, as this method can speed up the process. Opt for a short-nap roller to reduce texture and achieve a smoother finish. Apply gently and again, work from one edge to the other.
| Technique | Description |
|---|---|
| Spray Paint | Offers even application with no brush marks. Maintain a distance of 12 inches. |
| Synthetic Brush | Provides control, use light strokes, and avoid overloading with paint. |
| Short-Nap Roller | Efficient for large areas while minimizing texture. |
Finally, apply thin coats rather than one thick layer. Wait for each coat to dry completely before applying the next. This technique reduces the chances of runs and helps in achieving a professional-level finish.
Sealing and Protecting the New Finish
To ensure longevity and durability of the newly applied surface, I always follow up with a high-quality sealant. This step is crucial for preventing rust and maintaining the aesthetic appeal of the pieces. I prefer a clear, outdoor-rated polyurethane or enamel spray sealer for optimal protection.
Before applying the sealant, I wait at least 24 hours after the last paint layer dries. This allows the paint to cure properly and bond effectively with the underlying metal. When I’m ready to seal, I take the following steps:
| Step | Details |
|---|---|
| 1. Surface Preparation | Wipe the surface with a clean, dry cloth to remove any dust or debris. |
| 2. Choosing the Right Sealant | Select a sealant compatible with the paint used; look for options labeled as rust-inhibitive. |
| 3. Application Technique | Utilize a spray can or a brush for even application. I prefer spraying for a smooth, uniform finish. |
| 4. Drying Time | Allow the first coat to dry completely, then assess if a second coat is necessary for added protection. |
| 5. Curing | Let the finish cure for at least 48 hours before placing items back on the furniture. |
Regular maintenance is essential. I recommend inspecting the sealant periodically and reapplying it every couple of years, especially if the item is exposed to outdoor elements. This proactive approach significantly extends the life of my restored pieces.
Maintaining Decorative Metal Pieces After Refinishing
Regularly inspect your metal accents for signs of wear or damage such as rust or chipping. Address issues promptly to prevent further deterioration.
Clean these items monthly using a soft cloth and mild soap. Avoid harsh chemicals that could compromise the new finish. For outdoor pieces, consider a more frequent cleaning schedule to remove dirt and debris.
Applying a protective wax or sealant every six months can enhance durability and maintain the luster of the newly finished surface. This will also provide an extra layer against moisture.
Store items indoors during harsh weather conditions, especially in winter. If necessary, cover outdoor pieces with a breathable fabric to protect against elements while allowing air circulation.
Limit exposure to extreme temperatures and direct sunlight, as these can cause fading and damage over time. Whenever possible, place furniture in shaded or sheltered areas outdoors.
Lastly, handle these items with care during use. Avoid dragging to prevent scratches and dents, which can compromise the finish and longevity of the pieces.