First, use a vacuum cleaner with a nozzle attachment to lift any indentations left by heavy items. Make multiple passes across the affected areas. This helps in redefining the pile and restoring its initial look.
Next, employ a damp cloth to blot the fibers gently. If needed, steam from a kettle can also aid in loosening the fibers, making them more pliable.
For deeper restoration, consider using a soft-bristled brush to fluff up the fibers. Be careful not to apply excessive pressure to avoid damaging the surface.
After these steps, allow the area to dry completely. It’s crucial to avoid placing any heavy objects back onto the surface until the fibers have fully settled and regained their shape.
Raising Your Flooring Post-Furniture Relocation
Begin by assessing the situation, noting areas that require attention. Before addressing those spots, ensure you have the right tools: a heavy-duty vacuum, a steam cleaner, and a carpet rake or stiff-bristle broom.
Steps to Restore Your Flooring
- Vacuum the affected areas thoroughly to remove dust and debris.
- Use a steam cleaner in sections to revitalize fibers that may have become flattened due to weight.
- Allow the moisture to dry completely before proceeding.
- Employ a carpet rake or stiff-bristle broom to gently fluff the fibers.
- For particularly stubborn areas, consider using ice cubes; place them on flattened spots, let them melt, then rake the fibers.
Preventative Measures
- Position furniture pads under heavy items to reduce future indentations.
- Regularly rearranging furniture can help distribute weight and keep the texture consistent.
- Invest in a carpet protector or mat for high-traffic zones to minimize wear.
By attentively following these steps, you’ll restore the look and feel of your flooring in no time.
Identify the Type of Carpet You Have
Before attempting to adjust any floor coverings, I recommend determining the specific material and construction of the textile underfoot. The type of flooring impacts how it reacts to pressure, indentation, and other factors.
| Type of Material | Characteristics | How It Responds to Pressure |
|---|---|---|
| Nylon | Durable, resistant to stains, and comes in a variety of styles. | Typically rebounds well, with good resilience. |
| Polyester | Soft feel, vibrant colors, more susceptible to wear. | Can show indentations more easily, but can recover over time. |
| Wool | Natural fiber, luxurious touch, excellent insulation properties. | Usually maintains its shape, but can be affected by heavy objects. |
| Olefin (Polypropylene) | Mildew resistant, inexpensive, great for outdoor use. | Limited recovery from impressions; care needed to maintain appearance. |
Check the back of the material or consult the manufacturer’s guide if available for specifics. Recognizing the type of textile not only assists in understanding its behavior but also aids in selecting the right approach for adjustments.
Choose the Right Tools for Carpet Lifting
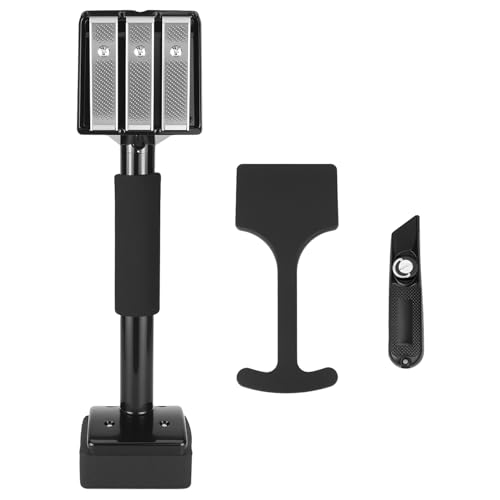
For tackling the task of lifting floor coverings, having the appropriate instruments can make a significant difference. I recommend starting with a carpet kicker, a tool designed to help stretch and reposition coverings with ease. This device allows precise adjustments without causing damage.
A utility knife is also valuable; it enables you to trim excess material for a more tailored fit. Ensure that the blade is sharp for clean cuts. Additionally, consider using a staple gun if you need to secure the edges firmly after repositioning.
To avoid any accidental tears, always have a protective cloth handy. This can be laid down to catch any slips or mishaps while you’re working. Don’t forget a sturdy putty knife; it’s useful for prying up edges that might be stuck or adhered to the floor.
Lastly, a pair of gloves is essential for maintaining grip while protecting your hands from sharp objects. Armed with these tools, I efficiently manage lifting and adjusting my flooring, keeping the process smooth and straightforward.
Clear the Area Around the Furniture
Before proceeding, I ensure that the space around the furniture is completely free from any obstacles. I move smaller items, such as decorations, books, or electronics, away from the designated area to avoid accidents or damage.
If the furniture is large or heavy, I gently push aside any nearby rugs or mats. Keeping the area clear not only helps prevent tripping hazards but also provides a clean surface to work on.
I also take a moment to check for any cords or cables that might be tangled or hidden behind the furniture. If necessary, I unplug and relocate these cords to avoid potential accidents during the lifting process.
If there are any items stored underneath the furniture, I remove those as well. This ensures that I have full access and allows me to work efficiently without interruptions.
Preparing the area in this manner allows for a smoother transition and makes it easier to handle the lifting process effectively.
Carefully Lift the Edges
Grip the edge of the fabric with one hand while using the other hand to slide a flat tool, like a putty knife, underneath. This method minimizes damage to the surface beneath. Angle the tool slightly; this helps in prying up the edge without tearing the material.
Maintain a steady lift as you move along the edge, being cautious of any attached adhesive or interlocking mechanisms that might require different handling. If you encounter resistance, pause and adjust the angle of your tool to avoid ripping the fabric.
Work in Sections
Focus on lifting small portions rather than trying to pull up a long stretch all at once. This approach provides better control and reduces stress on the material. Take your time to ensure each section is adequately detached before proceeding to the next area.
Support the Material
As I lift, I like to use blocks or other sturdy objects to support the lifted area. This prevents the fabric from falling back down and helps keep it elevated. Placing a few objects strategically ensures that I can work efficiently without constantly needing to lift the edges again.
Check for Carpet Tacks or Staples
Before proceeding with lifting the flooring material, I inspect the area for any tacks or staples that may have been left behind. These sharp objects can damage the fibers or even injure me if I’m not cautious.
Here’s what I do:
- Wearing heavy-duty gloves helps protect against accidental punctures.
- I scan the edges of the surface for visible tacks or staples, focusing on corners and seams where furniture often sits.
- If I spot any, I use pliers to carefully pull them out. This prevents future entanglements with the fabric.
- I also run a vacuum cleaner with a hose attachment around the area to pick up any loose debris or small particles.
By systematically checking for these fasteners, I ensure a smoother and safer process when lifting the material. If I happen to miss one, I may cause damage to the surface or myself. Therefore, a thorough examination is worth the time spent.
Utilize a Carpet Rake for Flattening
I recommend using a carpet rake to efficiently restore the texture of your flooring. This tool features bristle-like teeth designed to separate fibers and help them stand more upright. By running the rake against the grain of the material, it’s possible to lift flattened areas caused by heavy objects.
Proper Technique
Hold the rake at an angle and gently glide it over the affected spots. Apply minimal pressure initially to avoid damaging the fabric. Work in sections, starting from the edges and gradually moving inward. This method ensures an even distribution of fibers, making them more uniform in appearance. Always rake in the direction of the pile for optimal results.
Post-Raking Care
After using the rake, vacuum the area to remove any loose fibers or debris. This step enhances the revitalized look and maintains cleanliness. Consider applying a carpet protector spray after raking, as it can help in repelling dirt and reduce future wear from foot traffic.
Repair Any Damages to the Floor Covering
Address wear and tear immediately to prevent further issues. Start by examining the damaged areas closely for any rips, fraying, or stains.
For Minor Tears and Rips
- Use carpet adhesive to bond the ripped edges back in place. Apply a small amount carefully, ensuring even coverage.
- Press the fibers down to ensure they adhere properly, and place a weight on top for a few hours to secure the fix.
For Fraying Edges
- Trim frayed fibers with sharp scissors. Be cautious to avoid cutting into good material.
- Apply a small amount of fray check solution to the cut edges to prevent future fraying.
For Stains
- Blot stains with a clean cloth and a suitable carpet cleaner. Avoid rubbing, as it can spread the stain.
- If necessary, use a mixture of vinegar and water for stubborn stains, blotting rather than scrubbing.
Once repairs are made, allow the area to dry completely before placing any items back on it. Regular maintenance can extend the life of your flooring, helping to keep it looking new.
Use a Heavy Object to Weigh Down the Carpet
To effectively flatten the affected area, I often place a heavy object, such as a stack of books or a dumbbell, on the lifted section of the flooring. This weight helps to gently press the material back into its original position.
It is best to leave the object in place for several hours or even overnight. This duration allows the fibers to settle properly. If the area remains raised after this time, I adjust the weight distribution or add additional objects for better results.
When choosing a weight, ensure it is not excessively heavy to avoid damage. Distributing the weight over a wider area can also assist in providing even pressure across the surface.
After removing the object, I inspect the area. If it still appears uneven, repeating the process with a different weight might lead to improved outcomes.
This straightforward technique has proven helpful in restoring a smooth and cohesive feel to the surface, ensuring the space looks tidy and well-maintained.
Regular Maintenance Tips for Carpet Care
To extend the lifespan of your flooring, I recommend regular vacuuming at least once a week. This helps remove dirt and debris that can wear down fibers over time.
Routine Cleaning
Every six months, perform a deeper clean using a carpet cleaner with hot water extraction. This method effectively eliminates embedded dirt and allergens, revitalizing the appearance of the textiles.
Stain Prevention
For spills, act quickly by blotting the area with a clean, dry cloth. Avoid scrubbing, which can damage the pile. Use a carpet-safe cleaning solution only if necessary.
| Task | Frequency |
|---|---|
| Vacuuming | Weekly |
| Deep Cleaning | Every 6 months |
| Spot Cleaning | As needed |
I also find that placing mats at entrances helps reduce tracked dirt. Additionally, rotating furniture occasionally can prevent uneven wear and give the material a chance to recover.
By maintaining these practices, I’ve noticed a significant improvement in the condition of my textiles, ensuring they remain in excellent shape for years to come.