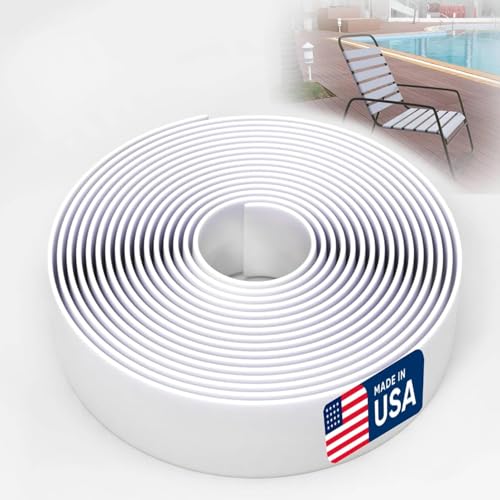
Begin with the correct type of replacements that match the design and color of your seating. Conduct a thorough inspection of the existing bands to determine the quantity required for your project. Gather high-quality materials to ensure durability against exposure to the elements.
Cut the replacements to the appropriate length, generally following the specifications of the original fastenings. It’s important to keep a margin for adjustments, as lengths can slightly vary. Be mindful of the tension; too tight can lead to excessive wear, while too loose can affect comfort.
Assemble the necessary tools, including a screwdriver, pliers, and a staple gun if needed. Carefully remove any old remnants, cleaning the area thoroughly before application. Start securing the replacements, ensuring an even distribution across the seating surface, which will enhance both appearance and longevity.
Choosing the Right Material for Straps
I recommend selecting materials based on their durability and weather resistance. High-density polyethylene (HDPE) is a popular option, as it offers excellent UV protection and strength, making it ideal for prolonged outdoor use. Additionally, it is available in various colors and can withstand the elements without fading or cracking.
Considerations for Comfort and Aesthetics
Mesh fabrics provide breathability, ensuring comfort during hot weather. They also dry quickly after rain, preventing mold and mildew growth. Look for options that have reinforced edges to improve longevity and withstand stretching.
Comparing Natural and Synthetic Options
Cotton and similar natural fibers deliver comfort and a classic look but may require more maintenance. Synthetic fibers like polyester are less susceptible to wear and tear and are typically easier to clean. Evaluate your preferences for maintenance and appearance to make the best choice for your settings.
Measuring the Old Straps for Accurate Sizing
Start with a tape measure to determine the exact dimensions of the existing bands. This ensures a perfect fit for replacements, minimizing installation complications.
Steps for Accurate Measurement
- Remove the old bands carefully to prevent damage to the frame.
- Measure the length of each band from one end to the other, ensuring to include any bends or curves.
- Check the width at the widest point and note any variations.
- If there are multiple pieces, label them to maintain consistency while shopping.
Double-check measurements for accuracy; miscalculations can lead to inefficient installation or discomfort in use.
Additional Considerations
- Factor in the thickness of the new material when measuring. Some options may be bulkier than the originals.
- Consider whether the replacement requires similar flexibility or strength as the previous ones.
Careful measurement plays a critical role in the longevity and functionality of your seating arrangements. Accurate sizing paves the way for a smooth transition and continued enjoyment of your space.
Removing Old Straps from Outdoor Furniture
First, I ensure that the chair or sectional is stable and in an accessible location. For removal, I use a flathead screwdriver or a utility knife to cut the old material at the attachment points. This method prevents damage to the frame while effectively detaching the worn pieces.
If the existing connection uses screws or rivets, I grab a drill or screwdriver to remove these. I carefully place the screws in a small container so they don’t get lost for future use. In cases where adhesive is involved, applying heat with a hairdryer can soften it, making it easier to pull away the remnants.
After the straps are off, I inspect the frame for any wear or damage. Cleaning the surfaces with a mild detergent helps remove residue left by the old material, ensuring a clean foundation for reattachment. A final check enables me to address any issues before installing replacements.
Preparing the Frame for New Straps
I begin by thoroughly examining the frame to identify any signs of wear or damage. If I notice rust, dirt, or loose components, I make sure to clean and repair these areas. Using a wire brush, I scrub off rust and apply a rust-inhibiting primer to prevent future corrosion.
Next, I ensure that the frame is stable before attaching any replacements. I check that all screws and bolts are tight and make adjustments as needed. A strong foundation is crucial for the longevity of the new material.
I pay special attention to the areas where the older materials were attached. It’s essential to clear out any debris or remnants from previous attachments to ensure a smooth installation. Sanding down rough spots can help as well, promoting a better bond between the frame and the fresh components.
If the structure is made of wood, I inspect for splintering or cracks, which I then sand down or fill with wood filler. After these repairs, I wipe down the frame with a damp cloth to eliminate any dust or particles before beginning the application of the new binding.
Finally, I consider applying a coat of protective sealant if the frame is made from a material vulnerable to the elements. This added layer will help extend the life of the entire structure. By following these steps, I ensure a solid base for the replacement components, enhancing both functionality and longevity.
Cutting New Straps to the Correct Length
Measure the distance between the frame’s attachment points where the replacement material will be secured. Add an additional 5-10 inches to this measurement for a proper fit around the ends, ensuring you have enough material for a secure knot or fastening method.
Use a straight-edge ruler or measuring tape to mark the material at the calculated length. A marker or chalk works well for making visible cutting lines. Be sure to double-check measurements before proceeding to avoid waste.
Utilize sharp scissors or a cutting tool suited for the type of material selected. Ensure cuts are straight and clean to prevent fraying, which can affect durability. If working with particularly tough materials, consider using a utility knife for a precise cut.
After cutting, double-check each piece against the furniture to confirm the lengths are consistent and appropriate. This will help in maintaining uniformity across all replacement components, enhancing both aesthetics and stability.
Attaching New Straps to the Furniture Frame
Align each length of fabric with the frame, ensuring a snug fit against the existing channels or brackets. Starting at one end, thread the strap through the designated slots or fastening points, pulling firmly to eliminate slack. I find it helpful to secure one end temporarily using a clip or clamp.
Securing the Straps
Once the initial end is in place, continue feeding the strap through the opposite side. Make sure to adjust the tension as you go. After threading through, pull the strap tight and fasten it according to the manufacturer’s instructions, whether using screws, clips, or any provided mechanisms. Double-check that each section remains taut and correctly aligned.
Finishing Touches
Complete the installation by trimming any excess material if required. Neatly finish the ends with a heat seal or other appropriate treatment to prevent fraying. Test the integrity of the attachments by applying gentle pressure to ensure they hold securely before using the seating or lounging area.
Securing Straps for Maximum Durability
It’s critical to ensure each fastening is tight and secure to maximize the lifespan of the bindings. First, I use a heavy-duty needle to stitch the ends of the materials together. This additional step forms a reliable bond that resists wear and weathering.

I check for any slack after the initial attachment. Any looseness can compromise strength, so I make necessary adjustments by pulling firmly on the ends while securing them into place. Double-check that there’s no bend or twist in the length; a flat arrangement prevents strain during use.
Using a strong adhesive tape along the inner seam also aids in safeguarding against fraying. This tape acts as a protective layer, reducing the chances of damage from environmental factors. I cover exposed edges to prevent moisture from seeping into the fabric.
If the construction allows, I add metal brackets or clips at critical junctions. These pieces distribute tension more evenly across the assembly, thereby reducing stress on any single point. Regular inspections of these areas can prevent premature failure.
Lastly, storing the items in a sheltered area during inclement weather can dramatically extend the life of the components. A protective cover can shield them from UV rays and moisture, both of which accelerate deterioration. By being diligent with these methods, I ensure the components remain in top condition for longer periods of time.
Checking for Proper Tension on Straps
I ensure that each band is adequately tightened by performing a simple tension test. I apply pressure with my hand to the surface of the seating area. If it feels too loose or if there’s noticeable give, I know adjustments are necessary.
After securing each band, I inspect for any slack visually. I pay careful attention to the spacing between bands; they should be uniform and evenly distributed. An inconsistent appearance often indicates uneven tension.
Using a ruler, I measure the distance between the bands to confirm they are set at the desired interval. Generally, a gap of about 4-6 inches works best for optimal support.
I also take a moment to sit on the seating piece to evaluate stability. A well-tensioned setup allows for even weight distribution without sagging or feeling unstable.
If I detect any areas that are still loose, I make the necessary adjustments. Tightening can be done by reconfiguring the securing knots or using tightening hardware as needed.
It’s critical to revisit the tension periodically, especially after regular use, ensuring everything remains in its ideal state. This guarantees the longevity and performance of my resting areas.
| Action | Description |
|---|---|
| Pressure Test | Apply hand pressure to check for any give. |
| Visual Inspection | Look for uniform spacing and adjust as necessary. |
| Measurement Check | Measure the gaps between bands for even distribution. |
| Weight Test | Sit on the furniture to assess overall stability. |
| Periodic Review | Check tension regularly to maintain integrity. |
Caring for Your Outdoor Furniture Straps
Regular maintenance significantly extends the lifespan of replacement bands on your seating. Here are specific actions I take to keep them in top shape:
Cleaning
- Use a soft brush or cloth to remove dust and debris. This avoids surface damage.
- Mix warm water with mild soap for a gentle cleaning solution. Rinse thoroughly.
- Avoid abrasive cleaners or tools to prevent wear, especially on plastic or fabric materials.
Inspection
- Check periodically for signs of fraying or discoloration. Early detection of wear can prevent further damage.
- Inspect the hardware, including fasteners or connectors. Tightening loose parts will enhance stability.
- Look for mold or mildew, particularly in humid climates. Treat immediately with a mildew remover to prevent further growth.
Seasonal Care
- Store items indoors during winter to protect them from harsh weather conditions.
- If applicable, apply a UV protectant spray at the start of the season to enhance longevity against sun exposure.
- Consider using protective covers to shield against dust and environmental elements when not in use.
By implementing these strategies, I ensure that my repaired items remain comfortable and visually appealing for outdoor gatherings.
FAQ:
What types of straps are best for outdoor furniture?
When selecting straps for outdoor furniture, consider materials that are durable and weather-resistant. Common options include vinyl, polyester, or heavy-duty nylon. These materials can withstand varying weather conditions, fading from sunlight, and abrasion from daily use. Additionally, check the width and thickness of the straps, as a wider strap typically distributes weight better and provides added comfort.
How do I measure the old straps before replacing them?
To accurately measure the old straps, start by removing them from the furniture if possible. Use a flexible measuring tape to determine the length of each strap. Record the length, width, and any additional features, such as holes for weaving. If the straps are damaged but still attached, measure them in place. Take note of the measurements for each strap since they may vary depending on the location on the furniture.
What tools do I need for replacing the straps on outdoor furniture?
Replacing straps on outdoor furniture typically requires a few basic tools. You will need scissors or a utility knife to cut the new straps to the proper length. A screwdriver may be necessary to remove any screws or bolts holding the old straps in place. Some people also find it helpful to have a measuring tape, a cloth for cleaning, and possibly a pair of pliers to assist with securing the straps tightly. Having these tools ready will make the replacement process smoother.
Can I replace the straps on my own, or should I hire a professional?
Replacing straps can be a straightforward DIY project if you feel comfortable with basic tools and have some experience in home repair. Many people manage to replace straps on their own with success. However, if you have a complex piece of furniture or are unsure about the process, it may be beneficial to consult a professional to ensure the job is done correctly and the furniture remains stable and safe to use.
How do I maintain the new straps after installation?
After installing new straps, maintaining them is key to extending their lifespan. Regularly clean the straps with mild soap and water to remove dirt, debris, and mildew. Avoid harsh chemicals that may degrade the material. If the straps are exposed to direct sunlight, consider applying a UV protectant spray to reduce fading. Additionally, check the straps periodically for wear and tear, and replace any that show signs of damage to keep your furniture safe and functional.
What materials do I need to replace the straps on my outdoor furniture?
To replace the straps on your outdoor furniture, you’ll primarily need new straps that are suitable for outdoor use, typically made from materials like vinyl or polypropylene. You’ll also require a pair of scissors for cutting the straps to the appropriate length, a measuring tape to ensure correct sizing, and possibly a staple gun or screws to secure the straps to the furniture frame. If your furniture has a complex design, it might be helpful to have a screwdriver or a wrench on hand to detach any components if needed.
How can I measure the old straps to ensure the new ones fit correctly?
Measuring the old straps is a straightforward process. First, remove one of the old straps from the furniture frame carefully. Lay it flat on a surface to measure its original length. Use a measuring tape to determine the length from end to end. If the strap consists of multiple pieces, measure each piece separately and note their lengths. It’s better to measure a few times to ensure accuracy. Don’t forget to check the width of the strap as well, as this will help you find a suitable replacement. If you’re replacing all the straps, take measurements of two or three straps to get an average length in case of any minor variances due to wear and tear.


