Begin with thorough preparation. Remove any existing finish by sanding the surfaces until smooth, ensuring all previous coatings are eliminated. This step is crucial for achieving a uniform outcome. Utilize medium-grit sandpaper to start, and finish with finer grit for a polished touch.
Next, clean the surfaces meticulously to eliminate dust and debris. I recommend using a damp cloth or a tack cloth for this purpose. Allow the wood to dry fully before proceeding, which will ensure proper adherence of the following layers.


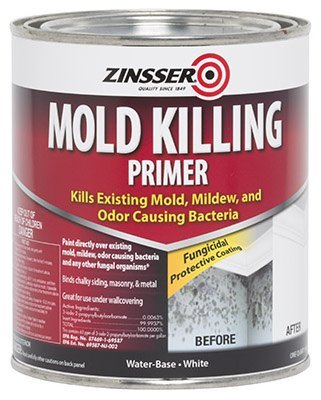
Select an appropriate coating product designed for this type of material. I favor water-based options for their quick drying times and low odor. Always apply a primer first to promote better bonding and enhance durability. A high-quality primer will also minimize the chances of wood tannins bleeding through.
Once the primer is dry, apply the color of your choice using a brush or roller for even coverage. Thin coats work best; this prevents drips and allows for better control. Patience is key here; multiple layers may be necessary for optimal richness and depth of color. After the final coat, let it cure thoroughly, ensuring longevity and a beautiful finish.
Steps for Transforming Your Wooden Pieces
Choose an appropriate primer designed for softwoods to ensure proper adhesion. I prefer a water-based primer for its ease of use and quick drying time.
Make sure the surface is prepped. Sanding eliminates any roughness, allowing for a smoother outcome. Begin with medium-grit sandpaper, followed by fine-grit for a polished finish.
After sanding, clean the surface thoroughly with a damp cloth to remove any dust particles. Allow it to dry completely before proceeding.
Apply the primer evenly using a high-quality brush or roller, ensuring full coverage. Let it cure completely as per the manufacturer’s instructions before going to the next step.
Select a topcoat that suits the look you desire. A latex or acrylic-based option provides a durable finish. Use the same application technique as with the primer, layering the coat for depth and richness.
Once the topcoat has dried, I always recommend adding a protective sealant. Choose a water-resistant varnish for longevity, applying it gently to avoid disturbing the base layers.
| Material | Recommended Product |
|---|---|
| Primer | Water-Based Primer |
| Topcoat | Latex or Acrylic-Based Paint |
| Sealant | Water-Resistant Varnish |
Ensure to allow ample drying time between coats for the best result, and always work in a well-ventilated area to improve both drying speed and personal safety.
Choosing the Right Paint for Pine Furniture
For a successful transformation, I recommend using water-based acrylic or latex coatings. These are easy to apply and clean up. They offer excellent adhesion, which is critical for softwoods like this, and they dry quickly, allowing for multiple coats in a single day.
Finishes to Consider
Choose between matte, satin, or semi-gloss finishes depending on the desired aesthetic. Matte provides a contemporary look but may require more touch-ups. Satin strikes a nice balance between elegance and durability, while semi-gloss can enhance the furniture’s features and is easier to clean.
Color Selection
Opt for lighter shades to achieve a fresh, airy feel, or deeper hues to create a dramatic effect. Test samples in the intended space to see how light impacts the color throughout the day. This step is crucial for ensuring the selected hue complements the surrounding decor.
Preparing Surfaces for Painting
Begin with a thorough cleaning of the wood, using a mixture of warm water and mild soap. This removes dust and grease, ensuring better adhesion. Rinse with clean water and let it dry completely.
Next, examine the surface for imperfections such as dents, scratches, or knots. Fill any holes or imperfections with a wood filler, smoothing it out to create an even texture. Once the filler is dry, sand the entire area with fine-grit sandpaper (220-grit recommended) to achieve a smooth finish.
For surfaces with a glossy finish, like varnish, sanding is crucial. I recommend scuffing the surface lightly to create a better grip for the upcoming layers. This step also prevents peeling over time.
After sanding, wipe the furniture down with a damp cloth or tack cloth to eliminate any dust particles. This step is key for a flawless application, as any dust left behind can affect the final look.
Applying a primer is advisable, especially for untreated wood. Primers help in achieving even color and improve the durability of the top coat. Select a primer suitable for the type of application, whether spray or brush-on.
Lastly, ensure the working environment is well-ventilated and free of debris. Proper ventilation helps drying and curing, reducing the risk of dust settling on the fresh layers.
Selecting Brushes and Tools for a Smooth Finish
For achieving a flawless surface, I choose high-quality synthetic bristle brushes. These brushes are ideal for oil-based and latex finishes, providing a fine application without leaving streaks or brush marks. A 2- to 3-inch angled brush allows for precise edging and corners.
I complement my brushes with a foam roller for larger flat areas, as it covers surfaces quickly while minimizing lint. Look for a roller with a smooth surface to enhance the finish quality further. Make sure to have a roller frame that matches the roller size for optimal performance.
An artist’s brush set can also be handy for detailed work, particularly for intricate designs or hard-to-reach spots. These will help in maintaining fine lines and corners.
Don’t forget to include a paint tray or a shallow container for easier loading of brushes and rollers, ensuring efficient working processes with less mess.
I also find investing in a sanding block useful for smoothening surfaces before any coating, which reduces imperfections and provides a better base for the finish. A tack cloth is essential to remove any dust or debris before I start applying the top layer.
Finally, gloves protect my hands from chemicals, ensuring safety and cleanliness throughout the process. Selecting the right tools lays the groundwork for a beautiful and enduring finish.
Applying Primer: Why It Matters for Pine Wood
Choosing a primer is essential for achieving a polished finish on softwoods. I recommend using a high-quality, stain-blocking formulation specifically designed for timber projects. This type of product prevents any natural resins from bleeding through the topcoat, which is particularly common with softer woods.
Before applying, ensure that the surface is clean and free from dust. A light sanding will also enhance adhesion, making it easier for the primer to bond effectively. I prefer using a foam roller for larger surfaces and a brush for intricate areas, ensuring an even application.
Let the primer cure fully before introducing any additional layers. This not only improves the durability of the topcoat but also enhances the vibrancy of the color. Skipping this step can lead to peeling or chipping, ruining the overall aesthetic of your project. Invest that extra time for a long-lasting result.
Techniques for Achieving an Even Coat
To obtain a smooth and uniform layer, I consistently employ the technique of using a high-quality roller, especially for larger surfaces. I ensure the roller is well-loaded but not dripping, which helps prevent streaks and provides a seamless application.
Brush Techniques
For edges and intricate details, I opt for a synthetic bristle brush. I use a light hand, applying minimal pressure to avoid leaving brush marks. I start from the center of the area and work my way to the edges, feathering the paint as I go to create a blend.
Applying Multiple Coats
I always follow the principle of thin, multiple layers instead of one thick application. After the first coat dries completely, I lightly sand the surface with fine grit sandpaper. This step is crucial as it smooths out any imperfections and allows for better adhesion of the subsequent coat. I repeat the process until the desired opacity is achieved.
Finally, I ensure I work in a well-lit area to identify any uneven spots quickly and address them before proceeding. Proper drying time between coats and following the manufacturer’s recommendations is vital for the best outcome.
Sealing and Caring for Painted Pine Furniture
After applying a fresh coat to your wooden items, sealing is a crucial step to enhance durability and maintain the appearance. A high-quality sealant not only protects against scratches and stains but also adds a layer of water resistance. I recommend selecting a clear polyurethane or water-based sealer for a non-yellowing finish.
Choosing the Right Sealant
Consider the following options:
- Water-Based Polyurethane: Dries quickly, low odor, and provides ample protection.
- Oil-Based Polyurethane: Offers a rich finish and deeper penetration but requires more drying time and releases stronger fumes.
- Furniture Wax: Ideal for providing a soft sheen and is easy to apply, though may require more frequent reapplications.
Maintenance Tips
To extend the life of your refinished pieces, follow these care guidelines:
- Dust regularly with a soft cloth to prevent buildup.
- Avoid using harsh chemicals or abrasive cleaners that can damage the surface.
- Wipe spills promptly with a damp cloth to prevent moisture damage.
- Consider applying a new coat of your sealant annually, particularly in high-use areas, to maintain protection.
Proper sealing and maintenance will ensure your refurbished pieces remain beautiful and functional for years to come.