Caleb Turner

I recommend preparing your surfaces thoroughly for an optimal finish. Begin by cleaning the item with a mixture of warm water and mild detergent to eliminate any grease or dirt that might interfere with adhesion.
Next, gently sand the surface using fine-grit sandpaper. This step is crucial; it helps to roughen the top layer, ensuring that the subsequent finishes will adhere properly. pay attention to any glossy areas and make sure to create a uniform texture.
A quality primer designed for non-porous surfaces will be your next step. Apply a thin, even coat using a brush or roller, making sure to cover all areas. Allow it to dry completely before moving on to finishing coats.


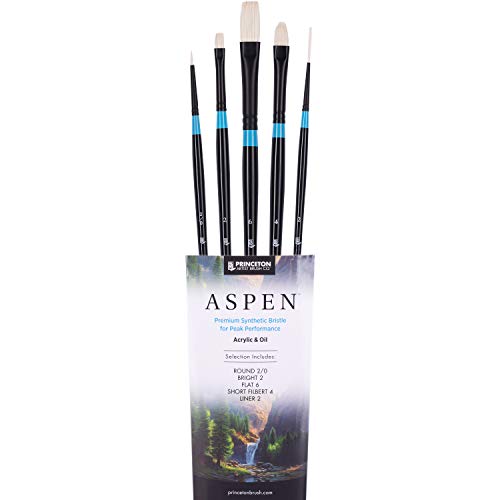
Finally, select your desired finish, whether it’s a solid color or a stain. Carefully apply it in thin layers, allowing each coat to dry according to the manufacturer’s instructions. This technique ensures a smooth, professional-looking outcome that can breathe new life into your aging pieces.
Painting Techniques for Veneered Surfaces
For a flawless finish, I first clean the surface thoroughly using a mixture of warm soapy water and a soft cloth. This removes any dirt or oils that can prevent the adhesion of the new coating. I ensure the piece is completely dry before proceeding. Next, a light sanding with fine-grit sandpaper scuffs the finish lightly–this promotes better bonding with the primer.
Choosing the Right Primer
Selecting a high-quality bonding primer is crucial. I prefer a water-based option that is specifically formulated for difficult surfaces. After applying the primer evenly, I wait for it to cure as directed–this step prevents peeling in the future.
Finishing Touches
Once the primer is dry, I apply at least two coats of finish, using a brush or roller depending on the desired texture. For a smooth look, a foam roller works wonders. I allow adequate drying time between each layer. Finally, I seal the surface with a clear topcoat for added durability and protection against wear and tear.
Choosing the Right Paint for Wood Veneer
Selecting a suitable coating for a laminated surface is vital for achieving a durable and visually appealing finish. I recommend using alkyd or acrylic latex formulas. Alkyd paints offer excellent adhesion and durability, making them ideal for furniture that sees regular use. On the other hand, acrylic latex provides flexibility and is easier to clean, which is advantageous for maintaining the look over time.
Consider the Application Method
Determine whether to use a brush, roller, or spray. Spraying tends to create a smooth finish with fewer brush strokes, but it requires proper ventilation and protective gear. A high-quality synthetic brush works well for details and touch-ups, while a foam roller can cover larger areas efficiently.
Color and Finish Selection
Your choice of color and gloss level affects the final appearance. Semi-gloss or satin finishes are popular for their balance between shine and practicality, offering some resistance to wear without being overly reflective. Test samples on an inconspicuous area to ensure the results match your expectations.
Finally, always read and follow the manufacturer’s instructions on the label to achieve optimal results for your project.
Preparing the Surface for Painting
Begin by cleaning the item thoroughly. Use a mixture of warm water and mild soap to wipe down all surfaces, ensuring that dust and grime are removed. Rinse with clean water and let it dry completely.
Next, assess the finish. If it has a glossy layer, sand it down lightly with a fine-grit sandpaper (220 grit). This will help create a texture for the coating to adhere to. Be careful not to damage the underlying material.
After sanding, wipe the item with a tack cloth to eliminate any dust particles that may interfere with adhesion.
If there are any defects such as scratches or dents, fill them with a suitable wood filler. Allow the filler to dry, then sand smooth until level with the surface.
Applying a primer specifically designed for non-porous surfaces can enhance adhesion. Select a high-quality primer and apply it evenly. Allow it to dry as per the manufacturer’s instructions before proceeding.
Your surface will now be ready for the next stage of the transformation. Remember to work in a well-ventilated area to ensure safety and a pleasant experience.
Applying Primer on Wood Veneer
Begin with a quality bonding primer specifically designed for non-porous surfaces. This choice prevents peeling and enhances adhesion for subsequent layers. I prefer using a stain-blocking primer if there are existing stains or colors on the surface, ensuring they don’t bleed through.
Before application, ensure the substrate is clean and dry. Wipe it down with a damp cloth and let it dry completely. I find using a fine-grit sandpaper (220-grit) lightly scuffs the surface, helping the primer grip better. Be sure to remove any dust afterward.
Using a high-density foam roller or a synthetic bristle brush, apply a thin, even coat of the primer. This method minimizes brush strokes and provides a smoother finish. Avoid heavy layers; it’s best to work in multiple thin coats. Allow adequate drying time between applications, usually around two hours, depending on the product’s instructions.
If necessary, lightly sand between coats with the same fine-grit paper to maintain smoothness and avoid any imperfections. Once the final coat is dry, ensure the surface is fully cured before moving on to the chosen finish. This attention to detail ensures that the final product achieves the desired look and durability.
Selecting Appropriate Paint Tools
For this task, I choose high-quality brushes and rollers. A synthetic bristle brush works well for water-based coatings, while a natural bristle brush suits oil-based materials. I opt for a small angled brush to reach corners and detailed areas, ensuring a smooth application. For larger surfaces, a foam roller is ideal, providing an even finish without leaving texture marks.
Additional Tools
Alongside brushes and rollers, I find it helpful to have a paint tray for easy loading of the rollers. A drop cloth is essential for protecting the surrounding area from accidental spills. Additionally, a sandpaper block aids in smoothing any rough spots after primer application, creating a flawless base for color.
Cleaning Supplies
After the task, I always keep mineral spirits or soap and water on hand for cleaning brushes. This ensures tools can be reused without compromising their quality, ready for future projects.
Techniques for Applying Paint Smoothly
For an even finish, I recommend using thin layers rather than thick applications. Thin coats can dry more uniformly and reduce the chances of drips and runs. I apply two to three light coats, allowing sufficient drying time between each application.
Using Proper Brush Techniques
Choosing the right brush is crucial. I opt for a high-quality synthetic brush for latex-based solutions and a natural bristle brush for oil-based options. I always start from one edge and work my way across, using long, even strokes to avoid brush marks. It’s essential to keep a wet edge while working to prevent lap marks.
Utilizing Rollers for Larger Areas
When covering expansive surfaces, I find using a roller extremely beneficial. A ½-inch nap roller is ideal for a smooth application. I apply the product in a ‘W’ pattern, then fill in the spaces without going back over drying areas. This technique helps in spreading the liquid evenly and achieving a consistent appearance.
| Application Method | Best For | Recommended Tools |
|---|---|---|
| Brushing | Small detailed areas | Synthetic or natural bristle brush |
| Rolling | Large, flat surfaces | ½-inch nap roller |
| Spraying | Even, quick coverage | HVLP sprayer |
Using a spray method can be efficient for a uniform coat. If I choose to spray, I ensure to practice on a scrap surface to adjust the nozzle settings and get comfortable with the distance from the surface. This method also requires careful masking of areas that should not receive product.
Lastly, I maintain a clean working space and tools. Regularly cleaning brushes and rollers prevents paint build-up that could lead to an uneven finish. Regular maintenance makes a significant difference in the final result.
Ensuring Proper Drying Time
I always allow adequate drying time between each application to avoid smudging and ensure a flawless finish. Typically, waiting at least 24 hours between layers is advisable, but this can vary depending on the type of coating used. For oil-based products, I find it beneficial to extend that period to 48 hours, as these formulations take longer to cure fully.
Humidity and temperature can significantly impact drying duration. Ideally, I choose to work in a well-ventilated area with a consistent temperature around 70°F (21°C) and low humidity, which promotes better drying conditions. If conditions are humid or cool, I might increase the waiting time between coats.
I also check the surface touch with my fingertip to feel for any tackiness before proceeding. If the surface feels sticky, I wait longer. Patience is essential for achieving a durable and smooth outcome, as rushing this step can lead to imperfections that require additional touch-ups later.
<pLastly, I always keep an eye on the manufacturer's instructions for drying times, as different products may have specific requirements. Sticking to these guides ensures optimal results every time.
Finishing Touches and Sealing the Paint
After achieving the desired look, sealing the surface enhances durability. I recommend using a clear topcoat suitable for your chosen color. This step protects the new finish and adds a layer of gloss or matte, depending on preference.
- Select a topcoat designed for furniture to ensure flexibility and adherence.
- Apply the sealer using a clean, lint-free cloth or a synthetic brush, following the direction of the grain.
- Consider multiple thin layers for optimal protection–allow each layer to dry completely before applying the next.
For a smooth finish, lightly sand between layers with fine-grit sandpaper. This step helps remove imperfections, making the final result more aesthetically pleasing.
Once fully sealed, allow the piece to cure for at least a week before heavy use. This period enables the finish to harden completely, ensuring longevity.
Avoid placing heavy objects or exposing the item to high humidity right after finishing. This care helps maintain the quality of both the appearance and structure.
Finally, regular cleaning and maintenance will preserve the beauty of this newly transformed piece. Use a damp cloth for cleaning, steering clear of harsh chemicals that could damage the finish.