First, I recommend thoroughly preparing the surface. Start by cleaning the piece with a mix of warm water and mild detergent to remove any grime or oils. After cleaning, allow it to dry completely. This ensures that the primer adheres properly.
Next, apply a high-quality primer designed for slick surfaces. Use a foam roller or a soft brush to create an even layer. This step is crucial as it prevents stains from bleeding through and provides a solid base for the next layer.


Once the primer is dry, choose a finish that suits your decor. Acrylic or latex options work well for durability and ease of application. Use a paint sprayer or a synthetic brush for a smooth application. Multiple thin coats yield the best results, allowing each layer to dry fully between applications.
Finally, once the final coat is dried, seal your work with a clear topcoat. This will protect the new finish and ensure longevity. By following these steps, I achieved the desired transformation, giving a fresh new life to a classic piece.
Painting Techniques for Rich Wood Surfaces
Choose a high-quality primer designed for dense woods to ensure proper adhesion. This step prevents the wood’s natural oils from seeping through your finish, which can cause discoloration. Apply a thin, even coat using a foam roller or a brush, depending on your preference for texture.
Once the primer is dry, select an appropriate topcoat. For durability, I favor water-based acrylics because they provide a smooth finish and are easy to clean up. Ensure you choose a shade that complements your existing decor.
Prepare to apply the topcoat in thin layers. Waiting for each layer to dry completely before applying additional coats is critical. This method helps avoid drips and bubbles, resulting in a polished appearance. A light sanding between coats can enhance adhesion and smoothness.
Consider the final finish as well. For a glossy effect, choose a high-gloss version of your topcoat. If you prefer a softer look, opt for a satin or eggshell finish. Regardless of your choice, remember to allow ample drying time before placing items back on the surface.
Assessing the Condition of Mahogany Furniture
Carefully examine the surface for any signs of damage, such as scratches, dents, or cracks. A thorough inspection will help determine the necessary steps for rejuvenation. Pay attention to the finish; if it appears dull or discolored, it’s a sign that restoration may be required.
Check for any signs of moisture damage, including warping or mold. This not only affects appearance but can also compromise structural integrity. If you notice any soft spots, the piece may require more extensive repairs before proceeding with any refinishing.
Inspect joints and connections for stability. Loose joints may need tightening or reinforcement to ensure durability after treatment. Use a small tool to test hinges and drawer slides; they should operate smoothly without resistance.
Evaluate any previous treatments applied to the piece. An existing oil or lacquer finish can impact the adhesion of new products, so it’s crucial to know what you’re dealing with. If unsure, conduct a small test area to assess compatibility.
Finally, consider the age and style of the piece. Vintage items may benefit from preservation rather than complete transformation, while contemporary designs might lend themselves better to a fresh aesthetic. Understanding the value and significance of the item will guide your approach.
Gathering Necessary Supplies for the Project
To achieve a successful transformation of your cherished piece, I recommend gathering specific items beforehand. You’ll need fine-grit sandpaper or a power sander to effectively prepare the surface for the new finish. A quality primer suitable for wood surfaces is crucial, as it promotes adherence and durability of the coating.
Select an appropriate top coat that aligns with your desired aesthetic, whether it’s a glossy, satin, or matte finish. A good quality brush or foam roller will help in applying the new layer smoothly without visible strokes or bubbles.
Additional Tools and Materials
Don’t forget to include a clean, lint-free cloth to wipe down the object after sanding, ensuring dust and debris are completely removed. A drop cloth will protect your surroundings from accidental spills or drips during the application process. Safety gear such as gloves and a mask is vital to protect against dust inhalation and chemical exposure.
Organization and Preparation
Getting everything organized can save time and improve outcomes. Having a sturdy workspace with ample lighting makes the process easier. Verify that all supplies are on hand before beginning, including painter’s tape for clean edges around surfaces you don’t want to alter. This preparation enables a smoother workflow and enhances the final appearance of your restored piece.
Preparing the Surface of Mahogany Furniture
Begin with a thorough cleaning of the item using a mixture of mild soap and water to eliminate dust, grease, and grime. Use a soft cloth to gently wipe the surface, ensuring no residue remains.
Once the surface is clean, assess for any imperfections. Check for scratches, dents, or old finish. If found, sand these areas lightly with fine-grit sandpaper (220-320 grit) to create a smooth texture. Always sand in the direction of the grain to avoid further damage.
After sanding, use a vacuum or damp cloth to remove dust particles generated from the sanding process. This step is vital for proper adhesion of the new coating.
If the original finish is glossy, apply a deglosser with a cotton cloth. This helps to enhance the grip of the subsequent layers while eliminating any sheen. Follow the instructions of the deglosser for effective application.
For items with significant wear, consider applying a primer formulated for oily woods. Apply it with a brush or roller, ensuring even coverage. Allow it to dry completely before proceeding with any further steps.
Finally, review the surface one last time for any blemishes or residue. Ensuring a clean and even base is paramount for achieving a flawless look in the next stages of your project.
Choosing the Right Primer for Mahogany
Opt for a high-quality oil-based primer when covering the rich tones of this wood. Oil-based formulations offer excellent adhesion and blocking capabilities, preventing tannins from bleeding through. For projects that require faster drying times, consider a fast-drying acrylic primer designed for wood surfaces.
Key Features to Look For
Select a primer that specifies compatibility with both oil and latex finishes. This versatility ensures a strong bond with the final coat, regardless of your choice. Additionally, choose a product that provides good coverage with minimal coats, making the process more efficient. A primer with stain-blocking properties is beneficial, particularly for darker woods like this, as it effectively prevents discoloration from affecting the final look.
Application Techniques
Apply the primer using a high-quality synthetic brush or a foam roller for a smooth finish. Ensure even coverage by working in sections and checking for drips or thick spots. Allow adequate drying time as recommended by the manufacturer before proceeding with your topcoat application. Sand lightly between coats for enhanced adhesion and a polished appearance.
Selecting Paint Types Suitable for Mahogany
For transforming the look of the rich wood grain, I recommend a few specific types of coatings that work exceptionally well with this type of timber.
- Acrylic Latex: This water-based option is ideal for indoor projects. It dries quickly, has low odor, and offers easy cleanup with soap and water.
- Oil-Based Enamel: Known for its durability and smooth finish, this choice is excellent for high-traffic items. It requires mineral spirits for cleanup and has a longer drying time.
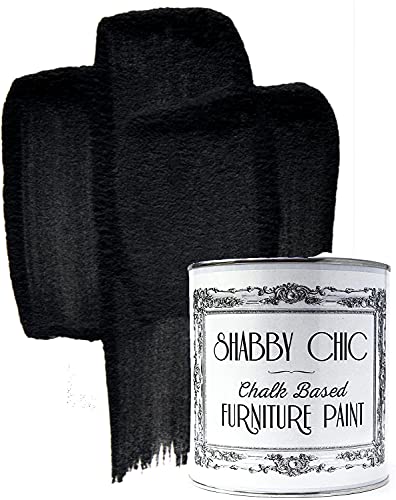
- Chalk Paint: If a matte finish is desired, chalk formulations create a vintage look. They adhere well to surfaces without extensive priming.
- Milk Paint: Organic and environmentally friendly, this option is perfect for achieving a rustic finish. It can create a unique, textured appearance that adds character.
- Spray Paint: For those looking for a quick and even application, a high-quality spray option can provide a smooth result, especially for intricate details.
Before finalizing my selection, I always consider factors like desired finish, durability, and intended use of the piece. Testing a small area can help ensure compatibility with the existing surface.
Applying Paint: Techniques for a Smooth Finish
To achieve a flawless coating on existing wooden surfaces, I begin by utilizing a high-quality synthetic brush for edges and corners. This tool allows me to navigate intricate areas without leaving brush marks. For larger expanses, I switch to a foam roller, which applies a more even layer and minimizes texture.
I ensure the first coat is thin, as this helps prevent drips and runs. After applying, I wait for it to dry completely per the manufacturer’s guidelines before assessing its texture. If the finish feels rough, I lightly sand it with fine-grit sandpaper to create a smooth surface.
For additional layers, I maintain the same application technique. Sanding between coats is critical; I simply wipe away any dust with a damp cloth after sanding, ensuring the next layer adheres properly.
Using a paint sprayer can also be an option for those seeking a professional-grade finish. When using a sprayer, I keep the nozzle about six to eight inches from the surface, moving in a consistent, sweeping motion. This approach applies an even layer while avoiding pooling in details.
Finally, I adjust my approach based on the final look I’m aiming for. A satin or semi-gloss finish is typically easier to maintain and clean, making it a practical choice for frequently used pieces. After the final coat dries, I conduct a thorough inspection, addressing any imperfections for that polished appearance.
Finishing Touches: Sealing and Protecting the Painted Surface
After transforming the look of the wooden piece, applying a protective layer is crucial. A quality topcoat not only enhances durability but also provides a flawless finish.
Choose a water-based polyurethane for an easy application and quick drying time. This option minimizes yellowing over time, ensuring the richness of the selected color shines through. Apply a thin coat with a high-quality brush or roller, using even strokes to avoid bubbles.
Allow adequate drying time, usually around 2-4 hours, before lightly sanding with fine-grit sandpaper (around 220 grit) between coats. This step helps achieve a smoother finish and ensures the subsequent layers adhere well.
For added protection, consider applying a second or third coat of the sealer, especially in high-traffic areas. Always follow the manufacturer’s instructions regarding curing times; some products may require up to a week to fully cure and reach maximum durability.
Lastly, after the final coat, avoid heavy use for at least a week to allow the surface to settle. This careful approach guarantees longevity and preserves the beauty of the piece you’ve revitalized.
Maintaining and Caring for Painted Mahogany Furniture
Regularly dust the surfaces with a soft, dry cloth to keep the finish looking fresh. Avoid using harsh cleaners that can damage the coating; instead, gently wipe with a damp cloth and mild soap as needed.
For preserving the vibrant sheen, consider using a suitable wax or furniture polish. Apply it sparingly, as too much can lead to a greasy residue. Follow the manufacturer’s instructions for the best results.
Direct sunlight can fade the color over time. Position pieces away from windows or use curtains to shield them from harmful rays.
Temperature fluctuations and high humidity can lead to warping or damage. Aim to maintain a stable environment, ideally between 60°F to 75°F with a humidity level of around 40-50%.
Inspect the surface regularly for signs of wear or damage. Touch up any scratches or chips promptly with matching paint or sealant to avoid deeper issues.
| Care Task | Frequency |
|---|---|
| Dusting | Weekly |
| Waxing/Polishing | Monthly |
| Surface Inspection | Every three months |
| Cleaning with Soap and Water | As needed |
| Temperature and Humidity Monitoring | Continuously |
Consider using coasters or placemats to protect the surface from heat or moisture. This practice not only prevents stains but also prolongs the project’s longevity.