For a successful transformation of laminate surfaces, the first step is to thoroughly clean the area. This means getting rid of any grease, dust, or residues. A mixture of warm water and mild soap works effectively for this task. After cleaning, ensure that the surface is completely dry to promote adhesion.
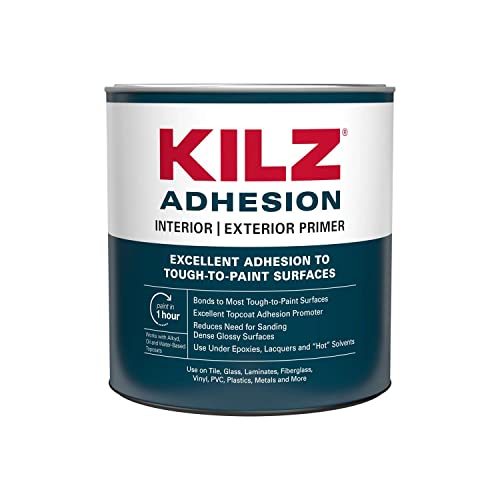
Next, I recommend using a high-quality primer specifically designed for smooth, glossy surfaces. This sets the foundation for the subsequent coat and ensures that the top layer adheres properly. Apply it evenly, using a foam roller or a brush, to avoid streaks.


When selecting a topcoat, consider using a spray paint formulated for laminate materials or a durable acrylic. These options provide a robust finish that resists chipping and scratching. Multiple thin layers yield the best results–aim for at least two to three coats, allowing adequate drying time between each application.
Lastly, finish with a clear sealant to protect your newly styled surfaces. This will provide additional durability and create a smooth, easy-to-clean finish. Remember, patience during the drying and curing process is key to achieving a professional look.
Techniques for Refinishing Laminated Surfaces
Begin with thorough cleansing using a degreaser, ensuring no residue is left. Choose a high-adhesion primer specifically formulated for non-porous materials; apply it evenly across the laminate. Allow sufficient drying time according to the manufacturer’s guidelines.
Select an acrylic or alkyd-based coating, which adheres well to previously primed surfaces. Use a foam roller or a high-quality brush to minimize streaks and lint, ensuring smooth application. Apply multiple thin layers, allowing each coat to dry completely before adding the next.
For a durable finish, add a protective topcoat. A water-based polyurethane works well for longevity. Again, use a foam roller to avoid bubbles. Allow the entire project to cure fully before using the item to achieve the best results.
Choosing the Right Paint for Formica
For a successful transformation, select a high-adhesion acrylic or urethane-based coating. These formulations bond well to non-porous surfaces like laminate, providing durability and resistance to wear.
Finishes and Sheens
A semi-gloss or satin finish works best, offering a balance between sheen and practicality. A glossier surface makes cleaning easier and can enhance the visual appeal of the surface.
Color Options
Choose colors that suit your décor while enhancing the overall aesthetic. Sample small areas with different hues before committing to a larger application, ensuring the final choice meets expectations in brightness and tone under various lighting conditions.
Preparing the Surface for Painting
I ensure that the surface is thoroughly cleaned using a degreaser or a mixture of water and mild detergent. Any grime or residues can interfere with adhesion. After cleaning, I rinse with water and allow the surface to dry completely.
I then sand the entire area with fine-grit sandpaper, paying attention to corners and edges. This step creates a textured surface, enhancing the bond between the coating and the substrate. After sanding, I use a damp cloth to remove any dust particles left behind. It’s crucial to achieve a smooth finish, so I repeat the sanding process if necessary.
If there are any deep scratches or imperfections, I fill them with a suitable filler and sand them down once dry, ensuring a uniform surface. For glossy finishes, I apply a primer specifically designed for non-porous surfaces; this improves adhesion and prevents peeling later on.
Before proceeding to apply the top layer, I confirm that the primer has dried completely as per the manufacturer’s recommendations, which can take several hours. Thorough preparation guarantees long-lasting results.
Cleaning the Surface Before Application
The initial step is to ensure that the surface is entirely free of dust, grime, and grease. I recommend using a mix of warm water and mild dish soap to thoroughly clean the area. Apply the solution with a sponge or soft cloth and scrub gently, paying special attention to any hard-to-reach corners.
Steps to Clean
| Step | Action |
|---|---|
| 1 | Mix warm water with a few drops of dish soap. |
| 2 | Soak a soft cloth or sponge in the solution. |
| 3 | Wipe down the surface in circular motions. |
| 4 | Rinse with clean water to remove any soap residue. |
| 5 | Dry the area completely with a clean towel. |
After cleaning, inspect for any stains or sticky residues. For persistent spots, a mixture of vinegar and baking soda can be effective. Apply this paste to the affected area, let it sit for a few minutes, then scrub gently with a cloth.
Final Touches
Once the surface is clean, ensure it is entirely dry. I recommend allowing it to air dry completely for at least an hour to prevent moisture from interfering with subsequent steps. After drying, a final wipe with a lint-free cloth ensures the surface is pristine and ready for treatment.
Using Primer on Formica Furniture
Applying a high-quality primer is crucial for adhesion and durability. Choose a product specifically designed for slick surfaces. This will ensure that subsequent coatings adhere properly.
Follow these steps for optimal application:
- Clean the surface thoroughly to remove any grease or dirt.
- Use fine-grit sandpaper to lightly scuff the top layer, enhancing the grip of the primer.
- Apply a thin, even coat of primer with a foam roller or a brush, ensuring full coverage without pooling.
- Allow the primer to cure completely according to the manufacturer’s instructions, usually 1-2 hours.
- Inspect for missed spots and apply a second coat if necessary for even adhesion.
This process prepares the underlying material for a successful transformation. It’s prudent to test the primer on a small, inconspicuous area first to check for compatibility and finish.
Applying Paint: Techniques and Tips
Choosing a high-density foam roller or a quality synthetic brush ensures a smooth application without leaving unsightly brush strokes. I prefer rollers for larger areas and brushes for edges and intricate detailing.
Work in thin layers. Each coat should be applied lightly and allowed to dry completely before the next one. This approach minimizes drips and runs, leading to a polished finish.
When applying the coating, maintain a consistent speed and pressure to achieve even coverage. Avoid putting too much paint on the applicator to prevent messiness.
For additional durability, consider using a topcoat or sealant after the final layer has dried. This step enhances longevity and provides protection against scratches.
If using a spray technique, keep the can at a consistent distance from the surface. This prevents pooling and allows for more control during application.
Always allow adequate drying time between coats as specified by the paint manufacturer. Rushing this process can lead to an uneven texture or prolong the overall project duration.
After completing my project, I make sure to clean my tools with the appropriate solvent. Maintaining my equipment ensures they are in good condition for future tasks.
Taking these steps can transform a tired old piece into something fresh and updated, making the effort truly rewarding.
Sealing Your Painted Surface
After the application of your chosen hue, it’s essential to apply a protective layer to ensure durability and longevity. I recommend using a clear polyurethane or acrylic sealer suitable for your surface type.
First, allow the color to dry completely according to the instructions on the paint can. This may take a few hours to a day, depending on environmental factors and product specifics.
Using a high-quality brush or a foam roller, apply the sealer in thin, even coats. Start in a corner and work your way across the surface, maintaining a wet edge to avoid lap marks.
For best results, two to three coats of sealer are ideal. Allow each coat to cure as per the manufacturer’s guidelines. A light sanding between coats can improve adhesion and create a smoother finish.
After the final application, let the sealed surface cure for at least a week before heavy use. This waiting period ensures that the protective layer has fully set and can withstand wear and tear.
Regular maintenance is crucial. Clean with a gentle soap and water solution, avoiding harsh chemicals that may degrade the sealant over time. Re-sealing every few years will enhance the surface’s resilience.
Fixing Common Mistakes
Identifying and correcting issues swiftly can save time and frustration. If the surface feels sticky after drying, it’s likely that too much paint was applied at once. Lightly sand the area and apply thinner coats to achieve a smooth finish.
Dealing with Uneven Color
If I notice splotches or inconsistency in hue, it indicates insufficient coverage. A light sanding followed by an additional layer can remedy this. It’s crucial to use the same application technique across the entire area to maintain uniformity.
Addressing Drips and Runs
Drips happen, especially on vertical surfaces. I gently scrape away the excess once fully dried and smooth the area with fine sandpaper. A final touch with a small brush for detail work helps refine the look.
Maintaining Your Newly Painted Formica Furniture
To keep your transformed surfaces looking fresh, I implement a few straightforward maintenance practices.
- Regular Cleaning: Use a soft cloth and mild soap to clean. Avoid abrasive cleaners that may damage the finish.
- Avoid Excessive Moisture: Wipe spills immediately to prevent them from seeping into the surface, which can lead to peeling.
- Use Coasters: Particularly for hot or wet items, coasters can help protect against heat damage and moisture.
- Refinish as Needed: If I notice wear or scratches, lightly sand the area and apply touch-up coating for a seamless look.
Storing items properly is equally important. I ensure that heavy objects do not rest on painted surfaces for extended periods to avoid impressions.
I also make it a point to avoid dragging items across the surfaces. Lifting instead of sliding prevents scratches and maintains the appearance of the finish.
For ongoing protection, I apply a maintenance sealant every few months. This not only enhances color but adds a layer of defense against everyday wear.
With these simple strategies, the longevity and aesthetics of my newly revamped surfaces are assured.