

Begin your transformation by selecting chalk or mineral paint. This type adheres well to various surfaces and provides a smooth, matte finish that mimics age. Choose colors like soft pastels or muted shades for a more authentic look.
Before applying the color, ensure the surface is clean and free from dust. Sanding the item lightly enhances paint adhesion and creates an intentionally worn appearance. A fine-grit sandpaper is ideal for this process, allowing you to achieve that subtle distressed effect.
Once prepped, apply the chosen hue with a brush or roller. For best results, layer the paint thinly, using multiple coats to build depth. Allow adequate drying time, which typically takes a couple of hours between coats, ensuring each layer sets effectively.

To achieve the signature distressed aesthetic, use a sandpaper or a sanding block once the base coat is dry. Focus on edges and protruding areas where natural wear would occur. This technique reveals the underlying color or wood, thus enhancing the vintage feel.


Finish the process with a sealing product to protect your creation. A clear wax or matte sealer works wonders, giving both durability and a soft sheen. Apply lightly with a cloth, buffing the surface for a polished look that maintains the rustic charm.
Achieving a Distressed Look
For the desired vintage aura, I apply a two-tone technique. Starting with a base coat in a soft, muted hue, I select a contrasting shade for the top layer. Once the base is dry, I gently sand the edges and high spots of the surface to expose the underlying color, enhancing that aged appearance. This method ensures each section highlights its character without overwhelming the overall look.
Sealing the Finish
To protect the surface and maintain the patina, I choose a matte or satin finish sealer. After all layers have cured, I gently brush on the sealer using a clean, high-quality brush. This not only safeguards against wear but also preserves the textured finish achieved through sanding. Allow ample drying time before using the item in everyday settings.
Color Combinations
| Base Color | Top Color | Effect |
|---|---|---|
| Light Gray | Soft White | Bright and airy feel |
| Pastel Blue | Cream | Coastal vibe |
| Muted Green | Dusty Rose | Warm and inviting |
| Beige | Light Lavender | Subtle elegance |
Pairing these colors not only enhances aesthetic appeal but allows for personal expression. Different combinations can evoke various atmospheres, making each creation unique to its environment.
Choosing the Right Type of Paint for Shabby Chic
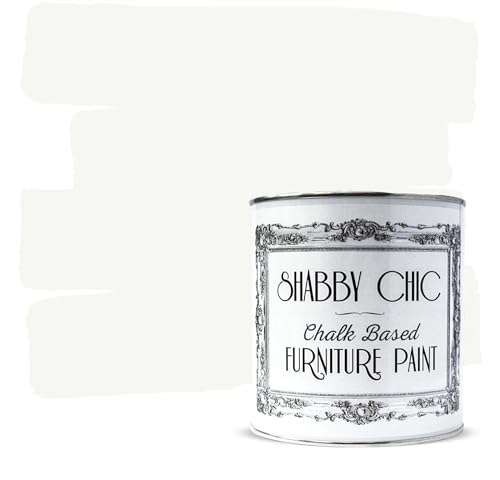
I recommend using chalk-based formulations for achieving that rustic elegance. These products offer a unique matte finish and are easy to distress, enhancing the vintage appeal of your item.
Types of Paints
Chalk paint, milk paint, and acrylics are excellent options. Chalk paint creates a smooth surface that easily adheres to various materials. Milk paint, often eco-friendly, provides a softer, more translucent effect, ideal for layering. Acrylic paints, particularly those with a satin finish, offer durability while maintaining a contemporary look.
Additional Considerations
Always opt for low-VOC or VOC-free solutions to ensure a safe environment during your project. Test your selected color on a small area first; this prevents unexpected results on your large endeavor. For long-lasting effects, consider applying a topcoat for added durability. Stay mindful of the ambiance you wish to create, as colors can significantly alter perception.
Ultimately, selecting the right paint dramatically influences the restoration process, so choose wisely!
Preparing Your Furniture for Painting
First, I thoroughly clean the surface with a mixture of warm water and mild soap. This removes dust, grease, and other residues that could hinder adhesion. I ensure the piece is dried completely to avoid trapping moisture.
Next, I inspect for imperfections. Any scratches, dents, or chips are sanded down carefully using fine-grit sandpaper. This smooths the area and creates a better surface for the new finish. For deeper flaws, I fill them with wood filler, allowing it to dry before sanding it flush with the surrounding surface.
After addressing imperfections, I lightly sand the entire area with a sanding block or a hand sander. This helps to scuff the existing finish, enhancing the bond with my chosen coating.
Once sanding is complete, I remove all dust using a tack cloth or a damp rag. Ensuring a clean surface is crucial for achieving a flawless result. Finally, I inspect the piece again, making sure everything is prepped for the next stages of transformation.
Choosing Suitable Hues and Finishes
The palette for a vintage-inspired look should predominantly feature soft, muted tones. I typically gravitate towards colors like pale blue, creamy white, dusty pink, or faded grey. These shades not only create a soothing atmosphere but also highlight any intricate details of the structure.
When considering finishes, selecting a matte or eggshell texture is preferable. These finishes contribute to the antiqued effect, giving surfaces a rustic charm. Avoid high-gloss options, as they may detract from the desired aged appearance.
Additionally, layering colors can add depth. I often apply a lighter base coat and follow it with a slightly darker hue, letting sections show through for a worn look. This technique enhances character and provides an authentic feel.
Experimenting with color samples on inconspicuous areas allows for better visualization of the final outcome. Always consider the surrounding décor to ensure harmony. Balance warm shades with cooler tones for a well-integrated look.
Finally, for added texture, I apply a clear or tinted wax after the paint dries. This not only protects the surface but also enhances the overall visual appeal, making it appear elegantly aged and inviting.
Techniques for Achieving the Distressed Look
For a vintage, worn aesthetic, employ these methods:
Sanding
- Utilize medium to fine grit sandpaper for edges and corners.
- Focus on areas that naturally wear over time, such as tabletops or drawer fronts.
- Rub lightly to reveal the base layer, enhancing authenticity.
Layering
- Apply multiple coats of a base color first, allowing each coat to dry thoroughly.
- Introduce a lighter or contrasting hue for the top coat to create depth.
- Consider using a wax or glaze to slow the drying process, which allows for easier manipulation.
Rubbing Off
- After the final coat is dry, use a damp cloth to gently wipe areas where wear would naturally occur.
- This technique softens the top color, allowing the undercoat to peek through.
- Experiment with pressure–more delicate wiping yields a subtler look.
Chippy Technique
- Add a layer of clear adhesive or glue on select sections before applying top color.
- After drying, apply the paint and allow it to cure completely.
- Gently scrape away sections using a putty knife or your fingers for a chippy appearance.
Wax Finishes
- After achieving your desired look, seal with clear or tinted wax for protection.
- Buff with a soft cloth to accentuate the textures and sheen.
- Apply additional wax to high-traffic areas to maintain durability.
By combining these techniques, you can create a beautifully distressed finish that showcases character and charm. Adjust methods as needed to achieve your envisioned design.
Applying the Base Coat: Tips and Tricks
Always choose a high-quality primer to provide a solid foundation. This ensures better adhesion and a smoother finish. I typically opt for a water-based option as it dries quickly and has low fumes.
Before applying, stir the primer thoroughly to achieve a uniform consistency. It’s best to use a foam brush or a synthetic bristle brush for an even application. I find that working in thin layers prevents drips and promotes quicker drying.
For those intricate details, a small artist brush works wonders. Carefully cover edges, corners, and any carvings to avoid missing spots. I recommend allowing at least two hours of drying time between coats, depending on humidity and temperature.
Once the first coat is dry, lightly sand the surface with fine-grit sandpaper before applying a second coat. This provides a better grip for the subsequent color layers and smooths out any imperfections. Make sure to remove any dust with a tack cloth afterwards.
If the desired opacity isn’t achieved after two coats, another layer may be necessary. However, it’s crucial to inspect the surface first and only touch up where needed. Patience during this phase leads to a more polished result.
Sealing and Protecting Your Project
I prefer to use a clear topcoat for a durable finish. Water-based polyurethane works well for interior items, providing strong protection while maintaining clarity. Ensure the layer is compatible with the underlying finish to avoid any reaction.
Application Tips
Before applying, make sure the surface is clean and fully dry. Use a high-quality synthetic brush for smooth application, and apply thin layers to avoid drips. Allow the first coat to cure completely before adding another, usually 2-4 hours.
Maintenance and Cleaning
Once cured, regular maintenance enhances longevity. I recommend using a soft, damp cloth for cleaning. Avoid harsh chemicals that may degrade the finish. For areas experiencing high wear, like tabletops, consider reapplying the sealer annually.
By prioritizing sealing, the beauty and integrity of my creation remain intact, ready to endure daily use while retaining that treasured vintage charm.
Adding Decorative Elements for a Complete Look
To enhance your newly transformed item, incorporating decorative touches significantly contributes to its overall appeal. Consider the following elements:
- Stencils: Using stencils can add intricate designs or patterns effortlessly. Choose motifs that resonate with your style, such as florals or vintage frames.
- Hardware: Replace standard knobs and handles with unique, antique-style options. This change can drastically alter the character of the piece.
- Decoupage: Apply beautiful paper designs or images over areas of the surface for a personalized effect. Use a clear sealant to protect the overlay.
- Textiles: Adding fabric accents, like cushions or covers, can complement the look, introducing color and texture. Choose materials that align with the rustic aesthetic.
- Natural Elements: Incorporate natural materials like twine, wood, or even dried flowers in arrangements to emphasize a rustic charm.
Focus on incorporating these elements thoughtfully, ensuring they blend harmoniously with the overall design. Layering decorative items helps create a cohesive and welcoming atmosphere, transforming the overall impression of the item.
Finally, consider the proportions of decorative elements. Balance is key; too many details may overwhelm, while too few may leave it feeling incomplete. Engage with the overall vision, allowing each decorative piece to contribute to the story.
FAQ:
What materials do I need to paint furniture in a shabby chic style?
To achieve a shabby chic look for your furniture, you’ll need several materials. Firstly, select your piece of furniture that you want to transform. You’ll also require chalk paint, which is ideal for this style due to its matte finish and smooth texture. Don’t forget sandpaper for distressing the edges once the paint dries, which creates that vintage feel. Soft brushes or a foam roller will help you apply the paint evenly. Finally, a sealant like wax or a clear coat will protect your finish and enhance the look.
Can I achieve the shabby chic look without sanding the furniture?
Yes, you can achieve a shabby chic look without sanding, but the outcome may vary. If you prefer not to sand, ensure the furniture is clean and free from any oils or wax. Using chalk paint directly on a well-prepped surface can still work to some extent. However, if you want a more authentic distressed look, having a sanded surface allows you to expose the original wood or previous paint layers during the distressing process. If you’re uncomfortable with sanding, consider using a primer designed for slick surfaces before applying chalk paint.
How do I create a distressed effect on my furniture?
Creating a distressed effect is a key component of shabby chic style. After painting your furniture and allowing it to dry completely, take fine-grit sandpaper and gently sand the edges and raised areas of your piece. Focus on spots that would naturally wear over time, like corners or areas where hands frequently touch. You can also use a damp cloth to wipe away some paint for a more subtle distressed look. Once you’re satisfied with the distressing, apply a clear sealant to protect your work and enhance the visual appeal.
How can I enhance the shabby chic look after painting?
After painting, you can enhance the shabby chic look by incorporating vintage or antique elements. Consider adding decorative hardware like knobs or handles that reflect a rustic style. Placing stencils or decals with floral patterns can also bring charm to your piece. Layering with fabrics such as a soft linen or lace tablecloth over a painted dresser can complete the look. Finally, strategically placing your furniture next to other vintage items in your home will further highlight its shabby chic aesthetic.
How long does the entire process take from start to finish?
The duration of painting furniture in a shabby chic style can vary based on several factors. Typically, you should allocate a full day to complete the project. This includes prep time for cleaning and possibly sanding, applying the paint (allowing for drying time between coats), distressing, and finishing with a protective sealant. If you opt for multiple paint layers for a richer color, or choose to add more decorative touches, the process could take longer. It’s wise to plan for at least 24 hours before putting the piece back to use, ensuring everything has cured properly.
What materials do I need to paint furniture in a shabby chic style?
To achieve a shabby chic look, you will need a few basic materials: chalk paint or milk paint, which provides a matte finish and sticks well to furniture; sandpaper or a sanding sponge for distressing; a paintbrush or foam roller for application; and a clear sealant or wax to protect your finish. Additionally, a drop cloth will help protect your workspace, and a primer may be needed if the furniture has a glossy finish that might prevent the paint from adhering properly.


