Use high-quality wood such as basswood or balsa for constructing charming miniature pieces. Both types ensure a balance between durability and ease of cutting, making them ideal choices for detailed work. A precision craft knife or fine saw will allow for clean cuts, ensuring your creations fit together perfectly.
Gather essential tools including sandpaper, wood glue, and a set of tiny clamps. Sanding edges smooths out rough spots and adds a polished look to the final pieces. A strong adhesive designed for wood will provide a solid bond, and clamps help secure joints while the glue dries, preventing any shifting.
Design your items with a pencil and ruler on paper before transferring the measurements to wood. This approach avoids costly mistakes and helps visualize the end product. Consider incorporating various styles from modern to vintage, as this variety adds personality to your miniature setting.


Painting or staining can enhance the aesthetics. Use acrylic paints for vibrant colors or wood stain for a natural finish. Applying a protective sealant afterwards will ensure longevity and guard against scratches.
Once assembled, arranging the completed creations within the miniature space can bring an entire scene to life, showcasing your craftsmanship and creativity. Aim for balance and cohesion in arrangement, as this will create a more inviting and realistic environment.
Creating Unique Miniature Home Items
For crafting tiny household pieces, select high-quality materials to ensure durability. I recommend using hardwood, such as maple or oak, which provide a sturdy foundation. Begin with sketching out your design, focusing on precise measurements to ensure everything fits perfectly in the miniature space.
Tools and Techniques
A good set of tools is essential. I use a fine saw for cutting, sandpaper for smoothing edges, and wood glue for assembling components. An efficient approach is to cut all necessary parts before beginning assembly, which minimizes disruptions. Pay close attention to joints and connections; I often employ clamps to secure pieces as the glue dries.
Finishing Touches
After assembly, I typically apply a coat of non-toxic paint or varnish for a polished look. This not only enhances aesthetics but also protects the wood. I tend to personalize my items with decorative elements, such as fabric cushions or tiny accessories, to add character and charm to each piece.
Choosing the Right Wood for Dollhouse Furniture
For crafting miniature pieces, selecting suitable timber is critical. I prefer using hardwoods like maple, oak, or cherry due to their durability and visual appeal. Softwoods like pine are lighter and easier to manipulate but may not withstand frequent handling.
Considerations in Wood Selection
Assessing grain patterns and textures is vital. Fine grains are more visually appealing and easier to finish. I look for pieces that have fewer knots and imperfections, ensuring a clean, elegant look. Additionally, the weight of the wood can influence the overall stability of the finished items.
| Wood Type | Pros | Cons |
|---|---|---|
| Maple | Hard, smooth surface; easy to stain. | Can be more expensive. |
| Oak | Sturdy; distinctive grain. | Heavier, may require additional tools. |
| Pine | Lightweight; affordable. | Less durable; susceptible to dents. |
| Cherry | Rich color; ages beautifully. | Higher cost; harder to find. |
Finishing Touches
After selecting the right timber, finishing is essential to enhance both appearance and protection. Using non-toxic sealers or varnishes is advisable, especially if the item will be part of a playset. I often opt for water-based options to ensure safety and ease of application.
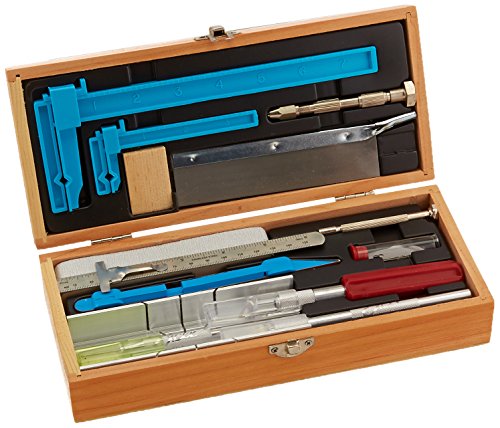
Tools Needed for Crafting Furniture
Choosing the right tools streamlines the crafting process and leads to superior outcomes. Here’s a list of indispensable instruments I use:
- Hand Saw: For precise cuts in various types of timber. A fine-toothed saw is ideal for delicate projects, while a more robust one works for thicker pieces.
- Router: Essential for shaping edges and adding decorative details. A plunge router provides versatility for different depths.
- Drill and Drill Bits: Useful for creating holes for joining pieces together or adding details. Use bits suited for the material at hand.
- Sandpaper: A range of grits is required for smoothing surfaces. Start with coarse grit to remove flaws, then switch to finer grits for a polished finish.
- Clamps: I rely on various types, such as bar or C-clamps, to hold pieces together securely while glue dries.
- Chisels: Essential for detail work and cleaning up joints. A set of different sizes allows for versatility in carving.
- Wood Glue: A solid adhesive ensures strong bonds between parts. Choose a type that suits your material and intended use.
- Measuring Tools: Accurate measurements are critical. A tape measure and square help achieve precise dimensions.
- Utility Knife: Perfect for trimming or scoring wood, especially when making finer adjustments.
Each of these tools allows for greater precision and quality in crafting miniature settings, ultimately enhancing the build process.
Step-by-Step Guide to Making Basic Furniture Pieces
First, gather all necessary materials. I utilize thin plywood or balsa wood for small scales, as they are lightweight and easy to work with. Choose a clean workspace to prevent any distractions or damage to the surfaces.
Creating a Chair
For a simple chair, cut out four identical pieces for legs, a rectangular piece for the seat, and two shorter pieces for the backrest. Begin by attaching the legs to the underside of the seat using wood glue. Once dry, secure the backrest pieces between the rear legs, ensuring they are level. Allow everything to set fully before applying a finish of your choice.
Crafting a Table
To construct a table, I start with a rectangular top and four legs. For the top, you can join two or more smaller rectangles. Next, attach the legs to each corner using wood glue, ensuring they’re perpendicular to the surface. Add reinforcement by gluing a smaller piece of wood between the legs if needed. After allowing it to set, sand the edges for a smooth finish and apply a protective coat.
Painting and Finishing Techniques for a Polished Look
Begin with a thorough sanding of each piece using fine-grit sandpaper to achieve a smooth surface, which enhances paint adhesion and final appearance.
A primer coat is recommended to prevent wood tannins from bleeding through and to ensure an even color distribution. Water-based primers work well and dry quickly.
When selecting colors, opt for acrylic paints for their quick drying time and easy cleanup. Apply multiple thin coats instead of one thick coat for better results. Allow sufficient drying time between layers to avoid peeling.
Consider using a small brush for detailed areas and a foam roller for larger surfaces, which yields a smooth finish without brush marks.
For a natural look, wood stains can enhance the grain while preserving visibility. Choose lighter stains for a subtle effect or darker ones for a bolder visual impact.
After painting, seal the surface with a polyurethane or varnish to protect against wear and provide a glossy finish. Apply with a clean brush in thin layers, allowing each coat to dry completely before adding the next.
For a distressed look, sand edges lightly to expose the base material after painting, giving the pieces a vintage character and charm.
Finally, consider finishing with a coat of wax or furniture oil for added durability. This not only enhances the wood’s natural sheen but also provides a protective barrier against moisture.
Incorporating Functional Elements in Your Designs
To enhance the usability of miniature settings, integrating functional features enhances realism. Consider the following strategies:
- Storage Solutions: Design pieces with hidden compartments or drawers. For example, a bookshelf can have removable shelves that slide out, providing a place to store tiny books or accessories.
- Relocatable Components: Create seating arrangements that can be easily rearranged. Use dowels or pegs to secure chairs and tables. This allows for flexible layouts during play.
- Moveable Parts: Incorporate doors that open and close. Simple hinges can bring cabinets and wardrobes to life. Ensure that these mechanisms are sturdy to withstand repeated use.
- Multi-Functional Items: Consider a piece that serves several purposes, like a bench that doubles as storage. This approach maximizes space and utility.
- Interactive Features: Add elements like pull-out beds or foldable tables. Not only do these add play value, but they also provide practical function in limited space.
When planning designs, sketch out functionality alongside aesthetics. Ensure that each piece captures attention yet remains practical for interaction. This balance maximizes both visual appeal and engagement in play scenarios.
Personalizing Furniture with Accessories and Textiles
Incorporating accessories and textiles adds a unique charm to handcrafted pieces. Start with selecting fabrics that complement the theme of your miniature environment. Choose tiny patterns or solid colors that reflect your style preferences and the overall look you aim for.
Textile Options
Consider using felt, cotton, or even remnants from old clothing. These materials are easy to cut and sew, making them ideal for creating cushions, curtains, and bed linens. To add authenticity, I prefer sourcing miniature trims, laces, or ribbons to embellish items.
Accessorizing for Detail
Small decorative elements like miniature vases, books, or artwork can dramatically enhance the aesthetic of each room. Many crafters utilize polymer clay to shape tiny accessories. I often suggest creating seasonal decorations to keep the appearance fresh and engaging.
Don’t overlook the potential of greenery; small potted plants or tiny cut flowers can infuse life into any setting. Utilizing appropriate scale is key–ensure that each accessory fits seamlessly within the space.
Finally, place emphasis on cohesion across the setting. A consistent color palette and style will tie various pieces together, making the entire arrangement visually appealing. Personal touches transform plain items into cherished creations.


