Choosing a suitable wood is my first step. Hardwoods like oak, walnut, or cherry provide durability and a classic appearance. Reclaimed wood offers unique character and an aged aesthetic that complements the vintage vibe.
Next, I focus on the finish. A combination of stain and antiquing wax often yields excellent results. Applying a dark stain enhances grain visibility, while wax adds a subtle sheen and depth, mimicking the wear found on genuine pieces.
For texture, I employ methods such as sanding with grit paper to create distress marks or using a hammer to simulate dings and scratches. This approach establishes a timeworn feel that truly resonates with antique lovers.


Finally, selecting the right hardware is crucial. Brass or wrought iron accents, such as handles and hinges, can elevate the overall design. The patina of aged metal complements the wood beautifully, reinforcing the vintage essence of the item.
Creating Vintage-Style Pieces
Begin by selecting solid wood, as this choice lends authenticity. Avoid particle board; instead, opt for oak, walnut, or cherry to achieve durability and classic beauty.
For surface work, a distressed finish captures the essence of age. Sand specific areas to create wear marks, then apply a base coat of dark paint. Once dry, use lighter shades over the top, gently distressing again to reveal the darker tones beneath.
Incorporating intricate details further enhances the piece’s charm. Use molding or carved embellishments to evoke an era. If unavailable, consider stenciling designs that mimic classic motifs.
- Install vintage hardware: look for ornate knobs and hinges at antique shops or online.
- Consider joint techniques such as mortise and tenon for a sturdy structure that reflects craftsmanship.
Next, apply a wax finish. This not only protects but also adds a soft sheen that resembles older finishes. Buff well to achieve a smooth surface.
Lastly, to complete the transformation, strategically place the item in a setting with appropriate decor. Pair with period-appropriate accessories such as a vintage mirror or patterned textiles to create a cohesive aesthetic.
Choosing the Right Wood Types for Antiquing
For projects aiming at a vintage aesthetic, I lean towards hardwoods like oak, walnut, and cherry. These species age beautifully and develop stunning patinas over time, enhancing the overall appearance.
Oak
Oak stands out for its durability and distinctive grain patterns. Its natural tannins react with stains, creating deep, rich hues ideal for a rustic vibe. I often use red oak for a warmer tone and white oak for a cooler, more refined look.
Walnut
Walnut features a darker shade and bold grain, making it perfect for statement pieces. It adapts well to various finishes, allowing me to manipulate its color during restoration. Engaging with its natural beauty often yields stunning results.
Cherry is another favorite. Its reddish-brown coloration deepens with age, adding sophistication. I appreciate how it develops a rich, warm patina, making it visually appealing when paired with distressed finishes.
In summary, selecting the right type of wood is crucial. The characteristics of each species significantly affect the final outcome, so I consider both aesthetics and functionality before starting any project.
Techniques for Distressing Surfaces
Employ sandpaper to create worn edges and soft curves. Use coarse grit initially for aggressive wear, followed by finer grit to smooth out rough patches. Pay attention to corners and raised areas that would naturally wear down over time.
Applying Paint Techniques
Consider a layered paint approach. First, coat the piece with a base color. Once dry, add a contrasting top layer. Lightly sand through the top layer in random areas to reveal the base color beneath, mimicking natural wear.
Using Household Items for Distressing
A hammer or chains can create dings and dents. Gently strike various spots to randomize the damage. For added effect, rub candle wax on specific areas before painting; this will help the top layer wear away differently, creating depth and dimension.
Applying Antique Stains and Finishes
Utilizing the right stains and finishes can significantly enhance the vintage appeal of your pieces. Begin with a base stain that mimics aged wood, such as walnut or mahogany. For an authentic look, consider mixing your own stain by combining different shades of brown and gray, ensuring the shades complement each other and the wood type used.
Staining Techniques
Apply stains using a clean cloth or a natural-bristle brush, working in the direction of the grain. Allow the stain to penetrate for a few minutes before wiping off excess with a lint-free cloth. This method ensures an even application, avoiding blotches. If a darker hue is desired, apply multiple coats, allowing adequate drying time between applications.
Finishing Options
The finish plays a crucial role in achieving a timeworn effect. Here are common options:
| Finish Type | Description |
|---|---|
| Oil Finish | Penetrates deeply, offering a warm tone and subtle sheen. |
| Wipe-On Polyurethane | Provides durability and is easy to apply; great for surfaces that will see use. |
| Shellac | Gives a classic, slightly glossy finish, ideal for traditional aesthetics. |
| Lacquer | Offers a hard finish but requires careful application; creates a high shine. |
| Milk Paint | Water-based, non-toxic, and allows for a chalky, subdued look reminiscent of historic furniture. |
For a weathered appearance, lightly sand the surface after the stain is dry, revealing base wood tones underneath. Follow up with your chosen finish, applying thin layers to build up the desired look. Experiment with different combinations to find the perfect blend for your project.
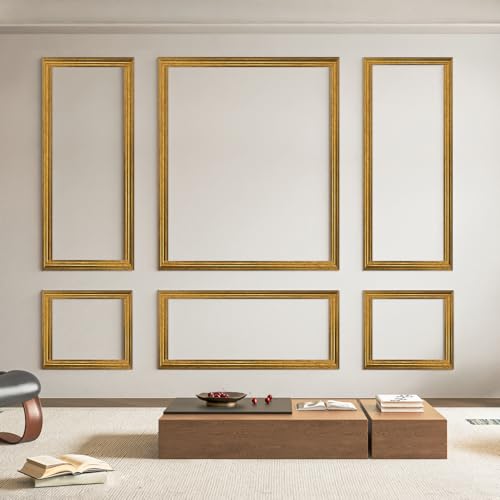
Creating Molding and Detail Work for Authenticity
Use intricate moldings to enhance the character of your piece. I typically opt for crown moldings, baseboards, and chair rails that mimic styles from the desired period.
To achieve a historical look, I carve or apply wooden details such as rosettes, corner brackets, or scrolling designs. These elements should complement the overall style–whether it’s colonial, Victorian, or arts and crafts.
For realism, incorporate additional layers, like applied carvings or decorative inlays made from contrasting woods. This layering creates depth and interest that echoes the craftsmanship of bygone eras.
When constructing moldings, I recommend using a miter saw for precise angles and a router for details. If you prefer a simpler method, consider purchasing pre-made moldings that suit your aesthetic, and modify them as necessary for fitting and alignment.
Don’t forget to pay attention to proportions. Oversized moldings may feel out of place, while too-small details will lack presence. Measure carefully and test various sizes to find the best fit.
Once installed, I often distress moldings with sandpaper to blend them seamlessly with the rest of the item. A bit of embellishment, like faux paint finishes or an aging technique, will enhance the illusion of age.
Always ensure the wood used for moldings matches or complements the main structure of the piece, considering wood grains and tones for a cohesive appearance. The right details can transform a simple structure into a stunning replica of craftsmanship from the past.
Using Hardware and Accents to Enhance Vintage Style
Incorporating authentic hardware can significantly elevate the charm of a piece. Selecting ornate knobs, antique drawer pulls, and hinge sets adds character. I often choose cast iron or brass finishes for their timeless appeal. Replicas of vintage hardware are also available if genuine pieces are hard to find.
Pay attention to the scale and style of the accents; they should complement the overall design. For instance, a Victorian-style chest would benefit from intricate, decorative elements, while a Shaker-inspired piece might require simpler, more functional designs.
Additionally, consider attaching decorative brackets or corner guards to tables and cabinets. These elements not only enhance aesthetics but also offer a touch of authenticity. Using aged leather or textile coverings for surfaces can also contribute to that old-world feel.
In terms of colors, I find that distressed finishes on hardware, like oil-rubbed bronze or aged pewter, work beautifully with rich stained woods. The contrast emphasizes the vintage look. Try layering different textures–such as metal and wood–to add depth and visual interest.
Finally, it’s worth exploring other accents like vintage-style decals or stencils to replicate the look of signage from the past. These can be applied to drawer fronts or tabletops for an added layer of uniqueness. Always opt for subtle designs that won’t overpower the craftsmanship.
Maintenance Tips for Preserving Antique Appearance
Regular cleaning with a soft, lint-free cloth prevents dirt from building up without scratching the surface. Avoid commercial cleaners with harsh chemicals that could damage the finish.
Humidity Control
Maintain indoor humidity levels around 40-60%. Use a humidifier in dry months to prevent cracking. During humid months, air conditioning can help maintain balance.
Temperature Management
Keep pieces away from direct sunlight and heat sources like radiators or fireplaces. Fluctuations in temperature can cause warping or fading.
- Rotate items regularly to minimize sun exposure.
- Use curtains or blinds to limit direct light.
Periodic Inspections
Check for loose joints and screws regularly. Tighten them gently to avoid splitting wood. For visible gaps, consider using wood filler for a more cohesive look.
Polishing Techniques
Periodically apply a quality wax or polish to maintain shine. Use a soft cloth to buff the surface after application for a natural glow.
- Choose a beeswax-based polish for richer results.
- Apply sparingly; excess can attract dust.
When storing items or pieces, wrap them in breathable fabric, avoiding plastic to prevent moisture accumulation.
By following these practices, the integrity and charm of vintage pieces can be preserved, ensuring they remain a beautiful part of your space for years to come.


