Begin with adequate preparation: clean the surface thoroughly to remove dust and oils, ensuring a smooth application. Select a suitable primer to ensure adhesion, especially if the original finish is glossy. A matte primer works well for this purpose.
Next, combine a chosen light pigment with water to achieve your desired tint. The mixture should be thin enough to penetrate the grain without obscuring it, allowing the natural beauty of the base color to shine through.
Utilize a clean cloth or brush to apply this mixture. Work in small sections to maintain control, wiping off excess to achieve the right balance of tone. Allow the finish to dry completely before applying a top coat of sealer, which will enhance durability while preserving the fresh look of your revitalized pieces.
Gray Washing Technique for Deep-Toned Surfaces
I recommend preparing the surface by cleaning and lightly sanding it to ensure a smooth application. Dust off the debris before applying any product. Choose a stain that embodies the desired soft hue.


Materials Needed
- Soft cloths for cleaning
- Fine-grit sandpaper
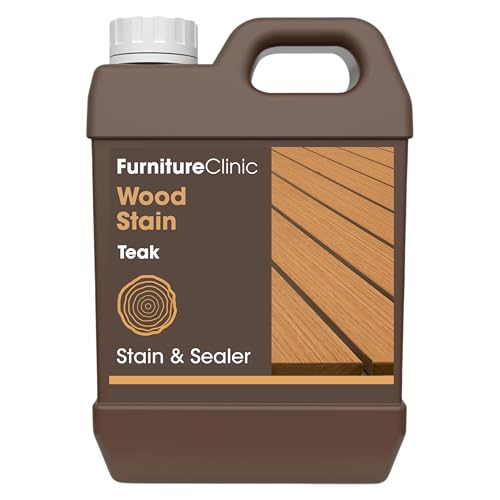
- Water-based stain in a light tone
- Paintbrush or foam applicator
- Clear coat finish (optional)
Application Steps
- Start by applying a thin layer of your chosen blend to the applicator.
- Work in sections, quickly spreading the mixture and wiping off excess with a clean cloth.
- Allow the first application to dry completely; this usually takes around 1-2 hours.
- Evaluate the finish. If it requires more depth, repeat the process until reaching the desired effect.
- For added protection, consider sealing with a clear top layer after the stain has dried thoroughly.
This approach achieves a subtle artistic transparency, enhancing the unique character of the pieces while bringing a refreshing modern touch.
Choosing the Right Formula for a Softened Finish
For an optimal result, I recommend using a mixture of water-based paint and a clear topcoat. This combination allows for greater control over the final appearance and ensures the surface stays protected. The ratio is generally one part paint to one part water, but adjusting this based on personal preference is key. Testing the mixture on a scrap piece of similar material can provide a clearer idea of the intended effect.
Water-Based vs. Oil-Based Options
Water-based solutions are preferable due to their quick drying time and ease of cleanup. They also have lower fumes and are less likely to cause ecological harm. On the other hand, oil-based options can offer a richer, more durable finish. The choice between these ultimately depends on your needs for durability and the working environment.
Choosing the Right Color Tone
Selecting a tone that complements existing decor is crucial. Consider sample swatches to visualize how different shades react with the underlying surface. A cooler tone can provide a modern feel, while warmer hues can evoke a cozy atmosphere. Always test on an inconspicuous area to confirm the color matches your vision before applying it to larger surfaces.
Preparing Your Dark Wood Furniture for Gray Washing
Remove any existing finish using a chemical stripper or sandpaper, ensuring a clean surface for better adherence. I find an orbital sander effective for large areas, while manual sanding works best for intricate details. Begin with coarse sandpaper and gradually transition to finer grits, finishing with a 220-grit for smoothness.
Clean the surface thoroughly post-sanding with a damp cloth or tack cloth to eliminate dust and residue. Allow the surface to dry completely. Next, inspect for imperfections; fill any dents or scratches with wood filler that matches the type of surface. After it dries, sand the repaired areas lightly to blend them with the surrounding surface.
Conduct a test on a small, inconspicuous area to check compatibility with your chosen treatment. This step ensures that the end result meets your expectations before applying it to the entire piece. Once satisfied with the color and finish, proceed to apply the treatment systematically for a uniform look.
| Step | Action |
|---|---|
| 1 | Remove existing finish |
| 2 | Sand surface |
| 3 | Clean thoroughly |
| 4 | Inspect and repair |
| 5 | Test application |
| 6 | Apply treatment |
Applying the Gray Wash: Step-by-Step Instructions
Begin with a clean surface; dust or wipe down the piece meticulously. A tack cloth works well for capturing fine particles.
Prepare the mixture by combining one part paint with one part water. Adjust the ratio for a lighter or darker effect according to your preference.
Using a wide brush, apply the solution in even strokes. Work section by section, ensuring complete coverage without overloading the brush.
Before the mixture dries, use a clean rag to gently wipe away excess product. This step reveals the undertones while allowing the natural grain to peek through.
For areas that require more depth, repeat the application, waiting for the previous layer to dry before adding more. Each layer enhances the desired translucency.
Once satisfied with the look, allow the piece to cure fully before applying a protective topcoat. A matte or satin finish works best to preserve the effect.
Regularly inspect your item, particularly if it’s in a high-traffic area, and perform touch-ups as needed to maintain its appearance.
Achieving the Desired Transparency with Additional Coats
For optimal control over the level of translucency, additional layers of the thinning mixture can be applied. I recommend waiting for each coat to fully dry before assessing the color intensity. This ensures that any excess moisture does not distort the finish. Generally, one to three extra applications will yield the desired effect.
To enhance the color beautifully, I use a clean, soft brush or a lint-free cloth for each coat. This method allows me to smoothly apply the mixture, enabling even distribution and minimizing streaks. I assess the transparency after each application and decide if further coats are necessary based on my preference for the final look.
I also suggest taking notes on the number of layers used and their effects. Documenting this process not only helps in replicating the finish in future projects but also allows for adjustments based on the specific nature of the timber I’m working with.
Additionally, considering the use of a protective topcoat after achieving the desired look can benefit longevity while maintaining clarity and sheen. I recommend a water-based polyurethane, as it preserves the finish without altering the undertones established by the previous applications.
Sealing Your Gray Washed Furniture for Longevity
To enhance the durability of your newly treated pieces, applying a high-quality protective finish is crucial. A polyurethane sealant offers excellent protection against scratches, moisture, and stains.
- Select a finish based on the intended use of the item. For heavily used surfaces, a water-based polyurethane is ideal due to its resistance to wear and ease of cleaning.
- Prepare the surface by ensuring it’s clean and dry before applying any sealant. Lightly sand the surface with fine-grit sandpaper to foster better adhesion.
- Use a brush or a clean cloth to apply the sealer in thin, even coats, following the grain direction. Avoid over-saturating the applicator to prevent drips and puddles.
- Allow each coat to dry completely as per the manufacturer’s instructions. Typically, a minimum of two coats is advised for optimal protection.
- After applying the last coat, let the item cure for at least 48 hours. This time frame allows the finish to harden fully, providing a robust protective barrier.
Regular maintenance is essential for longevity. Depending on the usage, consider reapplying the sealant every few years to keep the surface looking fresh and to maintain its protective qualities.
Cleaning and Maintaining the Gray Washed Finish
To preserve the beauty of the treated pieces, I recommend using a soft, damp cloth for regular cleaning. Avoid harsh chemicals that may strip away the finish; instead, opt for a mild soap mixed with water for deeper cleans. Make sure to dry surfaces immediately after cleaning to prevent moisture damage.
Preventing Damage
Place coasters and placemats under items to avoid scratches or heat marks. Regularly check for any signs of wear or dullness. If I notice the finish looking faded, a light reapplication of the sealing solution can refresh its appearance and provide additional protection.
Tackling Scratches and Scuffs
For minor scratches, I find that rubbing in a matching furniture wax can effectively conceal imperfections. For deeper marks, sanding lightly with fine-grit sandpaper followed by a touch-up application of the sealing product works wonders. Maintaining awareness of these small details will ensure the surface remains stunning for years to come.
Common Mistakes to Avoid When Gray Washing
Overly thick application leads to an unnatural finish. I always ensure to apply thin layers and build up gradually for a more authentic look.
Skipping the test patch can result in unexpected outcomes. Testing on a small, inconspicuous area gives me insight into how the mixture interacts with the surface.
Rushing the drying time can cause uneven results. Patience is key; I allow each coat sufficient time to dry before applying the next one.
Ignoring Surface Preparation
Neglecting to clean and sand the surface properly can affect adhesion. I meticulously clean and lightly sand to ensure optimal results.
Not Using a Proper Sealer
Failing to seal after the application can lead to a lack of durability. I always choose a suitable topcoat to protect the finish and enhance longevity.


