To create an aged effect on surfaces, I recommend beginning with a base coat. Choose a color that contrasts with the top layer you plan to apply later. A light shade works well if the final hue is darker, enhancing the wear and tear appearance.
Once the base layer dries, apply a top coat of your preferred color. Use a matte or eggshell finish for added authenticity. After the top coat dries, take fine-grit sandpaper and lightly scuff areas where natural wear would occur, such as edges and corners. This step is crucial in mimicking the look of age.
For added texture, consider using a wax or glaze. Apply a dark tinted wax over certain areas to accentuate the depth and create shadows. This technique enhances the visual interest, making the piece feel like a vintage find rather than a new creation.

Finally, seal the project with a clear top coat. This not only protects your hard work but also adds a slight sheen that makes the piece easily cleanable. Through these steps, you’ll achieve a convincing worn appearance that adds character to your home.
Achieving a Worn Aesthetic on Surfaces
Choose a base color that suits your vision–typically, a neutral or muted shade works best. After applying the first coat, let it dry thoroughly to create a solid foundation.


Next, select a contrasting hue for the top layer. Apply it generously, but avoid complete coverage. Focus on areas that typically wear down, like edges and corners.
Once the second layer dries to a point that’s still slightly tacky, gently sand specific sections using fine-grit sandpaper. Concentrate on areas where natural wear would occur, allowing the base color to show through. This technique creates dimension.
Mixing a glazing medium with your top color can add depth. Once the top coat is dry, use a soft cloth to apply this glaze selectively. This step enhances the overall texture and makes imperfections stand out, contributing to an authentic aged effect.
To seal the character of your surface, choose a matte or satin finish topcoat. Apply it lightly to maintain the vintage feel while ensuring durability. Allow it to cure according to product instructions.
Finally, step back and evaluate. If any areas seem too pristine, lightly sand them again or add additional layers of glaze to enhance the aged appearance. Each piece can tell its own story through these techniques, bringing a unique personality to your space.
Choosing the Right Type of Coating for Aging Effects
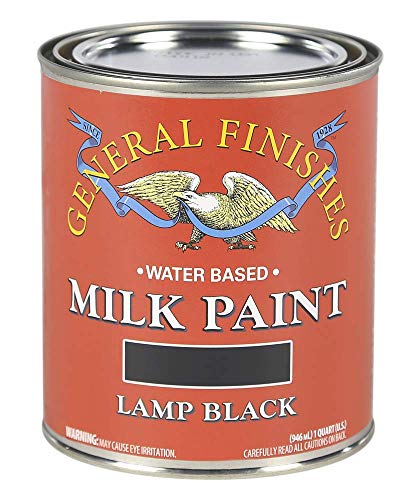
I recommend using either chalk or milk-based formulations for achieving the desired aging appearance. These types provide a matte finish that adheres well to surfaces and allows for easier manipulation during the distressing process.
Chalk products are particularly user-friendly; they require minimal surface preparation and dry quickly. They also offer a rich, velvety texture that can be sanded down effectively for the aged effect. On the other hand, milk-based options contain natural ingredients, making them eco-friendly and safe for indoor use.
| Type of Coating | Features | Benefits |
|---|---|---|
| Chalk | Matte finish, quick drying, easy to sand | Great for layering and achieving a smooth surface |
| Milk-Based | Eco-friendly, unique undertones, natural ingredients | Safe for indoor projects and provides a rustic look |
| Acrylic | Versatile, various finishes available | Ideal for vibrant colors, easily mixed |
| Latex | Durable, easy clean-up with water | Widely available and suitable for multiple applications |
Before starting, ensure the substrate is clean and lightly sanded if necessary. Testing the coating on a small, inconspicuous area can help confirm the desired outcome. This simple step prevents surprises and allows you to adjust your approach as needed.
Preparing Your Furniture Before Painting
I begin by thoroughly cleaning the surface to remove dirt, grease, and old polish. A clean base ensures better adhesion of the coating. I use a mixture of warm water and mild soap, along with a soft cloth, making sure to wipe down all parts thoroughly.
Assessing and Repairing Damage
I carefully inspect for any dents, scratches, or loose pieces. Using wood filler, I fill in damaged spots, ensuring a smooth finish. Once the filler dries, I sand the area lightly to create an even surface that blends seamlessly with the rest of the piece.
Sanding and Priming for Better Adhesion
Next, I sand the entire item lightly using fine-grit sandpaper. This step not only scuffs the surface for better paint adhesion but also helps create that desired worn texture. After sanding, I wipe off any dust with a clean, damp cloth. If necessary, I apply a primer to promote adhesion, especially for surfaces that are previously painted or have a glossy finish.
Once the primer is dry, I’m ready to move forward with the next steps in creating an aged appearance on my piece.
Selecting Appropriate Distressing Techniques
Focus on methods that enhance the charm of your piece. Here are the techniques I recommend:
- Sanding: Lightly sand areas where natural wear would occur. Concentrate on edges and corners for an authentic appearance.
- Waxing: Apply a clear or tinted wax to create depth. This adds a subtle sheen while protecting the surface.
- Chipping: Use a brush or tool to remove paint intentionally. Choose spots that would typically show use over time.
- Staining: Apply a darker stain over the base layer. This can create an aged effect, especially in crevices.
- Heat Distressing: Carefully apply heat with a heat gun to blister the finish. This offers unique textures and variations.
Combining Techniques
Pairing different methods can yield striking results. For instance, I often sand areas after chipping to blend them seamlessly. Experimentation with various combinations can lead to a unique finish tailored to your style.
Test Before Committing
Always test techniques on a hidden section or sample wood. This practice ensures you achieve the desired character without risking your main piece. Adjust the intensity of each method based on personal preference.
Applying the Base Coat Evenly
For a successful foundation, I always ensure that the initial layer is applied with precision. This begins with choosing a high-quality primer that complements the final hue. Using a foam roller for larger surfaces helps achieve a smooth finish without brush marks.
When rolling, I apply the coating in long, even strokes, overlapping slightly with each pass. For intricate areas or edges, I prefer using a synthetic brush, as it allows for more control and precision. It’s crucial to avoid excessive paint that can lead to drips; working in sections can help manage this effectively.
Drying Time and Second Coat
Patience is essential when waiting for each layer to dry thoroughly. I usually allow at least two to four hours before assessing the need for a second coat. If the base seems uneven or transparent, a light second application will ensure proper coverage, enhancing the overall appearance.
Final Touches
After the second layer dries, I lightly sand any uneven spots with fine-grit sandpaper, focusing on corners and edges. This not only smooths the surface but also prepares it for the subsequent layering techniques. Pay attention to the texture; achieving a uniform base is fundamental before introducing any aging techniques.
Using Sandpaper for Distressing Effect
I recommend using sandpaper to create an authentic worn appearance. Begin with medium-grit sandpaper, around 120-150 grit, for initial wear. Focus on edges and corners, where natural wear occurs. This method highlights the underlying layers and provides depth.
Switch to finer grit, approximately 220, for smoothening out any rough spots after initial sanding. Ensure even pressure during sanding to avoid uneven surfaces. Experiment with different sanding techniques to achieve varied levels of wear. A circular motion produces a softer look, while straight strokes create sharper edges.
Always test on a hidden area before applying to the entire piece. This allows for adjustment based on personal preference without affecting the overall project. Don’t rush the process; take your time to observe the transformation as you gradually expose the base layer.
Consider the application of wax or a sealant afterward to protect your work. This ensures longevity while maintaining the rustic charm achieved through sanding.
| Sandpaper Grit | Purpose |
|---|---|
| 120-150 | Initial distressing on edges and corners |
| 220 | Smoothing surface and refining the look |
Taking these steps not only enhances texture but also adds character, transforming a simple item into a unique conversation starter. Combine these techniques with other methods for a custom finish.
Incorporating Wax or Glaze for Depth
To achieve a richer aesthetic, applying a wax or glaze after the base color enhances the character of the surface. I recommend using clear or tinted wax for added dimension. Begin with a soft cloth or brush to apply a thin layer, concentrating on crevices and edges to accentuate natural wear. Allow it to sit for a few minutes before wiping away excess for a nuanced finish.
Choosing the Right Product
When selecting a product, consider using furniture wax or a water-based glaze. Wax creates a soft sheen, while glaze offers a more pronounced visual effect. Experiment with a small sample area to determine which product aligns with your desired outcome.
Application Techniques
For a textured feel, I recommend layering multiple applications of wax or glaze. After the first layer dries, sand lightly with fine-grit paper to create a smoother blend. Repeat this process for the desired depth, ensuring the finish remains cohesive and not over-processed. This approach amplifies the vintage appeal and enriches the overall appearance of the project.
Sealing Your Distressed Finish Properly
To protect the unique qualities of your newly finished piece, I recommend using a high-quality clear sealer. Choose between spray or brush-on options based on your preference. Here are the steps I follow:
- Ensure Thorough Drying: Allow the surface to dry completely. This may take up to 24 hours, depending on the products used.
- Select the Right Product: Look for a water-based polycrylic for an easy application and quick drying. Oil-based options provide more durability but take longer to cure.
- Application Technique: For spray sealers, maintain a distance of about 12 inches to avoid drips. If using a brush-on sealer, apply thin, even coats with a synthetic bristle brush.
- Multiple Coats: Apply at least two or three coats for adequate protection, allowing each layer to dry thoroughly before adding the next.
- Sand Between Coats: Lightly sand with fine-grit sandpaper between each coat to ensure a smooth finish and better adhesion. Wipe away dust with a clean, dry cloth.
Once fully cured, your piece will not only have a striking aesthetic but also be shielded from wear and tear. This ensures longevity and preserves the effort put into creating an artisanal finish.
Maintaining Distressed Furniture Over Time
To keep your vintage-inspired pieces in top shape, regular cleaning with a soft, damp cloth is essential. Avoid harsh chemicals that can wear down the finish. Instead, opt for a gentle soap as needed. Wipe spills immediately to prevent damage.
Using a light coat of furniture wax every few months will enhance the surface shine while providing an extra layer of protection. Pay attention to high-use areas, as these spots may require more frequent applications.
Inspect for any chips or wear regularly. If repairs are necessary, I recommend adding touch-up paint to address these areas. This can help maintain the aesthetic without compromising the overall character.
Keep these items out of direct sunlight and humidity, as extreme conditions can cause fading or warping. If possible, place them in a climate-controlled environment to extend their lifespan. Regular assessments will ensure that your treasured pieces remain both functional and visually appealing throughout the years.
Creative Ideas for Distressing Unique Pieces
I recommend exploring a variety of materials and textures to achieve a distinct appearance in your projects. Consider using reclaimed wood accents or vintage hardware to contrast with your newly treated surfaces.
- Old Maps and Sheet Music: Decoupage these onto surfaces for an artistic flair. Apply a thin layer of your chosen coating over the top for cohesion.
- Leather Strips: Incorporate leather for handles or edging. This adds a tactile element while complementing the weathered aesthetic.
- Glass Inserts: Instead of traditional panels, consider inserting antique glass or colored glass to elevate aesthetics and uniqueness.
- Metallic Accents: Use metallic spray or rub-on finishes on corners or handles to provide a contemporary contrast to a rustic background.
Combining bold colors with a lighter undercoat can make the finish pop. I’ve had success layering shades of blue or green with creamy undertones for a beach-inspired effect.
- Layering Techniques: Layer different paint colors and sand through to reveal underlying shades, creating depth in coloration.
- Stencils and Stamps: Using stencils can add unique patterns. I often opt for nature-inspired designs to maintain an organic feel.
- Textured Applications: Experiment with sponges, brushes, or rags to create interesting textures. I’ve found stippling techniques work well for achieving that aged feel.
For a truly personalized item, consider adding your own artwork. Freehand designs can be a striking way to infuse individuality while enhancing character.
Lastly, search for inspiration in thrift shops or antique stores. Each piece you find tells a story, and I often find ideas from the imperfect finishes of vintage items that guide my creative process.


