

First, try applying a small amount of lubricant like furniture wax or silicone spray directly to the tracks. This can significantly reduce friction and enable smoother movement. It’s essential to ensure that the lubricant doesn’t spill over onto the visible surfaces, as this might affect the finish.
If the issue persists, examining the alignment is crucial. Gently remove the problematic section and check if it’s warped or misaligned. Often, a slight adjustment can make all the difference, allowing it to slide back into place seamlessly.
In cases where wood expansion due to humidity is the culprit, taking preventive measures involves placing silica gel packets inside the compartments. These packets absorb moisture, helping to maintain a stable environment for the wood.
Lastly, if damage is evident, sand down any splintered edges. A smooth surface will not only enhance functionality but also extend the lifespan of these treasured items. Regular maintenance can prevent future issues and keep these pieces in optimal condition.


Identify the Cause of the Stuck Drawer
I began by checking for misalignment. Gently pull the drawer out, observing if it wobbles or appears crooked. This often indicates that it is not aligned properly within the frame. If that’s the case, adjustments may be necessary.
Next, I examined the runners or slides. Accumulated dust and debris can obstruct movement. I used a soft brush to clean these areas thoroughly. In some instances, the slides may be bent or damaged, which could require replacement.
I also inspected the wood itself for signs of warping or swelling. High humidity can cause wooden components to expand. If this was the issue, I considered implementing a dehumidifier in the area to prevent further problems.
Lastly, I looked for any foreign objects lodged within the compartment. Small items can easily get caught in the mechanism. A meticulous search often resolves the issue quickly.
Remove Contents and Clean the Drawer
First, I empty the contents of the compartment. This allows me to inspect the interior thoroughly and ensures that no items are causing interference.
Next, I use a soft cloth to wipe down the inside. If there’s significant grime or residue, I mix a mild detergent with warm water and apply it with a cloth. After cleaning, I make sure to rinse with a damp cloth to eliminate any soap residue.
Addressing Stains and Odors
For stubborn stains, I often treat them with a paste of baking soda and water, applying it directly to the stain and letting it sit for a few minutes before gently scrubbing with a soft brush. To eliminate odors, I sprinkle some baking soda in the compartment and leave it overnight; this remedy effectively absorbs persistent smells.
Final Steps
Once the surface is clean and dry, I check the rails and surrounding structure for dust or debris, ensuring everything is clear of obstacles. Before returning items, I group them and consider whether anything should be discarded or relocated for better organization in the future.
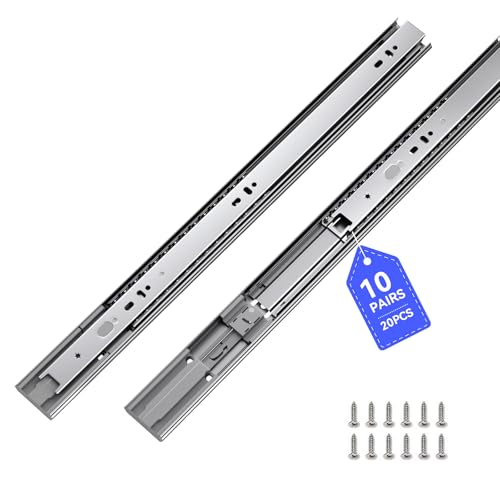
Inspect and Repair the Drawer Slides
Examine the slides for any signs of damage or wear. Look for bent or broken components, as well as accumulated dirt or debris that could affect movement. Use a flashlight to help see into tight spaces.
To begin the repair process, follow these steps:
- Remove the drawer from its housing and inspect both the slides and the runner for cracks or deformation.
- If the slides are metal, clean them thoroughly with a degreaser and a cloth. For wooden components, ensure they are free of dust and grime.
- Check for proper alignment. If misaligned, gently adjust the slides using a screwdriver or a small hammer, being careful not to damage the material.
- For bent metal slides, carefully bend them back into shape, making sure to maintain their original contour to ensure functionality.
- Replace any severely damaged slides. Measure the existing ones, and purchase replacements from a hardware store that match the specifications.
After repairs, apply a silicone-based lubricant along the slides and the runner to facilitate smooth operation. Avoid oil-based products as they can attract dirt and grime over time.
Reconnect the drawer and test its operation, ensuring it moves freely along the repaired slides. Adjust as needed for a seamless fit.
Lubricate Moving Parts for Smooth Operation
I recommend using a suitable lubricant to enhance the functionality of mechanisms. Begin by selecting a product that is safe for your specific materials, such as silicone spray or a wax-based lubricant. Apply a thin layer directly onto the slides and any pivot points.
Ensure that the area is clean before applying lubricant. Wipe away any dust or grime, as contaminants can interfere with performance. After applying the lubricant, open and close the compartments several times to distribute the product evenly. This will allow the lubricant to penetrate and eliminate friction between surfaces.
Types of Lubricants
For metal components, a light machine oil can work effectively. Wood elements benefit from beeswax or paraffin wax, which provides a protective barrier while allowing movement. For plastic parts, silicone-based options are ideal, as they do not attract dust and debris.
Maintenance Tips
Regular inspections are key. I recommend checking lubrication levels periodically, especially after heavy use. Reapply as necessary to maintain optimal functionality. Observing changes in movement can help identify when lubrication is needed again, ensuring longevity and prevent future issues.
Adjust the Drawer Alignment and Fit
I recommend checking the alignment of the sliding mechanism to ensure the compartment fits properly within its opening. First, open the compartment fully and examine the sides for even spacing. If there’s a noticeable gap or if one side appears higher than the other, shim adjustment may be necessary.
Use a level to confirm that the furniture is sitting evenly. If it’s tilted, place small shims or adjust the legs to level the piece and subsequently enhance the alignment of the compartment. This can resolve issues caused by uneven settling over time.
If misalignment persists, loosen the screws holding the sliding rails onto the furniture. Carefully reposition them to achieve an optimal fit, then re-tighten. Avoid overtightening, which could cause new restrictions.
Check the alignment with the adjoining furniture parts, especially if the design includes multiple compartments. Both horizontal and vertical fittings should be uniform across all surfaces for flawless operation. With patience and meticulous adjustments, I believe proper alignment will restore smooth function.
Consider Replacement of Worn Components
When components that facilitate movement deteriorate, replacing them is often necessary. Drawer slides or rollers that have lost their functionality will hinder proper operation. Begin by determining the type of hardware installed. Standard metal glides can often be replaced with modern equivalents that feature smoother mechanisms.
Remove any remaining parts carefully and take them to a hardware store to find suitable replacements. If your piece has wooden slides, inspect them for wear. In some cases, sanding or filling with wood glue may suffice, but severely damaged pieces should be swapped out entirely.
Choosing the Right Replacement Parts
Look for components designed specifically for similar types of cabinetry. Ensure that the new parts align well with existing holes and assembly points to avoid additional modifications. Various materials are available, including durable metals and plastics that may extend the lifespan of your restoration efforts.
For wooden fixtures, consider handcrafting new slides if original designs are not available. Use high-quality hardwood to match the aesthetic of the item and achieve a seamless integration.
Installation Process
Follow the manufacturer’s instructions carefully for installing new components. Ensure alignment is precise to avoid future issues. Utilizing screws or brackets as anchors will help maintain stability. Regularly inspect these parts after installation to confirm they are holding up well under regular use.
By replacing worn-out components, I have significantly improved the functionality and longevity of various pieces, ensuring they not only operate smoothly but also retain their charm and character.
FAQ:
What are some common causes of drawers getting stuck in old furniture?
Drawers in old furniture can become stuck for several reasons. One common cause is the accumulation of dust and debris in the tracks, which can block smooth movement. Additionally, warping of the wood due to changes in temperature and humidity can lead to misalignment, causing the drawer to bind. Another factor can be old or damaged hardware, such as rusty or broken slides. Finally, the presence of built-up paint or varnish can create an uneven surface that hinders the drawer’s movement.
How can I identify if the problem is with the drawer or the track?
To determine whether the issue lies with the drawer or the track, first remove the drawer completely and inspect both parts carefully. Check the sides of the drawer for any signs of damage or warping. Next, examine the track for debris or misalignment. You can also try sliding the drawer’s track along the guide rails without the drawer in place; if it moves freely, the track is likely fine, and the issue may lie with the drawer itself.
What are some practical methods to fix a stuck drawer?
Several methods can fix a stuck drawer, depending on the underlying cause. If debris is the issue, clean the tracks thoroughly with a vacuum or a damp cloth. For drawers that are warped, gently sanding the edges may create a better fit. If the problem is with the hardware, consider replacing slides or adding lubricants like wax or silicone spray to reduce friction. If paint buildup is the culprit, carefully scraping away the excess from the edges of the drawer can restore smooth movement. Always test the drawer after each adjustment to see if it improves the situation.
Can I prevent my drawers from getting stuck in the future?
Yes, there are several preventative measures you can take to keep your drawers functioning smoothly. Regularly clean the drawer tracks to remove dust and dirt that can build up over time. Additionally, apply a silicone or wax lubricant every few months to the sliding surfaces to ensure they remain slippery and easy to pull. It’s also wise to check the alignment of the drawers periodically, especially after changes in humidity, to address any warping before it becomes a bigger issue. By taking these steps, you can help maintain the condition of your furniture and prolong the life of its drawers.