Begin by selecting a classic piece that resonates with you. Look for items that may have seen better days but boast strong craftsmanship. I often scout flea markets and thrift stores for unique finds that can be easily revitalized.
Once you have your vintage treasure, a thorough cleaning is key. Use a mixture of warm water and mild soap to remove layers of dust and grime. For wood surfaces, a gentle wood cleaner will bring out the natural grain and prepare it for refinishing.
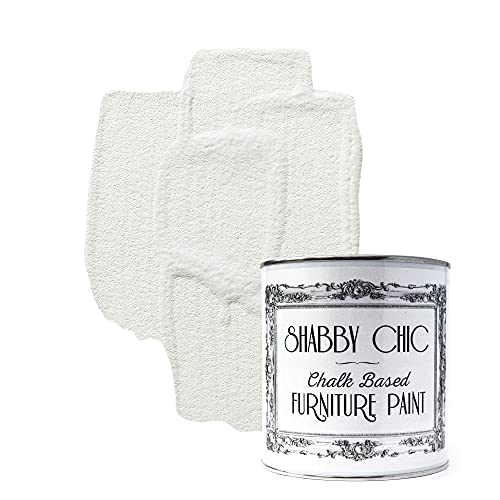
The next step revolves around applying a fresh coat of paint. Opt for soft, muted tones like pastel pinks, blues, or whites. I prefer using chalk paint for its matte finish and ease of use. After painting, lightly distress the edges with sandpaper to achieve that charming, worn look.
Accessorizing is essential. Consider adding decorative hardware or stenciling to personalize the piece further. Vintage knobs or handles can dramatically change the overall aesthetic, adding a touch of character.
Finally, don’t hesitate to showcase your creativity. Layering different textures with throw pillows, linens, or distressed decor can enhance the overall vibe. By following these steps, you’ll create a stylish centerpiece that enhances your space while telling a unique story.
Selecting the Right Furniture Pieces for Transformation
Focus on items with solid structures and interesting details. Look for unique designs or intricate carvings that can be enhanced with paint or distressing techniques. Pieces made from hardwood are preferable due to their durability and ability to hold paint well.
Key Characteristics to Consider
- Shape: Choose pieces with vintage silhouettes, like curved lines or ornate legs. These add character and charm.
- Condition: Items that require minimal repairs are ideal. Pay attention to minor scratches or dents that can be part of the aesthetic.
- Size: Ensure the dimensions fit your space. Oversized pieces can become statement items, while smaller ones can be layered.
- Material: Look for wood, metal, or even sturdy fabric. Each material offers unique possibilities for finishing touches.
Types of Pieces to Look For
- Dressers and Chests: Their surfaces provide ample space for paint and stenciling, and knobs can be replaced for an instant update.
- Nightstands: Small size makes them perfect for experimenting with color and design.
- Chairs: Vintage chairs can become showpieces with reupholstering or new paint.
- Coffee Tables: A simple design allows for creativity–stenciling or decoupage can add personality.
By carefully selecting pieces with these qualities, I ensure that each project not only enhances the item but also complements my overall aesthetic vision.
Preparing Furniture for the Shabby Chic Process
Begin with a thorough cleaning to eliminate dust and grime. I use a mix of warm water and mild soap. A soft cloth or sponge helps prevent surface damage.
Inspect for structural issues. Strengthen any weak joints with wood glue or screws if needed, ensuring it’s solid before proceeding.
Remove hardware like knobs, hinges, and any other attachments. This simplifies the painting process and allows for easier updates later.
Sand the surfaces gently. I prefer a medium-grit sandpaper to scuff glossy finishes, which enhances paint adhesion. A fine-grit option smooths rough edges.
Applying a primer is essential. I use a water-based primer for lighter shades or a shellac-based one for stains and dark colors. This step prevents bleed-through and improves coverage.
After priming, let it dry fully, checking for any imperfections. A light sanding before the final paint application ensures an even finish.
Gather materials for distressing. Tools like sandpaper, a damp cloth, and even a putty knife can help age the piece effectively.
- Consider which areas will show wear naturally, such as corners and edges.
- Apply pressure lightly; less is more in achieving that worn appearance.
Keep the vision in mind while preparing. Each action should align with the desired outcome, from the cleaning to the final coat of paint.
Choosing the Perfect Paint Colors for a Shabby Chic Look
Focus on soft, muted shades that evoke a sense of nostalgia. My go-to colors include pastel pinks, light blues, and gentle greens. These hues create an inviting atmosphere and blend well with rustic elements.
Consider using white or cream as a base, which allows other colors to pop. Layering with a distressed finish offers an authentic, vintage appearance. When selecting your palette, draw inspiration from nature–soft earth tones such as taupe or sage complement floral patterns beautifully.
For a more dramatic touch, incorporate muted grays or lavenders, which can provide depth without overshadowing the lightness typical of this style. Mixing different shades on the same piece can add dimensions: a darker trim against a lighter body can enhance visual interest.
Don’t shy away from experimenting with finishes. A matte or eggshell finish will enhance the worn look, while a glossy coat could detract from that rustic charm. Test your colors on small areas before committing, ensuring they harmoniously blend with your existing décor.
Ultimately, the best choices resonate with your personal taste while adhering to the ethereal, romantic qualities typical of this aesthetic. Keep a color wheel handy for complementary ideas, and let your imagination guide your selections!
Applying Paint: Techniques for the Ideal Finish
To achieve a perfect finish, I select a high-quality paint suitable for the desired texture. A chalk-based or acrylic paint typically provides the best results for my projects. I begin applying using a synthetic brush, ensuring smooth strokes for an even coat.
Layering for Depth
After the first coat dries, I lightly sand the surface with 220-grit sandpaper. This step not only smooths imperfections but also helps the subsequent layers adhere better. I apply a second coat, repeating the sanding process again once it dries. Each added layer enhances the dimension and character of the piece.
Creating Soft Distress
To achieve that charming, weathered look, I focus on strategic distressing. Using a fine-grit sponge or sandpaper, I target edges and corners where wear would naturally occur. I also find that dry brushing with a contrasting color helps to highlight details and textures effectively.
| Technique | Description |
|---|---|
| Brush Application | Use a synthetic brush for smooth, even coats. |
| Layering | Apply multiple coats with sanding in between for depth. |
| Distressing | Sand edges and use dry brushing to enhance character. |
Finally, for added protection, a clear matte topcoat can be applied. This step not only seals my work but also adds durability while maintaining the soft, vintage aesthetic I aim for.
Distressing Furniture: Methods and Tools Needed
I recommend starting with sandpaper, ideally a variety of grits ranging from coarse (80) to fine (220). This will help achieve that worn appearance by effectively smoothing edges and creating imperfections that mimic years of use.
Techniques for Distressing
Using a hammer or a chain, gently tap on the edges and surfaces to create dents. This method adds character effectively without requiring too much finesse. For a more rustic feel, consider employing a paint scraper or utility knife to chip away at the paint, revealing underlying wood in areas where wear would naturally occur.
Additional Tools
When distressing, having a wire brush can be beneficial. Lightly scraping over the surface helps to lift the paint slightly, producing a naturally aged appearance. Alternatively, a wet sponge dipped in vinegar can enhance the effect by eroding the paint edges. Gloves are advisable to protect your hands throughout the distressing process.
Finally, finish off with a protective clear coat to seal the distressing and ensure durability. Choose a matte or satin finish to maintain that rustic vibe.
Incorporating Fabric and Textiles in Shabby Chic Designs
Using textiles is a straightforward way to enhance the overall aesthetic of a space with a vintage appeal. I recommend choosing soft, natural fabrics like linen, cotton, or lace that embody the relaxed vibe of this style. These materials can instantly elevate an ambiance by adding warmth and texture.
Embellish chairs or settees with cushions covered in floral or pastel patterns. Mix and match prints to create a layered look without overwhelming the eye. A vintage quilt draped over the back of a sofa not only provides a cozy touch but also showcases character.
Window treatments play an essential role; I prefer sheer, flowing curtains that allow natural light to filter through, adding an ethereal quality to the room. Incorporate ruffled or lace details for added charm. It’s important to maintain a light color palette, as darker shades tend to detract from the airy essence of this design theme.
A great way to introduce textiles is through upholstery. Reupholstering a chair with a faded floral fabric can breathe new life into the piece while maintaining a vintage feel. Accented with buttons or trim, such pieces can become focal points in the room.
Don’t overlook the importance of accessories. Table runners, placemats, and napkins can be layered to create visual interest. Textiles showcasing natural hues or muted tones will blend seamlessly and support the hand-crafted, rustic atmosphere.
Finally, consider incorporating textiles with personal meaning, such as family heirlooms or items collected over time. These pieces not only add depth but also tell a story, enhancing the unique charm that embodies this style.
Accessorizing Your Shabby Chic Furniture for Maximum Impact
Incorporate vintage accessories to enhance the charm of your revamped pieces. Think about adding items like antique mirrors, glass vases, or wrought-iron décor to create a cohesive look. Layering textures is key; use linen table runners or crochet doilies to soften hard surfaces.
Incorporating decorative pillows can bring life to upholstered chairs or sofas. Choose fabrics with delicate floral prints or soft pastels to match the overall aesthetic. Mixing patterns within a similar color palette can add depth without overwhelming the space.
Consider the use of natural elements such as driftwood or stone accents. These can serve as rustic centerpieces on a coffee table or as unique drawer pulls, enhancing the organic feel of the space. Additionally, vintage books or rustic crates can function as quirky side tables or storage solutions.
Lighting plays a significant role in setting the mood. Opt for soft, warm bulbs in vintage-style fixtures. A worn chandelier or a pair of antique sconces can make a striking statement, while string lights add a whimsical touch to any corner.
Lastly, don’t underestimate the power of plants. Incorporating potted herbs or fresh flowers can breathe life into your setting. Use weathered pots to complement the furniture’s aesthetic, ensuring a seamless integration into your design.
Maintaining and Caring for Shabby Chic Furniture Over Time
Regular dusting with a soft cloth prevents dirt buildup on surfaces. I opt for a gentle microfiber cloth to ensure delicate paint finishes remain intact.
Occasional cleaning with a mild soap solution keeps items looking fresh. I mix a couple of drops of gentle dish soap with warm water, dampening a cloth before wiping surfaces. It’s crucial to avoid soaking the wood, as excess moisture can damage the integrity of the pieces.
For preventing scratches and wear, I always use coasters under drinks and placemats under dishes. This simple habit drastically reduces surface wear.
Every few months, I check for any signs of wear or damage. If I see chips in the paint or small scratches, I take the time to touch up those areas using the same paint I originally applied. It’s a quick way to keep everything looking cohesive.
A periodic application of wax or a dedicated furniture conditioner nourishes the finish and offers added protection against daily use. I prefer using natural waxes, as they enhance the texture and luster of the paint without leaving a synthetic sheen.
It’s essential to keep pieces out of direct sunlight whenever possible. UV light can fade colors over time. I ensure that items are positioned in a way that minimizes their exposure to harsh sunlight, which helps maintain their vibrancy.
Lastly, avoiding excessive humidity is crucial. In damp environments, I utilize dehumidifiers to combat moisture levels, ensuring that the wood remains stable and free from warping.