

Utilize a heat source like a hairdryer to soften the material, making it more pliable and easier to manipulate. Carefully apply heat to the area around the fasteners for about 30 seconds, avoiding overheating that could damage surrounding parts.
When the synthetic components have softened, employ a pair of pliers or a small screwdriver wrapped in cloth to grip and twist the fastener, applying slow, steady pressure. This technique should help in loosening the connection without causing damage to the surrounding assembly.
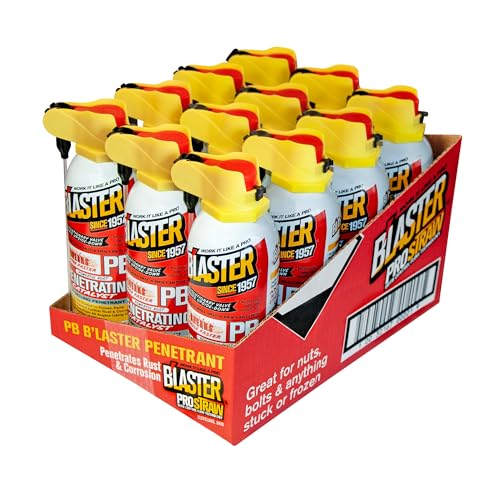
If the fasteners remain stubborn, consider using a penetrating oil to further ease the removal process. Spray a small amount around the base of the fastener and allow it to sit for a few minutes before attempting extraction again. Patience and gentle movements work best in these situations.
Identifying the Type of Fasteners Used
Assess the shape and size of the fasteners. Ikea commonly employs various designs, including cross-head, slotted, and hexagonal. A close inspection can reveal the exact type, aiding in the selection of appropriate tools for extraction.
Assessing Material and Size
Evaluate the texture and thickness. Most are molded plastic, standard in terms of length, usually ranging from 15mm to 25mm. Use calipers to achieve accurate measurements, ensuring the chosen tool aligns perfectly with the component.
Checking Compatibility with Tools
Examine the head design to determine the correct screwdriver or bit required. For example, a Phillips head requires a corresponding driver, while a hex design necessitates an Allen key. Accurate identification minimizes damage during the extraction procedure.
Gathering the Necessary Tools for Removal
Begin with a flathead screwdriver, crucial for prying the head of the fastener. Select one that fits comfortably in your grip and matches the size of the screw head. A precision toolset can offer various sizes, which is advantageous.
A pair of pliers is beneficial for gripping and twisting. Opt for needle-nose pliers for tighter spots, allowing for better maneuverability while working in confined areas.

A plastic or nylon wedge might be handy for creating space and leverage around the connection without damaging the surrounding material.
Consider a small hammer. Light taps can assist in loosening stubborn fixtures. Use it cautiously to avoid harming the surrounding structure.
Your workspace organization plays a role. Keep a magnetic tray or a small bowl nearby to prevent any loss of fasteners as you proceed.
Lastly, some safety glasses can protect your eyes from flying debris during the disassembly. This small step can safeguard against unexpected mishaps.
Ensure to have all items at hand before beginning; preparation saves time and minimizes frustration.
Assessing the Condition of the Fasteners Before Removal
Inspect each fastener carefully for signs of wear or damage. Cracks, warping, or fading can indicate the plastic’s compromised integrity, potentially affecting the removal process.
Check for tightness; if the fasteners appear to be stripped or spinning without resistance, note this as it may necessitate a different approach.
Consider temperature effects; cold can make plastic more brittle, while heat may soften it, impacting removal techniques. Ensure the environment is suitable by maintaining moderate temperature.
Test the flexibility by gently twisting or nudging the fasteners. A slight give suggests they might come out more easily, while excessive rigidity could lead to breakage.
Utilize a magnifying glass for a closer view of any imperfections or irregularities. This can reveal underlying issues that might not be immediately visible.
Document any findings. Taking notes on the condition will help in choosing the right tools and methods for extraction.
Utilizing Heat to Loosen Tight Fasteners
Applying heat creates expansion in the material, which can effectively facilitate the loosening of stubborn fasteners. Use a heat gun or hairdryer for precise application, ensuring not to damage surrounding parts.
Follow these steps for optimal heat application:
- Set the device to a moderate setting to avoid overheating.
- Hold the heat source about 6 inches away from the fasteners, moving it in a circular motion.
- Monitor the area closely to prevent any deformation of nearby components.
Once the material is warmed, assess the tension:
- Test the resistance while gently twisting the tool used for extraction.
- If necessary, reapply heat as required. Avoid prolonged exposure to concentrated heat.
After loosening, allow components to cool before proceeding with further disassembly to prevent any unintended damage. This method can be particularly beneficial for components subjected to stress or environmental factors over time.
Applying lubricants to facilitate removal
I recommend using a penetrating oil like WD-40 or a silicone-based lubricant. These products can significantly ease the extraction process. Apply the lubricant directly onto the threaded area where the fastener is seated. Allow it to sit for at least 10-15 minutes to penetrate the material effectively.

For particularly stubborn joints, heat the area slightly before applying the lubricant. This will help the oils soak into the threads better. If the location permits, a heat gun or hairdryer can generate the necessary warmth.
After applying the lubricant, use a torx or flathead screwdriver, depending on the type of connector, to gently twist counter-clockwise. Doing this should reduce friction, making the task easier. Always ensure to check for any residual lubricant before reassembling or working with other components.
In some cases, using a combination of lubrication and tapping gently on the tool’s handle may help break any form of adhesive bond that might have formed over time.
Using the Right Technique for Unscrewing
Apply steady and even pressure counterclockwise to install fixtures. Ensure your grip is firm but not excessive to avoid stripping or damaging the head. Utilizing an appropriate driver, whether a screwdriver or power tool, allows for better torque application.
For manual turns, position the driver head fully seated within the head of the fastener. This minimizes slippage. In cases of stubborn fixtures, consider gently tapping the driver with a hammer to create impact and loosen the grip.
| Technique | Detail |
|---|---|
| Steady Pressure | Apply consistent force to avoid damage. |
| Driver Type | Select suitable screwdriver or power driver for efficiency. |
| Proper Seating | Ensure correct alignment to prevent slippage. |
| Impact Method | Use a hammer for tight fixtures to help break hold. |
Consider adjusting the speed on power tools. Slower speeds provide control, while higher speeds can quickly strip the head. If resistance builds, halt the process and reassess; excessive force can lead to damage.
Dealing with Broken or Stripped Fasteners
If I encounter a broken or stripped fastener, I avoid force as this can worsen the situation. First, I assess the damage. If the head is broken, I check if there’s enough of the shaft left to grab onto with pliers. Grip firmly and turn slowly to extract it. If the head is entirely missing, I might need to drill out the remaining shaft.
Using a Screw Extractor
A screw extractor is extremely useful for this issue. I select one that matches the diameter of the post. After drilling a small pilot hole into the center of the shaft, I insert the extractor, turning it counterclockwise. This method often grips and removes the stubborn piece without damaging the surrounding material.
Employing a Dremel Tool
If standard methods fail, I consider using a Dremel tool. I create a groove across the top of the shaft, allowing a flat screwdriver to grip the fastener. This requires precision, so I take my time to ensure a clean cut. With the right angle, I can often extract the stubborn part successfully.
In some cases, if the material surrounding the fastener is not too damaged, replacing the fastener with a slightly larger one allows me to bypass the issue altogether. I ensure the new fastener fits securely, keeping everything intact.
Heightened caution is vital during this process to prevent further damage.
Replacing Removed Fasteners with Alternatives
Consider using metal or rubber alternatives that match the original length and diameter for optimal stability. Ensure compatibility with the existing holes to maintain structural integrity.
For wood pieces, wood screws can be a solid option. Choose screws that are slightly longer than the original to secure a tight hold. Pre-drilling pilot holes can reduce the risk of splitting the material.
If opting for plastic fasteners, look for high-quality nylon or polycarbonate types that provide enhanced durability. These materials are often more resilient than standard versions and can withstand greater stress.
In situations where aesthetics matter, select options that mirror the original color or finish. Many manufacturers offer paintable screws that allow for customization to blend seamlessly with your item.
For quick fixes, consider using adhesive or compound fillers to keep components in place temporarily while awaiting proper replacements. Ensure these solutions do not interfere with future repairs or adjustments.
Always secure the replacements firmly, avoiding over-tightening to prevent damage to the components. Regularly check the condition of these substitutes, especially in high-use areas, to ensure longevity and safety.


