Crafting small decorative pieces for enchanting outdoor scenes can be an enjoyable and rewarding venture. Begin with simple materials like twigs, stones, and clay. For a charming table, gather a few flat stones and stack them securely. Attach a round twig on top with a suitable adhesive to form a tabletop. This design is durable and blends naturally into the surroundings.
Seating arrangements can be made from bark slices or small logs. Cut them to suitable heights, ensuring they remain stable. You can even incorporate painted pebbles for added whimsy. Paint them with bright colors or intricate designs to mimic picnic stools, making them a playful addition to your tiny setting.
For a touch of magic, consider adding miniature lanterns. Use tiny jars or even acorn caps filled with a small LED light or a glow stick. Secure them onto your table or hang them from slender twigs. This will create a delightful atmosphere during dim evenings, perfect for storytelling under the stars.
The key is to keep all elements in proportion while allowing for creativity. You may also incorporate fabric scraps to create cushions or canopies, adding comfort and style to the intricate outdoor set. Enjoy the process, and let your imagination flourish as you design a captivating scene.
Selecting Materials for Miniature Furniture
Begin with wood, particularly balsa or plywood. Both are easy to shape, lightweight, and provide a natural aesthetic. Balsa is softer, making it ideal for intricate designs, while plywood boasts more durability.
Natural Elements
Incorporate stones, twigs, and moss for an organic feel. Pebbles can serve as tabletops or seat bases, while twigs can form legs or frameworks. Moss adds color and texture, enhancing visual appeal.
Recycled Items
Consider repurposing materials from household items. Bottle caps, wine corks, and matchsticks are excellent candidates. They are often overlooked but can transform into charming details such as stools or tables. Metal pieces can introduce a rustic flair.
For finishing touches, paint or stain can be applied to ensure longevity and improve aesthetics. Non-toxic options are preferable to maintain safety within your decorative scene.
Experiment with contrasting textures; combining smooth finishes with rugged surfaces can create a dynamic look that draws attention. Always prioritize stability and balance, ensuring that each piece can withstand slight movement without tipping over.
Creating a Comfortable Chair for Enchanted Settings
Select materials that ensure durability and aesthetics. I often choose twigs for a rustic look or scrap fabric for upholstery. For a whimsical touch, I use vibrant paint on wood or stones to make unique designs.
Dimensions and Structure
Focus on proportions that suit the scale of the setting. A chair about 3-4 inches tall works well for most setups. When constructing the frame, I typically shape it in a ‘C’ or ‘L’ formation for a more inviting appearance. Consider adding a slight curvature to the backrest to enhance comfort.
Finishing Touches
To add flair, decorate with natural elements. Incorporating moss or small leaves can provide a cozy vibe. For added comfort, I sometimes glue a piece of soft fabric onto the seat. This small detail encourages interaction within the setting, making it visually appealing and inviting.
Building a Tiny Table with Natural Elements
Choose small twigs or sticks as the base. For stability, select ones of similar thickness, each about 3-5 inches long. Lay four pieces parallel to form a square, then use shorter sticks to connect the corners, creating a frame.
Next, gather small pebbles or flat stones to serve as the tabletop. These should be roughly uniform in size to maintain balance. Arrange them closely together to form a solid surface. If desired, you can glue them using a natural adhesive, like craft glue, for added durability.
For extra flair, incorporate moss or lichens as decoration. Place small clumps around the edges of the stones to create a seamless look. This not only enhances the aesthetic but also connects the piece to its natural surroundings.
Complete the table by smoothing any rough edges on the wood with sandpaper, ensuring safe handling and an appealing finish. Consider painting the legs with non-toxic paint to add color, but keep it minimal to preserve the organic feel.
Finally, find a perfect spot for your creation within the enchanting scene. Position it near the seating area or by a bridge made of similar materials to create a cohesive look. This tiny table can serve as a delightful focal point in the whimsical setting.
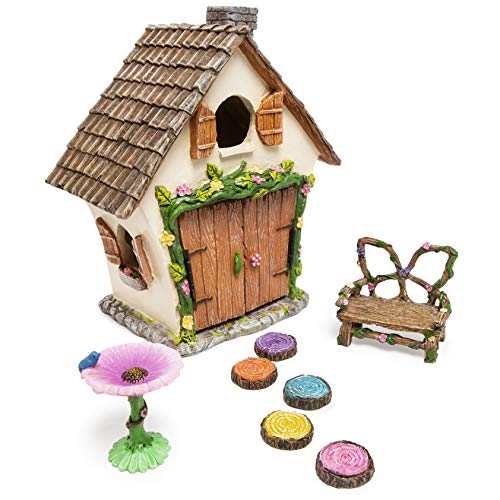
Designing a Miniature Garden Bench
For creating an enchanting seating piece, I focus on simplicity and natural aesthetics. I prefer using twigs or small branches for the structure, which provides authenticity and blends seamlessly with surrounding elements.
Begin by cutting two sturdy pieces around 6 inches long for the bench’s legs. These will anchor the entire design. Next, cut a longer branch, about 12 inches, for the seat. I ensure the seat is wide enough to accommodate tiny decorative characters comfortably.
Connect the legs to the seat with twine or hot glue, ensuring they are evenly positioned. I reinforce the joints for durability, especially if the bench will sit outdoors. To add charm, I often adorn the backrest with smaller twigs, creating an arch that gives it a whimsical touch.
Once assembled, I sand down sharp edges to ensure safety and comfort. A light coat of natural wood stain can enhance the bench’s appearance, making it look inviting while protecting it from weather elements.
| Material | Recommended Size | Purpose |
|---|---|---|
| Sturdy twigs | 6 inches for legs, 12 inches for seat | Benchtop structure |
| Twine or hot glue | N/A | Joining components |
| Sandpaper | N/A | Smoothing edges |
| Natural wood stain | N/A | Finish and protection |
Position the completed bench among colorful foliage or near a sparkling pebble path for a picturesque look. Incorporating small cushions made from soft fabric can add an extra layer of comfort, providing an inviting resting spot for miniature inhabitants.
Crafting Unique Fairy Garden Accessories
Use found objects creatively to enhance the charm of whimsical outdoor settings. Wine corks can be transformed into delightful toadstools. Simply paint them red with white spots to mimic classic mushrooms. For an enchanting touch, attach a small leaf or piece of paper as a cap.
Repurposing Natural Elements
Twigs and branches from your backyard serve as perfect materials for crafting tools and accessories. For example, utilize a thin twig to create a rustic broom. Cut it to about five inches long and bundle the end with fine twine for a realistic appearance.
Adding Decorative Touches
Shells or stones can become charming decor pieces. A simple thumb-sized shell can serve as a unique bowl. You can even use stones as table settings; paint them in bright colors to simulate plates or drinkware. Small glitter accents create an enchanting appeal, capturing sunlight beautifully.
By doing this, not only do I create delightful accents and enhance playfulness, but these accessories also bring life to any miniature scene. The use of natural materials adds an organic feel, making the tiny compositions an inviting and magical experience.
Painting and Finishing Techniques for Furniture
To achieve captivating results, I apply multiple layering techniques. Begin with a primer that adheres well to the chosen material, ensuring an even base coat. Acrylic paints work brilliantly due to their quick drying time and vibrant colors.
For a rustic charm, consider using a dry brush technique. Lightly dip a stiff-bristled brush into the paint, then wipe off excess on a paper towel. Gently drag the brush across the surface, allowing the base color to peek through and create texture.
When detailing, acrylic markers are perfect for intricate designs. They offer precision and control for fine lines or patterns, enhancing visual appeal. Experiment with shades to add depth, using a darker tone for shadows and a lighter one for highlights.
After painting, sealing the design is crucial for longevity. I recommend a clear acrylic sealer–this provides protection against moisture and fading while maintaining the paint’s vibrancy. Spray or brush-on options are both effective; choose based on your comfort level.
Incorporate natural elements into the finish for unique results. A mixture of paint and sand can create a textured surface that mimics natural wood grain. This blend can be applied to chairs or tables for a stunning, earthy appearance.
Lastly, adding metallic finishes can elevate the design. Gold or silver paint used sparingly on edges can bring a touch of elegance. Use a fine brush for precision, ensuring the metallic accents enhance without overpowering the overall look.
- Use primer for a strong foundation.
- Dry brush technique for a textured look.
- Acrylic markers for detailed decoration.
- Clear acrylic sealer to protect the finish.
- Mix paint with sand for a natural texture.
- Incorporate metallic finishes for elegance.
Experiment with combinations of these methods to develop a unique style that reflects personal creativity.
Incorporating Plants into Your Furniture Design
To enhance the aesthetic appeal of your tiny constructions, I often integrate live plants directly into the design. This approach not only adds a natural touch but also seamlessly merges functional elements with greenery.
Choosing the Right Types of Greenery
Small succulents or air plants are ideal due to their low maintenance requirements and compact size. I prefer using plants that thrive in limited soil and moisture, ensuring they will endure in natural habitats without constant care. Consider selecting hardy varieties that can withstand exposure to the elements.
Planting Techniques for Optimal Integration
Creating small pockets or troughs within the structure during the crafting process allows for the insertion of plants. For instance, I carve out sections in clay or use small wooden boxes with openings that can accommodate soil. This way, I embed the plants within the furniture, making them an integral part of the design.
Utilizing moss along edges or as ground cover can enhance the appearance while maintaining moisture for the plants. I often apply a layer of pebbles at the base to aid in drainage and prevent root rot, ensuring the longevity of my green additions.
This technique transforms ordinary accents into living features, resulting in a delightful interplay between the crafted items and nature.
Arranging the Furniture in Your Fairy Garden
Positioning items strategically can significantly enhance the charm of your enchanted space. I recommend starting by visualizing different configurations before permanently placing each piece.
-
Focal Points: Identify a central point, such as a lovely stone or a decorative element, and arrange seating around it. This draws the eye and creates an inviting gathering spot.
-
Layering: Consider varying the height of structures. Place taller items, like plant stands or small trellises, in the back, while keeping shorter elements, like benches or chairs, in the front for a pleasing visual effect.
-
Walkways: Leave enough space between furniture for paths or accessibility. I often use small pebbles or mulch for pathways that guide visitors through the tiny environment.
-
Natural Arrangements: Incorporate natural elements as part of the setup. Position rocks or logs as makeshift tables or seats to blend the furniture with the surroundings seamlessly.
Experimenting with various placements helps to determine what feels right in your scene. I sometimes take photos of different configurations, allowing me to compare and choose the best layout without committing right away.
Don’t forget to consider sunlight and shadow when arranging. Watching how light interacts with spaces throughout the day can lead to delightful discoveries!
Lastly, adjust the placement of items as plants grow or seasonal changes occur. Flexibility keeps the atmosphere fresh and engaging throughout the year.


