
 Caleb Turner
Adequate ventilation is my first recommendation for tackling humidity issues in the upper space of your home. Installing vents or ensuring existing ones are unobstructed allows moist air to escape, preventing it from accumulating and causing trouble. I often suggest venting through soffits or gables to create an effective airflow system.
Insulating pipes and checking for leaks can significantly reduce moisture levels. By wrapping vulnerable areas in insulation, I have seen a marked decrease in humidity issues. It’s also prudent to inspect your roof for any openings or damages that could allow water intrusion.
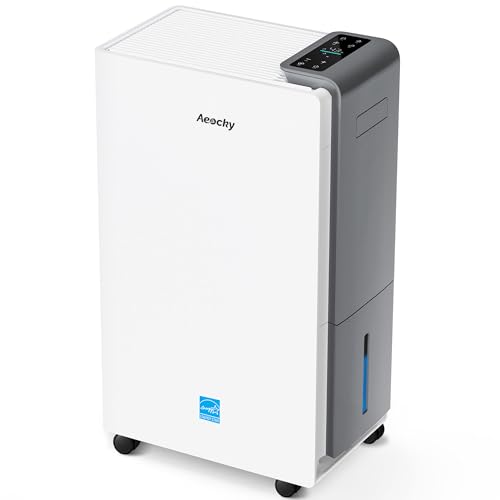
Using a dehumidifier has proven beneficial in many situations. These devices draw excess moisture from the air, creating a drier environment that’s less prone to dampness. Keeping an eye on humidity levels with a hygrometer can help in maintaining comfortable conditions.
Regular maintenance is key. Cleaning gutters and ensuring downspouts are appropriately directing water away from the home are simple steps I’ve found to be very effective. By staying proactive, I can maintain a dry and comfortable upper space for the long haul.
Identify the Sources of Moisture in Your Space
Inspect any potential leaks in the roof or walls; a small crack can create significant humidity issues. Look for water stains or signs of mold growth, indicating persistent moisture ingress.
Check the ventilation system. Insufficient airflow can trap moisture, especially in areas with high humidity, such as bathrooms and kitchens. Ensure vents are unobstructed and functional.
Evaluate Insulation and Building Materials
Poor insulation can allow warm air to escape, leading to temperature fluctuations that encourage atmospheric moisture. Inspect insulation integrity and replace any damaged sections. Consider using vapor barriers in key areas to minimize moisture transmission.
Understand activities within the home, such as laundry or cooking, that can contribute to humidity. Ensure exhaust fans operate effectively. If these activities are frequent, additional ventilation solutions may be necessary.
Seasonal Factors and Environmental Conditions
Monitor the outdoor humidity levels. In seasons with high humidity, moisture may infiltrate more easily. Use a hygrometer to track levels inside your space and consider utilizing dehumidifiers during peak moisture periods.
Finally, evaluate your external drainage system. Ensure gutters and downspouts direct water away from the property, preventing water from pooling around the foundation.
Improve Ventilation to Reduce Humidity Levels
Installing ventilation systems is crucial for lowering moisture within enclosed spaces. Consider adding roof vents or soffit vents to allow air circulation. Properly spaced, these vents create a balanced airflow, expelling humid air while drawing in drier outside air.
Types of Ventilation Systems
- Passive Ventilation: Includes vents positioned at eaves and ridge lines. This method harnesses natural airflow to regulate temperature and humidity.
- Mechanical Ventilation: Utilizes exhaust fans or whole-house ventilation systems. Fans can be installed to ensure consistent air movement, especially in areas prone to dampness.
Regular Maintenance
Check and clean vents regularly to prevent blockages caused by dust, debris, or pests. Maintaining unobstructed pathways allows for optimal airflow and minimizes moisture accumulation.
Consider installing a hygrometer to monitor humidity levels. Keeping this data on hand helps me make informed adjustments to the ventilation system as needed.
Incorporating these modifications leads to a significantly drier environment, mitigating issues related to buildup and enhancing the overall air quality. Aim for a consistent airflow for best results.
Insulate Your Loft Properly to Prevent Temperature Fluctuations
I ensure proper insulation in the attic by using materials such as fiberglass, rock wool, or spray foam. These options provide excellent thermal resistance, reducing heat loss during winter and heat gain in summer.
I measure the required thickness based on the recommended R-value for my region. Generally, I aim for R-30 to R-60, depending on local climate conditions. This helps maintain a stable temperature, minimizing humidity buildup.
Sealing gaps and cracks around joints and seams is critical. I use caulk or expanding foam to fill these voids, preventing air leaks that contribute to temperature changes and moisture accumulation.
If there are ducts in the attic, I insulate them as well. Insulated ductwork helps maintain the temperature of the air being transported, further stabilizing the overall environment and mitigating excess moisture.
I regularly check insulation for settling or compression. If any areas are compromised, I replace or add more material to maintain the needed thermal barrier.
In addition, I consider installing radiant barriers, especially in hot climates. This reflective layer can help reduce heat transfer, keeps spaces cooler, and aids in moisture control.
Finally, I pay attention to the measuring of relative humidity and temperature after installation. Keeping an eye on these metrics helps monitor the effectiveness of insulation in maintaining a comfortable atmosphere and reducing excess moisture.
Use dehumidifiers to control moisture accumulation
Incorporating a dehumidifier is a practical approach for managing excess moisture. I recommend selecting a unit with a suitable capacity based on the volume of space. Typically, units between 30 to 70 pints per day are ideal for attics, varying by local humidity levels.
It’s critical to place the dehumidifier in an optimal location where air circulation is adequate. Avoid corners or enclosed spaces to ensure the device operates efficiently. Regularly monitoring the water reservoir is essential; many modern models offer automatic shut-off features when full to prevent overflow.
Setting the humidistat to maintain indoor humidity levels between 30% and 50% can significantly decrease moisture issues. I suggest using a hygrometer to measure humidity accurately and adjust settings as necessary.
| Dehumidifier Type | Optimal Area Coverage | Average Capacity (Pints/day) |
|---|---|---|
| Small | Up to 1,000 sq ft | 30-40 |
| Medium | 1,000 – 1,500 sq ft | 50-60 |
| Large | More than 1,500 sq ft | 70+ |
Regular maintenance is crucial. Clean the filter monthly to ensure efficient airflow and efficiency. Additionally, periodic checks for dust buildup on coils can enhance the unit’s performance.
Lastly, integrating a dehumidifier into an ongoing maintenance routine alongside other moisture reduction strategies leads to a noticeable improvement in comfort and air quality over time.
Seal Any Gaps to Prevent Warm Air from Reaching Cold Surfaces
Every gap in floorboards, ceilings, and walls can allow warm air to escape and come into contact with chillier surfaces. I recommend inspecting areas such as electrical outlets, vents, and joints to identify any leaks. Using caulk or expanding foam can effectively seal these openings.
Common Areas to Check
Focus on seams where walls meet ceilings, corners, and areas around windows and doors. Insulating these points diminishes thermal bridging, which occurs when warmth is transferred to cooler materials, resulting in moisture buildup. Consider weatherstripping for movable components like windows and doors to minimize air leakage.
Tools for Sealing
I suggest using a simple caulking gun for applying sealants, as it provides precision. Pair it with a utility knife for trimming excess material. In tight spaces, foam insulation can be advantageous, as it expands to fill gaps effectively. Regularly inspect these seals to ensure they remain intact and functional.
Regularly monitor and maintain attic conditions
Conduct checks of humidity levels at least once a month. A hygrometer is a valuable tool for this purpose, providing accurate measurements of moisture in the air. Ideally, aim for humidity levels between 30% and 50%.
Inspect Insulation and Ventilation
Examine insulation materials for gaps or wear. Ensure that they are installed correctly to avoid thermal bridging. Regularly assess ventilation; look for any blockages in vents that could restrict air flow, which might exacerbate moisture issues.
Address Leaks Promptly
Inspect the roof, walls, and any pipes or ducts for potential leaks. Promptly address any water ingress to mitigate the buildup of moisture. Even minor leaks can lead to significant humidity problems if left unattended.
FAQ:
What are the main causes of condensation in the loft?
Condensation in the loft typically results from a combination of factors. The primary cause is the difference in temperature between the warm, moist air inside the house and the cooler surfaces in the loft. This can happen due to inadequate insulation, which allows heat to escape and causes surfaces to become cold. Additionally, everyday activities like cooking, showering, and drying clothes contribute moisture to the air. Poor ventilation in the loft exacerbates the issue by trapping humid air, leading to condensation.
How can I improve ventilation in my loft to reduce condensation?
Improving ventilation in your loft can be achieved through several methods. One effective approach is to install roof vents or soffit vents that promote air circulation. Ensuring that any existing vents are clear of obstructions is also important. Adding a ridge vent at the peak of the roof can facilitate the escape of warm air. Additionally, consider using mechanical ventilation systems, such as extractor fans, to help expel moist air. Regularly checking for blockages in ventilation paths is essential for maintaining proper airflow.
What role does insulation play in preventing condensation in the loft?
Insulation plays a significant role in preventing condensation in the loft by maintaining a consistent temperature. A well-insulated loft helps keep warm air inside the living spaces, reducing the temperature difference between the indoor air and the surfaces in the loft. This minimizes the likelihood of moisture in the air condensing on cold surfaces. It’s important to use appropriate materials and ensure that insulation is installed properly without gaps, as this can significantly enhance thermal performance and moisture control.
Are there specific products I can use to reduce condensation in my loft?
Yes, there are various products designed to combat condensation in loft spaces. These include moisture absorbers, which can be placed in the loft to soak up excess humidity. Additionally, breathable membranes can be applied to roofs to help manage moisture while allowing for air circulation. You can also consider using dehumidifiers in the loft during particularly humid seasons to control moisture levels effectively. It’s advisable to consult with specialists to find suitable products based on your specific loft conditions.


