To rejuvenate your light-toned synthetic weave seating, I recommend a mixture of warm water and mild dish soap. This simple blend works wonders on dirt and grime. Begin by dampening a cloth with the solution and gently scrubbing the surfaces, paying special attention to crevices where dust accumulates.
For tougher stains, a paste made from baking soda and water serves as an excellent abrasive. Apply it directly onto the affected areas, then scrub using a soft brush. Rinse thoroughly to remove any residue, ensuring the elegance of your seating remains intact.


Incorporating a regular maintenance routine not only enhances the appearance but also prolongs the lifespan of your outdoor pieces. A light wipe-down every few weeks can prevent the build-up of unsightly marks and ensure that your possessions stay looking fresh and inviting.
Cleaning Techniques for Light-Colored Synthetic Rattan
I recommend using a mild detergent mixed with warm water to address stubborn stains on light-colored synthetic rattan. Apply this solution with a soft cloth or sponge, ensuring to wipe gently to avoid damaging the texture. For areas that require more attention, a soft-bristled brush can help reach into crevices.
Routine Maintenance
Regular upkeep consists of simply rinsing with a hose to remove dirt and debris. This prevents buildup and keeps the material looking fresh. A quick wipe with a damp cloth after rain or heavy use can prevent lingering moisture from leading to mildew.
Stain Removal Tips
If deeper stains arise, consider using a paste of baking soda and water. Apply it to the stain, let it sit for 10-15 minutes, and then scrub gently before rinsing. For oily stains, a drop of dish soap mixed with water can effectively cut through grease.
| Issue | Solution |
|---|---|
| Dust and Dirt | Hose down regularly |
| Food Stains | Mild detergent and warm water |
| Grease Stains | Dish soap with water |
| Deep Stains | Baking soda paste |
Always ensure that the surface is dry before storing the items indoors to prevent moisture-related issues. Protecting these items with UV-resistant covers can also extend their lifespan.
Choosing the Right Cleaning Supplies
I recommend gathering a few key items before tackling your project. The right materials will influence the overall result and ensure that the items remain in great condition.
Recommended Supplies
- Mild Detergent: Opt for a gentle soap, such as dish soap, which won’t harm the surface.
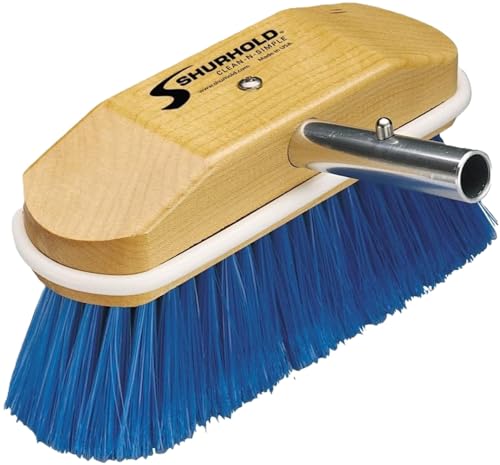
- Soft Brush: A soft-bristled brush or sponge helps to lift dirt without scratching.
- Bucket: Use a dedicated container for mixing your cleaning solution, making it easy to transport and apply.
- Microfiber Cloths: These are excellent for drying and polishing without leaving lint behind.
- Water Hose or Spray Bottle: A hose provides a strong rinse, while a spray bottle is great for controlled application.
Avoid Harmful Chemicals
Stay away from bleach or abrasive cleaners, as these can damage the finish and create discoloration. Always check the labels of any products you intend to use to ensure they are safe for the type of material you’re working with.
By selecting the right tools, you make the process simpler and preserve the quality of your pieces.
Preparing the Furniture for Cleaning
I first ensure the area is well-ventilated, ideally outdoors or in a spacious, well-lit room. Next, I remove any cushions, pillows, or accessories to prevent them from getting wet or soiled during the process. This step is key in maintaining their appearance.
I then inspect the surfaces for any visible debris, such as dirt, leaves, or dust. A soft brush or broom gently sweeps away the loose particles. I pay particular attention to the crevices and joints, as these areas tend to accumulate grime.
If needed, I check for any signs of damage or wear. Identifying these issues beforehand allows me to address them appropriately, whether that’s through repair or adjusting my cleaning approach to avoid further harm.
Finally, I gather all necessary supplies, ensuring I have everything on hand to streamline the process. This preparation minimizes interruptions and keeps the task efficient.
Step-by-Step Cleaning Process
Begin by relocating the item to a shaded area. Direct sunlight can cause cleaning solutions to evaporate quickly, reducing their effectiveness. Ensure the surface is free from dust and debris using a soft brush or a dry cloth.
Preparation of Cleaning Solution
Mix a solution of warm water and a mild dish soap in a bucket. Aim for a ratio of two tablespoons of soap per gallon of water. For stubborn stains, consider adding a cup of white vinegar. This combination will help lift dirt without damaging the surface.
Application and Treatment
Using a sponge or soft-bristled brush, gently scrub the surface with the soapy solution. Focus on areas with visible stains or discoloration, applying extra pressure as needed. Rinse the sponge frequently to avoid redistributing dirt. After treatment, rinse thoroughly with a hose, ensuring no soap residue remains, as this can attract dirt. Allow the item to air dry completely before returning it to use.
Removing Stains and Discoloration
To tackle stubborn stains on this type of seating, I recommend making a paste using baking soda and water. Apply it to the affected areas and let it sit for about 15 minutes before gently scrubbing with a soft brush. Rinse thoroughly with clean water and dry with a soft cloth.
For Specific Stains
For grease stains, I find that a mix of dish soap and warm water works wonders. Apply with a sponge, allow it to penetrate for a few minutes, and rinse off. For ink or colored stains, rubbing alcohol on a cotton ball is effective. Dab it on the stain gently, then wipe away with a damp cloth.
Dealing with Discoloration
For overall yellowing, a solution of white vinegar and water can help. Mix equal parts and spray onto the surface. Let it sit for a few minutes before wiping off. This method not only cleans but also helps restore the original brightness.
Drying and Protecting the Outdoor Seating
After the cleansing routine, I ensure the seating is thoroughly dried before placing it back outdoors. I utilize a soft cloth to absorb excess moisture, particularly in intricate areas where water may accumulate. If possible, I move the pieces to a shaded spot or use a fan to speed up the drying process.
To safeguard against future damage, I apply a UV protective spray specifically designed for outdoor materials. This creates a barrier that helps prevent discoloration and brittleness caused by sun exposure. I check the product’s instructions carefully for optimal application methods and drying times.
Finally, I store the items in a dry area during inclement weather or winter months, using protective covers designed for this type of seating. This proactive approach extends the lifespan of my pieces, keeping them looking fresh and vibrant throughout the seasons.
Regular Maintenance Tips for Longevity
To prolong the life of your outdoor seating, I recommend routinely inspecting it for any signs of wear or damage. Detecting issues early can help prevent further deterioration.
Cleaning Schedule
- Perform light wiping weekly to eliminate dust and debris.
- Conduct a thorough wash every month to maintain its condition.
- Seasonal deep cleaning prepares it for various weather changes.
Protective Measures
- Store items indoors during extreme weather conditions to prevent fading and cracking.
- Utilize furniture covers for added protection against UV rays and moisture.
- Apply a UV protectant spray every few months to shield from sun damage.
By sticking to this regimen, I can ensure that my decor remains in great shape, saving time and money on replacements or repairs in the long run.