Mix a solution of warm water and gentle soap, then apply it to the surface using a soft cloth or sponge. This combo effectively lifts dirt and grime without causing harm. Avoid abrasive agents; they could scratch and damage the material.
If stubborn stains linger, a paste made of baking soda and water works wonders. Apply it directly to the affected area and let it sit for about 15 minutes. Then, gently scrub with a soft-bristled brush before rinsing with clear water.


Finish by rinsing thoroughly with plain water to eliminate any soap or residue. Dry the items properly in the sun; ultraviolet rays will help in disinfecting and enhancing the color. For ongoing maintenance, consider applying a UV protectant to keep the polymeric surfaces looking fresh and resilient.
Cleaning Techniques for Outdoor Seating
I recommend using a mixture of warm water and mild soap to tackle dirt and grime. A soft cloth or sponge is ideal for applying this solution. Gently scrub the surface without using abrasive pads to avoid scratching.
Removing Stains
For tougher blemishes, a paste made from baking soda and water serves as an excellent option. Apply it directly to the stain, let it sit for about 10-15 minutes, then scrub gently before rinsing with clean water.
Protective Measures
After maintenance, consider using a vinyl protectant to guard against UV rays and prolong the lifespan of your outdoor seating. This application helps prevent fading and discoloration over time.
Always ensure the pieces are thoroughly dried after cleaning to prevent moisture-related issues. Regular upkeep keeps the outdoor seating looking fresh and inviting.
Gathering Necessary Cleaning Supplies
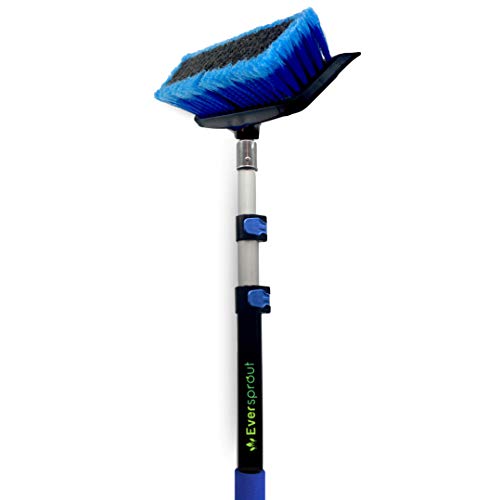
I recommend collecting a few specific items to ensure an effective cleaning session. First, grab a soft-bristle brush or sponge. This will help remove grime without scratching the surface. Next, secure a bucket to mix your cleaning solution.
Choose a mild detergent, such as dish soap. Avoid harsh chemicals that may damage the material. A spray bottle is also useful for applying the cleaning solution evenly.
For stubborn stains, consider using a mixture of water and white vinegar in your spray bottle. This natural solution works well on tough spots.
Don’t forget protective gloves to shield your hands during the process. A soft cloth or towel will be helpful for drying off surfaces after cleaning.
Finally, ensure access to a source of clean water for rinsing. Having these items accessible will streamline your effort and make the process more efficient.
Removing Loose Dirt and Debris
Begin with a handheld broom or a leaf blower to remove larger particles from surfaces. Focus on corners and crevices where dirt tends to accumulate.
For smaller debris, use a soft-bristle brush or a microfiber cloth. A gentle, sweeping motion prevents scratching while ensuring thorough pick-up.
Next, utilize a vacuum cleaner equipped with a brush attachment for hard-to-reach areas. This will lift dust and sand effectively.
After the initial debris removal, check for any stuck-on residues. Use a damp cloth to wipe surfaces lightly, ensuring no particles remain before moving to the next cleaning stage.
- Utilize a handheld broom or leaf blower for larger debris.
- Employ a soft-bristle brush or microfiber cloth for smaller particles.
- Use a vacuum cleaner with a brush attachment for tight spaces.
- Lightly dampen a cloth to catch any remaining dust.
Completing these steps prepares the items for deeper cleaning, maintaining their appearance and longevity.
Preparing a Cleaning Solution
I mix a solution using warm water and a mild dish soap. For every gallon of water, add about two tablespoons of soap, ensuring it’s well combined. This ratio strikes a balance, effectively lifting grime without risking damage to the material.
If stubborn stains persist, I incorporate a cup of white vinegar. The acidity helps break down tough spots while remaining safe.
For those seeking a natural alternative, I recommend using baking soda. Mixing a quarter cup of baking soda with a gallon of water creates a gentle yet effective cleaner, perfect for larger surfaces.
Finally, always stir the solution until it’s uniform before application. A well-combined mixture optimizes cleaning without leaving residue, ensuring a thorough treatment of the surfaces.
Scrubbing Stains and Spot Treatment
For stubborn marks, I apply a paste made from baking soda and water directly to the stain. Using a soft-bristle brush helps to gently scrub the area without scratching the surface. I ensure to work in small sections and rinse frequently to avoid any paste residue.
If a spill occurs, I act quickly. Blotting the area with a clean cloth removes excess liquid before treating the spot. For greasy stains, a mixture of dish soap and warm water effectively breaks down the grease. I use a sponge to apply the solution and scrub in a circular motion.
In cases of mold or mildew, I opt for a solution of equal parts vinegar and water. Spraying it directly on the affected areas allows for a thorough cleaning when left to sit for 10-15 minutes before scrubbing.
After scrubbing, rinsing the surfaces with a garden hose eliminates any remaining cleaning agents. It’s important to check for residue, as it can attract more dirt.
| Stain Type | Cleaning Solution | Method |
|---|---|---|
| Grease | Dish soap & warm water | Apply, scrub, rinse |
| Mold/Mildew | Vinegar & water (1:1) | Spray, leave, scrub, rinse |
| General Stains | Baking soda & water paste | Apply, scrub, rinse |
Regular maintenance keeps these items looking fresh. Incorporating spot treatments into my routine makes a significant difference in keeping surfaces in prime condition.
Rinsing and Drying the Furniture
Thoroughly rinse the surface with a garden hose to remove any soap residue. Start at the top and work your way down to ensure that all cleaning solution is washed away. Aim for a gentle spray to prevent any water from being forced into seams or crevices, as this could lead to mold growth.
Drying Techniques
For drying, use a soft, lint-free cloth to wipe excess water off. You can also let the pieces air dry in a shaded area. Direct sunlight may cause warping or fading, so it’s best to keep them out of intense heat. If you notice any remaining spots after air drying, give those areas a light buff with a cloth.
Final Touches
After ensuring everything is dry, look for any missed spots or areas that may need further attention. A last check goes a long way in keeping your outdoor seating looking fresh and ready for use.
Protecting Furniture from Future Damage
Regular maintenance is key to ensuring longevity. I recommend applying a UV protectant designed for outdoor materials. This will shield against sun damage, preventing fading and brittleness.
Always store your items indoors during winter or harsh weather conditions. This simple action minimizes exposure to elements that can weaken or discolor surfaces.
Choosing the Right Covers
Investing in high-quality protective covers is a smart choice. Look for breathable materials that prevent moisture buildup while shielding from dirt and debris. Ensure they fit snugly to avoid wind-related damage.
Routine Inspections
I prioritize conducting routine inspections for scratches, cracks, or any signs of wear. Promptly addressing minor issues can prevent them from turning into significant problems. A quick touch-up with appropriate repair kits can extend the lifespan significantly.
Regular Maintenance Tips for Longevity
To extend the lifespan of outdoor seating and lounge pieces, routine upkeep is crucial. Here are specific practices I follow:
- Seasonal Checks: Inspect items at the change of each season. Look for signs of wear, including fading, cracking, or any structural issues.
- Protective Covers: Utilize covers during harsh weather. Investing in high-quality protective gear minimizes exposure to elements that can cause deterioration.
- Storage Solutions: During off-seasons, store items in a dry, shaded space. If indoor storage isn’t possible, stack and store them safely out of reach from moisture and direct sunlight.
- Regular Dusting: Utilize a soft, dry cloth for dusting. This routine eliminates dirt buildup and keeps surfaces looking fresh.
- Avoid Harsh Chemicals: When maintaining surfaces, steer clear of abrasive cleaners and solvents that can cause harm to the material.
Incorporating these strategies into your maintenance routine will ensure outdoor items remain in great shape for years to come.


