To maintain the appearance of your dark metal outdoor seating, I recommend using a mixture of warm water and gentle soap. A soft cloth or sponge will help lift away dirt without scratching the surface. Make sure to rinse thoroughly with clean water to prevent any soap residue from dulling the finish.
If stubborn stains persist, a paste made from baking soda and water can work wonders. Apply the paste to the affected area, gently scrubbing with a soft brush or cloth, then rinse once again. This method effectively targets marks without damaging the protective layer of your materials.


For regular upkeep, a light coat of automotive wax not only enhances shine but also provides an additional barrier against the elements. Using it a few times a year can help keep your seating looking brand new, resisting the effects of sun and moisture.
Cleaning Techniques for a Sleek Look
For a polished appearance, I use a mixture of warm water and mild soap. I apply it with a soft cloth, ensuring to cover every inch. Particular attention is given to seams and crevices where dirt collects. Rinse thoroughly with a hose to eliminate any soap residue, then dry with a clean towel.
Dealing with Stubborn Stains
For persistent marks, I create a paste of baking soda and water. I gently scrub the area using a soft brush or sponge, then rinse well. If the stains persist, I use a vinegar solution, applying it directly to the affected spots.
Regular Maintenance Tips
I advise rinsing the surfaces regularly with water to prevent buildup from dust and debris. Seasonal deep cleans help restore their original allure. Investing in protective covers can also minimize exposure to the elements when not in use.
| Cleaning Method | Frequency | Notes |
|---|---|---|
| Warm water & soap | Monthly | Use a soft cloth |
| Baking soda paste | As needed | For tough stains only |
| Vinegar solution | As needed | Apply directly to stains |
| Rinsing with water | Weekly | Simple quick clean |
| Seasonal deep clean | Seasonally | For thorough upkeep |
Assessing the Condition of Your Furniture
I examine the surface for any visible signs of wear, such as scratches, fading, or peeling. These indicators can inform the cleaning process and help me decide when to apply protective coatings. If I notice stains or discoloration, I identify their source, as some may require specific treatment methods.
I check joints and connections for stability. Loose parts can affect the overall integrity and safety of the seating. Tightening screws and bolts ensures longevity and comfort.
I inspect for rust spots or corrosion, as these can compromise structural strength. Addressing these issues promptly can prevent further damage. If minor, I gently buff them with a soft cloth and a suitable rust inhibitor.
I assess the environment where the items are kept. Prolonged exposure to elements can expedite wear. If I notice significant damage from weathering, I may consider relocating my setup to a more sheltered area or adding covers during harsh seasons.
Lastly, I take into account the age of the items. Older pieces may exhibit more pronounced wear, warranting a more thorough approach to maintenance. Understanding how much time and effort I need to invest can greatly improve the lifespan of my outdoor seating.
Gathering Necessary Cleaning Supplies
I recommend collecting specific items to achieve optimal results when refreshing outdoor seating. Here’s what I find useful:
- Mild detergent: A gentle dish soap works effectively for cutting through grime and residue.
- Soft bristle brush: Choose one with non-abrasive bristles to prevent scratching the surface.
- Microfiber cloths: These are excellent for wiping surfaces without leaving lint behind.
- Bucket: A medium-sized container will help mix cleaning solutions and hold water.
- Hose or pressure washer: A low-pressure setting is ideal for rinsing without causing damage.
- Protective gloves: Wearing these keeps your hands safe from chemicals and dirt.
- White vinegar: This natural cleaner can assist in removing stubborn stains.
Optional Supplies
- Baking soda: Works well for tougher spots when combined with vinegar.
- Spray bottle: Convenient for applying solutions evenly without waste.
- Soft sponge: Good for detailed cleaning and reaching corners.
- Wax or sealant: Provides protection after the cleaning process is complete.
By gathering these supplies ahead of time, the process becomes streamlined, allowing for thorough rejuvenation of your outdoor seating area.
Preparing the Cleaning Solution
I recommend mixing a simple yet effective cleaning solution. A combination of warm water and mild dish soap works well for this type of material. Use approximately one tablespoon of soap for every gallon of water.
Alternative Solutions
If you prefer natural ingredients, consider using vinegar or baking soda. For vinegar, combine equal parts vinegar and warm water; for baking soda, mix a quarter cup of baking soda with a gallon of water. Both options are excellent for removing grime.
Steps to Create the Solution
- Gather your chosen ingredients, such as dish soap or vinegar.
- Fill a bucket with the recommended amount of warm water.
- Add the soap or your chosen natural ingredient, and stir gently until fully mixed.
For tougher stains, I mix a few drops of dish soap with a cup of vinegar for a more potent cleaning solution. Always test any mixture on a small, inconspicuous area first to ensure it won’t damage the surface.
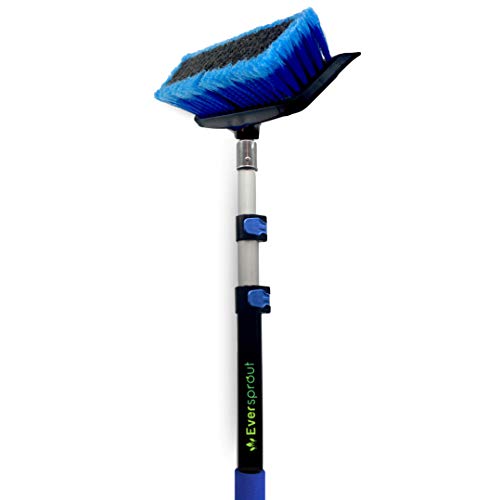
Removing Loose Dirt and Debris
Begin with a soft brush or broom to sweep away any loose dirt or leaves. A gentle motion prevents scratching the surface. If your set has crevices, consider using a vacuum cleaner with a brush attachment for thorough removal.
Follow up by rinsing the items with a garden hose, using a spray nozzle. This technique effectively dislodges remaining particles without scrubbing, which might risk damaging the finish. Make sure to angle the nozzle to direct water into tighter spaces.
Gather a microfiber cloth after rinsing. This will help catch any stubborn bits that remain. Wipe along the edges and between slats carefully to ensure all debris is eliminated.
| Tool | Purpose |
|---|---|
| Soft brush/broom | To sweep off loose dirt and debris. |
| Vacuum with brush attachment | To remove debris from crevices. |
| Garden hose with spray nozzle | To rinse away remaining particles. |
| Microfiber cloth | To wipe off any stubborn remnants. |
Ensure to work systematically, allowing for a thorough sweep and rinse. This step lays the groundwork for the next stages in restoring the appearance of your outdoor seating arrangement.
Applying the Cleaning Solution
Using the prepared mixture, I apply it generously to a soft cloth or sponge. I prefer beginning at the top of the surface and working my way down, ensuring an even distribution. For stubborn stains, I let the solution sit for a few minutes to break down grime.
As I clean, I use light pressure to avoid scratching the finish. It’s important to tackle one section at a time, rinsing the cloth frequently to avoid reintroducing dirt. I make sure to cover every area, paying special attention to crevices and joints where residue tends to accumulate.
After I finish with the initial application, I rinse the surface with clean water using another cloth or sponge dampened in fresh water to remove any remaining solution. This step is crucial to prevent residue buildup that could dull the surface.
Once I’ve rinsed thoroughly, I dry the surfaces with a microfiber towel. This prevents water spots and ensures a polished appearance. If I notice any remaining spots or stains, I repeat the process as necessary until the furniture reflects its original beauty.
Scrubbing Stubborn Stains
For persistent marks, a non-abrasive scrub pad works wonders. I recommend using one that won’t scratch the surface. Apply a small amount of your cleaning solution directly onto the stained area, allowing it to sit for a few minutes to penetrate. This helps break down the grime.
Techniques for Stubborn Marks
Gently scrub the area in circular motions. Be patient, as some stains may require more effort. For tough spots, consider using a mixture of baking soda and water to create a paste. Apply this paste on the stain, let it sit for approximately 10-15 minutes, then scrub again.
After Scrubbing
Once the stains are gone, rinse thoroughly with clean water to remove any residue from the cleaning solution or baking soda paste. This ensures that no leftover materials can lead to future staining or damage. Dry with a soft cloth to prevent water spots and keep the finish looking its best.
Rinsing Off the Cleaning Solution
Thoroughly rinse the surface with clean water after applying the cleaning agent. Use a garden hose with a spray nozzle set to a gentle setting to avoid damage.
Steps for Effective Rinsing
- Begin at one end of the area, directing the water evenly across the entire surface.
- Ensure that all corners, crevices, and joints receive sufficient water to eliminate any residue.
- Pay extra attention to areas that may have accumulated more grime or cleaning solution.
For enhanced efficiency, consider using a pressure washer on a low setting, maintaining a safe distance to prevent any etching or abrasion on the material.
Final Touches
After rinsing, allow the surface to air dry completely. If possible, use a soft microfiber cloth for additional drying to prevent water spots. Inspect for any remaining dirt and repeat rinsing if necessary.
Drying the Furniture Properly
After rinsing, I ensure thorough drying to prevent water spots or mildew. I use a clean microfiber cloth to wipe down each surface, absorbing any remaining moisture. It’s crucial to focus on joints and crevices where water may linger.
Air Drying Techniques
I place the items in a well-ventilated area, preferably outdoors but out of direct sunlight to avoid fading. This method naturally evaporates moisture without causing damage. Positioning them slightly apart allows air circulation between pieces.
Using a Fan or Towels
If time is a concern, I may utilize a fan aimed at the furniture to accelerate the drying process. For stubborn spots, I’ll gently pat them with an absorbent towel. I avoid rubbing, which may scratch the surface finish.
Ensuring complete dryness keeps the finishes intact and ready for the next use, maintaining their appealing appearance throughout the seasons.
Applying Protective Coating for Longevity
To ensure the enduring appeal of my outdoor seating set, I choose a high-quality sealant designed specifically for metals. After ensuring the surface is fully dry post-cleaning, I apply the product evenly with a soft cloth or spray applicator, following the manufacturer’s instructions carefully.
I pay attention to overlapping areas to create a uniform layer. This step prevents moisture damage and rust formation, extending the life of the pieces. Once applied, I allow the coating to cure for the recommended time before using the seating again, ensuring optimal protection.
Annually repeating this process not only retains the look of the furniture but also saves time and effort on extensive upkeep. I always keep an eye out for any signs of wear on the coating and reapply as necessary for continuous defense against the elements.


