Before working with your patio pieces, ensure the surface is clean and free from dust or previous finishes. Use a power washer or a stiff brush with soapy water to prepare. Allow everything to dry thoroughly for at least 24 hours.
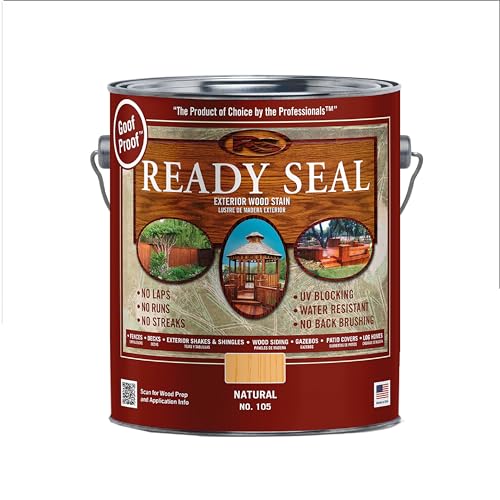
Choosing the right product is crucial. I recommend a high-quality penetrating oil or semi-transparent finish for a natural look. These options not only enhance the grain but also provide adequate protection against the elements.
When applying the finish, use a brush or a roller. For intricate designs, a brush is best. Apply evenly, working along the grain. A second coat may be necessary; allow the first coat to dry as instructed by the manufacturer.


Finally, after the application process, let the pieces cure for several days before exposing them to rain or heavy usage. Regular maintenance, including cleaning and reapplication every couple of years, will keep your outdoor seating looking its best.
Techniques for Enhancing Exterior Wooden Pieces
Before applying any coloration agent, ensure the surface is free from dust and debris. I recommend using a high-quality wood cleaner to prepare the surface effectively. Allow the wood to dry completely after cleaning; this is crucial for adhesion and a uniform finish.
Choosing the Right Product
Select an exterior-grade product that contains UV protection to shield against sun damage. Oil-based options tend to penetrate deeper and provide long-lasting results, while water-based products dry faster and have less odor.
Application Methods
A natural bristle brush allows for smooth application while helping to reduce streaks. I prefer using a foam applicator for intricate areas, as it provides precision. Make sure to apply the product along the grain and not against it to achieve an even coat. After the initial layer dries, assess the coverage and apply a second coat if necessary. This step often enhances the depth of color.
Choosing the Right Type of Wood Stain
For optimal results, I prefer to select a product based on its transparency and durability. I typically use transparent stains for a natural look, allowing the grain to show while providing some UV protection. Semi-transparent options offer a balance, enhancing color without completely obscuring the texture. If a more pigmented appearance is desired, solid stains provide excellent coverage and are ideal for protecting surfaces heavily exposed to the elements.
I prioritize products formulated for outdoor application, as these are designed to withstand varying weather conditions. Look for options labeled as water-repellent; this feature prevents moisture absorption, reducing the risk of warping or cracking. It’s also wise to choose a product with mildew resistance to protect against mold and algae growth.
Another aspect I consider is the type of finish. Satin finishes usually offer a nice sheen while adding more protection than matte finishes. If high gloss is preferred, it can create a more polished look but often requires more upkeep and maintenance.
Lastly, I always check for low VOC content to ensure safety and environmental friendliness during application. Brands that prioritize sustainability resonate with my values, and I feel better about using them in my projects.
Preparing the Wood Surface for Staining
Before applying any finish, I always clean the surface thoroughly. I remove dirt, dust, and residues using a mild soap solution and a soft cloth. For stubborn grime, a sponge with a scrubbing side helps, but I avoid aggressive abrasives that could scratch the grain.
After cleaning, I let the surface dry completely. Depending on the humidity, this can take a few hours. Once dry, I inspect the surface for imperfections; sanding is usually necessary to create a smooth base. I start with a medium-grit sandpaper (around 120 grit) and progress to a finer grit (220 grit) to ensure an even finish.
If the item was previously treated with another product, I strip the old finish using a suitable chemical stripper or a belt sander. Following this step, I ensure any residual chemicals are entirely removed by washing the surface again. Once I confirm that it’s clean, I wipe everything down with a tack cloth to catch lingering dust particles.
In some cases, especially with softwood like pine, I might choose to use a conditioner before applying any finish. This product helps achieve a consistent look, reducing blotchiness. I apply the conditioner evenly and let it set according to the manufacturer’s instructions before moving to the staining phase.
After conditioning or sanding, I perform a final inspection, making sure the surface is entirely smooth and devoid of any dust. With everything prepared, I am ready for the application process, ensuring optimal adhesion and finish quality for the subsequent treatment.
Selecting and Using the Right Tools for Application
For optimal results, I select a high-quality brush or pad designed for the application method chosen. A natural bristle brush is ideal for oil-based finishes, allowing even distribution and minimal streaks. For water-based products, I prefer synthetic bristle brushes, as they hold their shape and do not shed.
Rollers are efficient for covering larger areas, but I ensure I have a smaller brush for corners and edges. A 4-inch roller is typically suitable for most surfaces, while a foam applicator works wonders for smooth finishes.
Prior to starting, I gather all necessary supplies, including a drop cloth to protect surrounding surfaces, sandpaper for any touch-ups, and a stir stick for mixing the finish thoroughly. I also keep a clean cloth on hand for any drips or excess product that may need wiping away.
Wearing gloves is essential to protect hands from chemicals. I also use a mask if working in a poorly ventilated area, particularly with solvent-based compounds. Having everything organized allows me to work efficiently and achieve a uniform appearance throughout the application process.
Finally, I pay attention to the environmental conditions. Ideally, I choose a day with mild temperatures and low humidity for application. Extreme heat or moisture can affect drying times and the end result, so I plan accordingly.
Understanding the Best Weather Conditions for Staining
The optimal climate for applying color to exterior timber includes mild temperatures, low humidity, and minimal wind. Aim for a temperature range of 50°F to 85°F (10°C to 29°C) to ensure proper adhesion and drying.
Key Weather Factors
- Temperature: Avoid extremes. Too hot may cause the finish to dry too quickly, while cold can inhibit proper curing.
- Humidity: Ideal humidity levels are between 40-60%. High moisture can lead to improper curing, while low humidity might cause rapid drying.
- Wind Conditions: Staining in breezes can lead to dust and debris sticking to the surface. Choose a calm day for the best results.
Timing Considerations
- Time of Day: Early morning or late afternoon provides the best conditions, avoiding harsh sunlight.
- Forecast: Check the weather for the next 48 hours. Rain or high humidity can compromise the application.
By selecting the right moment based on these conditions, I’ve consistently achieved a flawless finish that enhances the durability and appearance of my outdoor pieces.
Applying the Stain Evenly for Optimal Coverage
To achieve uniform application, I recommend using a quality brush or a clean rag. A brush can reach into the grain of the surface better than other tools, ensuring that every crevice gets coated. Begin at one end and work your way to the other, applying the product in long, smooth strokes. This technique minimizes blotching and helps to distribute the solution evenly.
Techniques and Tips
Here are specific practices I follow to enhance coverage:
- Work in sections, so the material does not dry before completing an area.
- Use a small amount of the product to avoid excess pooling, which could cause uneven color.
- Always follow the direction of the grain to enhance absorption.
Setting Up for Uniformity
It’s essential to maintain a consistent working pace and to avoid overworking the applied areas, as this could lift the finish. After the initial coat, I assess the surface under natural light to identify any missed spots or inconsistencies. A second coat, if necessary, often helps level out the appearance.
| Application Phase | Recommended Action |
|---|---|
| Preparation | Ensure the surface is clean and dry. |
| First Coat | Apply in even strokes; avoid pooling. |
| Drying | Allow adequate time before applying a second coat. |
| Final Check | Inspect for uniformity and address any missed spots. |
By implementing these strategies, the finish not only appears consistent but also enhances longevity, protecting the surfaces from elements more effectively.
Sealing and Protecting the Stained Furniture
Apply a clear protective finish to safeguard the color and integrity of the treated surfaces. A polyurethane or marine-grade sealer works exceptionally well, providing a durable barrier against moisture and UV rays. Select a product designed for exterior use to ensure longevity.
Application Steps
1. Wait for the discoloration to cure completely, usually 24 to 48 hours after treatment. This ensures the protective layer adheres properly.
2. Lightly sand the surface with fine-grit sandpaper to promote adhesion. Clean the debris with a damp cloth.
3. Use a high-quality brush or sprayer for application. Work in manageable sections, applying an even coat, ensuring to follow the grain. Avoid excessive pooling of the liquid.
4. Allow the first coat to dry as per the manufacturer’s instructions. Additional coats enhance protection; typically, two to three coats are recommended for optimal results.
Maintenance Tips
Regular maintenance extends the life of the finish. Clean surfaces with a mild soap solution and avoid harsh chemicals. Reapply the protective finish annually or as needed, especially after harsh weather conditions.
Monitor for signs of wear, such as peeling or fading, and reapply as necessary to maintain the vibrant look and structural integrity of your surfaces.
Maintaining Stained Outdoor Furniture Over Time
Regular inspections are critical. I check for any signs of wear or damage at least twice a year. Look for peeling, fading, or areas where moisture may have penetrated. Addressing these issues early prevents further deterioration.
Cleaning is essential for longevity. I use a mixture of mild soap and water to remove dirt and grime. A soft cloth or sponge works best, avoiding harsh chemicals that can damage the finish. Rinse thoroughly and let it dry completely.
Reapplying finish is necessary every few years. I gauge the need by assessing the appearance; if it looks dull or rough, it’s time. Light sanding before the application can enhance adhesion.
- Choose a similar product to maintain consistency.
- Apply in a shaded area to prevent the finish from drying too quickly.
Protective covers can be a great investment during harsh weather. I use breathable fabric covers to shield against moisture while allowing air circulation. This reduces the risk of mold and mildew.
Lastly, I store cushions and accessories indoors when not in use. Keeping these items protected extends their life and prevents unwanted wear and tear.