To achieve a rich color and protection for your outdoor seating, I recommend using a high-quality wood preservative. This will not only enhance the appearance but also extend the life of your items significantly.
Before beginning the enhancement process, thoroughly clean the surfaces. Use a mixture of warm water and mild detergent, and scrub with a soft brush to remove dirt and grime. Ensure that the surface dries completely before applying any product.
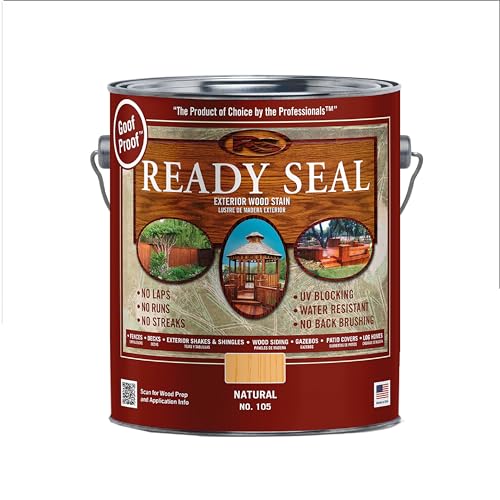
Select a product that offers UV protection and is specifically designed for outdoor applications. It’s crucial to check the label for compatibility with the type of wood your furnishings are made of.


When applying the wood treatment, use a natural bristle brush for even coverage. Work along the grain and avoid heavy application to prevent pooling. Allow it to penetrate for the recommended time, as provided by the manufacturer’s instructions.
For optimal results, consider applying multiple coats. Each coat should be given sufficient time to dry before adding the next, ensuring a perfect finish that will withstand the elements.
Technique for Applying Color to Outdoor Seating
First, I ensure the surface is clean and dry. I use a power washer or a scrub brush with soap to eliminate dirt and grime. Allow it to dry completely before proceeding.
Next, I choose a high-quality product suitable for outdoor applications that provides protection against UV rays and moisture. It’s crucial to read the manufacturer’s instructions regarding application conditions, such as temperature and humidity.
Application Process
I start with a small area, using a brush or roller for even coverage. I apply the mixture in thin layers, allowing adequate drying time between each coat. For intricate designs, I use a foam brush to reach tight corners and details.
After the initial coat dries, I lightly sand the surface with fine-grit sandpaper for better adhesion and a smoother finish. I repeat the process, adding at least two coats for optimal durability and appearance.
Final Steps
Once finished, I let everything cure for the time recommended on the label. Regular maintenance every few years enhances its longevity, keeping the color vibrant and the material protected from the elements.
Selecting the Right Stain for Your Furniture Material
Choosing the appropriate coating depends on the material composition. Here’s a breakdown to guide the selection process:
- Wood:
- For softwoods like pine, opt for a transparent or semi-transparent finish to enhance natural grain.
- Hardwoods, such as oak, can benefit from a pigmented formulation for added protection and richer color.
- Metal:
- Select a rust-resistant solution designed for metals. Look for options that contain inhibitors to prevent corrosion.
- A translucent or colored enamel can provide a decorative touch while safeguarding against elements.
- Plastic:
- Use specialized coatings that adhere well to plastic surfaces, ensuring durability and resistance to fading.
- UV-stable options can prolong color integrity when exposed to sunlight.
- Composite:
- Choose a product specifically formulated for composite materials. This ensures compatibility and effective adhesion.
- Prefer products that blend with the surface texture to maintain the original appearance.
Testing the product on a small hidden area guarantees matching expectations before full application. Consider performance features like drying time, weather resistance, and ease of application. Select a finish that complements your style and usage needs for optimal results.
Preparing Your Outdoor Seating for Finishing
Thoroughly clean the surface using a mixture of warm water and mild soap. This removes dirt and oils that will prevent proper adherence of the finish. A soft brush or cloth works well for this task. After cleaning, rinse with fresh water and allow it to dry completely, preferably in a shaded area to avoid direct sunlight that can cause rapid drying and cracking.
Sanding for a Smooth Surface
Lightly sand the surfaces with fine-grit sandpaper (around 150-220 grit). This process enhances the texture and allows the new finish to grip better. Pay special attention to any rough spots, old finish, or splintered areas. Always sand in the direction of the grain, and ensure any dust created is fully removed by wiping down with a damp cloth.
Inspect for Damage
Before applying any finish, carefully check for signs of rot, cracks, or loose joints. Repair any issues to ensure durability. Use wood glue for minor repairs and clamps to hold the pieces together while the glue dries. Replace severely damaged components to maintain integrity throughout.
Applying the Stain: Techniques and Tools
For an even and consistent application, I opt for a high-quality brush or a foam applicator. Brushes work well for intricate areas, while foam applicators excel in covering larger surfaces swiftly. I always carry multiple tools to adapt based on the furniture’s design.
Before starting, I pour the finish into a separate container to avoid contamination in the main can. I make sure to mix the product thoroughly, ensuring uniform color. As I apply the product, I keep a wet edge to prevent unsightly lap marks, particularly on horizontal surfaces.
I prefer using long, smooth strokes in the direction of the grain for a flawless look. For more complex shapes, I dab the applicator into corners and crevices to ensure thorough coverage without pooling. If I notice any excess, I immediately wipe it with a clean cloth, preventing it from drying unevenly.
For detailed work or intricate designs, a small artist’s brush can be used to get into tight spaces. This method guarantees that no area is neglected, maintaining an appealing finish throughout.
After applying the first coat, I allow it to dry completely as directed, typically 24 hours. Inspecting it carefully helps me identify if a second coat is necessary to achieve the desired depth of color. If needed, I lightly sand with fine-grit paper before applying another coat, ensuring optimal adhesion and a smooth surface.
Lastly, I clean my tools immediately after use to prolong their lifespan. Soaking brushes in water or solvent, depending on the product, ensures they remain in good condition for future projects.
Drying and Curing Times for Different Stain Types
For achieving optimal results with your outdoor pieces, it’s crucial to pay attention to the drying and curing times associated with various products. Here’s a breakdown of timings specific to several common finishes:
| Type of Finish | Touch Dry Time | Recoat Time | Curing Time |
|---|---|---|---|
| Water-Based | 1-2 hours | 2-4 hours | 1-2 weeks |
| Oil-Based | 6-8 hours | 12-24 hours | 1 month |
| Gel | 4-6 hours | 24 hours | 2-4 weeks |
| Varnish | 2-4 hours | 6-8 hours | 1-3 months |
Key Points
Water-based options are ideal for quicker projects, while oil-based ones provide prolonged durability but require patience. Gel products offer unique applications but extend curing times. Be mindful of temperatures and humidity, as they can significantly affect these times.
Always check the manufacturer’s recommendations on the label for the most accurate information. Waiting for a full cure will ensure optimal protection and longevity for your outdoor pieces.
Maintaining Stained Outdoor Seating
To preserve the integrity of your outdoor seating, routinely clean with a mild soap solution and a soft cloth. This prevents dirt and mildew from building up on the surface.
Protective Measures
Apply a protective sealant every couple of years. This adds an extra layer against moisture and UV rays, enhancing durability. Choose a product compatible with the color and type of the previous finish.
Regular Inspections
Check regularly for signs of wear or damage. Look for peeling, cracking, or discoloration. Touch up affected areas immediately to prevent further degradation. If significant damage occurs, consider a complete refinishing to restore appearance.
Handling Stain Application Mistakes and Touch-Ups
If inconsistencies appear after applying the finish, address them immediately for a seamless result. Here are specific strategies for correcting those errors:
Identifying Common Mistakes
- Uneven Coverage: Often caused by inadequate application techniques or insufficient product.
- Drips or Runs: These can happen from excess material pooling in spots.
- Brush Marks: Usually arise from using the wrong type of brush or applying too much pressure.
Correction Techniques
- For Uneven Coverage: Lightly sand the affected area with fine-grit paper. Wipe dust away before reapplying a thin layer of the liquid.
- Addressing Drips or Runs: Allow the finish to dry completely, then sand the area smooth. Use a clean cloth to remove debris, followed by a coat applied evenly.
- Eliminating Brush Marks: Use a high-quality, synthetic brush for a smoother application. Apply the liquid in long, even strokes, and avoid excessive over-brushing.
After correcting any application errors, ensure the area is dried thoroughly before using the piece again. Keep an eye on the texture and color consistency to achieve a professional finish. Touch-ups may be needed periodically, particularly in high-use areas.
Regular inspection helps catch any issues before they become larger problems. A simple, quick touch-up can save extensive repairs later on.


