The first step involves sourcing quality wooden pallets. Look for sturdy, undamaged options without hazardous chemicals or treatments. Local retailers or warehouses often have surplus pallets that they’re willing to sell or give away.
Next, proper disassembly is key. Use a pry bar and hammer to carefully take apart each pallet if needed. This preserves the wood for cutting and assembling into various designs. Aim for precision to ensure that pieces fit seamlessly together in the final product.
Once the wood is ready, consider your intended design. Sketching out plans beforehand can simplify the process, whether crafting a bench, table, or shelving unit. Measurements should be accurate to ensure stability and aesthetics, especially when combining multiple pallets.

When assembly begins, utilize exterior-grade screws for durability, and ensure joints are snug. Sanding the surfaces prevents splinters and enhances the overall finish. A good stain or protective seal can enhance the natural beauty of the wood while providing weather resistance for outdoor items.
Finally, personal touches with paint or additional embellishments allow customization. This can reflect individual style, making each creation truly unique. With the right tools and creativity, reimagining wooden pallets can result in impressive and functional handcrafted pieces.


Choosing the Right Type of Pallets for Your Project
Selecting suitable skids is key for achieving desired aesthetics and structural integrity. Look for those labeled as “heat-treated” (HT) to avoid concerns related to harmful chemicals, ensuring fewer health risks.
Standard European pallets (Europallets) often deliver a superior quality due to their stringent manufacturing guidelines. Their durability makes them ideal for building projects that require longevity and sturdiness.
Consider using blocks or solid wood variations for heavier items, as they bear more weight without compromising safety. However, the choice of design varies–if aesthetics are the priority, decorative styles provide attractive finishes while maintaining functionality.
Ensure the absence of broken parts, excessive splinters, or signs of rot. Prior inspections can spot potential issues early, saving future hassles. Choosing pallets with a uniform size also facilitates construction, making assembly more straightforward.
Reclaimed or vintage options can add rustic charm but require careful evaluation for any possible damage. Sanding down rustic surfaces retains character while eliminating sharp edges, promoting safety.
Lastly, color schemes and finishes are critical for creating cohesive designs, complementing existing decor. Preparation of the surface through staining or painting provides protection and enhances appearance, making any project stand out.
Tools and Materials Needed for Building Pallet Furniture
Firstly, a reliable set of tools simplifies the crafting process significantly. A power saw, such as a circular or jigsaw, is fundamental for cutting wood to desired dimensions. Drill and driver combos are indispensable for making holes and securing pieces together with screws.
The hammer serves well for projects that involve nails, while screwdriver sets ensure a tight fit on all screws. A sander or sandpaper helps to refine the surfaces, providing a smooth finish.
Safety gear like safety goggles and work gloves is non-negotiable to protect one’s eyes and hands during the process.
As for materials, the choice of wood is key. Quality pallets are often the primary resource; however, supplementary materials like wood screws and wood glue enhance stability and durability. Finishing elements such as stain, paint, or varnish may be necessary to elevate appearance and longevity.
A good measuring tape and square are vital for ensuring accurate dimensions and right angles. Lastly, a level ensures that the assembled piece is balanced and stable.
Preparing Pallets: Cleaning and Sanding Techniques
Begin by inspecting each piece of wood for structural integrity, checking for broken boards, protruding nails, or excessive wear. Remove any obvious debris such as dirt or dust using a stiff bristle brush.
Cleaning Steps
- Utilize a pressure washer or hose to eliminate stubborn grime, ensuring to clean all surfaces.
- For stains or oil marks, apply a mixture of vinegar and water, scrubbing with a cloth or sponge until the marks disappear.
- Allow the wood to dry completely before proceeding to the next stage to prevent mold growth.
Sanding Techniques
Gather sandpaper of varying grits: start with 80-grit for rough areas, transitioning to 120-grit for smoothing the surfaces.
- Sand all exposed areas by hand or with an electric sander, following the wood’s grain.
- Pay special attention to corners and edges to ensure no rough patches remain.
- After sanding, wipe the surfaces with a damp cloth to remove dust before applying any finishes.
This thorough preparation will enhance the aesthetic appeal and durability of the final creation, providing a solid foundation for subsequent steps.
Designing Your Pallet Furniture Layout and Functionality
Begin by sketching a rough layout of your creation on paper or using design software. Consider the dimensions of the space where the item will reside. Use graph paper for an accurate scale if needed. Measure the area to ensure a snug fit, and visualize how different pieces will interact in the room.
Functionality First
Assess the primary function of the piece. Is it for seating, storage, or a workspace? Create a list of functionalities, which will guide the design process. For instance, if selecting a bench, decide whether it should include hidden storage or a backrest. This decision impacts the overall structure and complements the intended use.
Creating a Visual Flow
To achieve a cohesive look, establish a theme that resonates with other room elements. Choose a finish or color scheme that aligns with existing decor. Integrating cushions or upholstery not only enhances comfort but also ties various elements together visually. Utilize natural stains for an organic touch, or paint to introduce a splash of color.
Ensure that the arrangement allows for easy movement around the piece. Avoid overcrowding by leaving sufficient space for foot traffic. This balance between style and practicality elevates the overall aesthetic while maintaining usability.
Finally, test the assembled item in its intended spot before finalizing it. This step allows for adjustments in size or design based on the actual space, confirming that the outcome meets both form and function effectively.
Step-by-Step Guide to Assembling Pallet Furniture
Gather all necessary components before initiating assembly. Organize the pallets according to the specific design requirements to streamline the process.
Begin by constructing the base. Secure the initial pallets together using wood screws, ensuring they are level and sturdy. A strong foundation prevents future instability.
Next, for vertical supports or legs, choose pallets of appropriate height. Attach them at each corner of the base. Reinforce connections by using additional screws or brackets for enhanced stability.
If creating a tabletop or top surface, select two or more pallets. Lay them side by side, connecting with screws through the top surface into the underlying supports. Pay attention to alignment for a neat finish.
Once the main structure is assembled, sand rough edges thoroughly to eliminate splinters and ensure safety. Using a power sander can expedite this process and achieve smoother results.
For finishing touches, consider painting or staining the exterior to match desired aesthetics. Make sure to use weather-resistant products if the piece will be outdoors.
Finally, attach any additional features, such as shelves or cushions, and verify the structure’s overall stability before use. Testing weight distribution can help identify any weaknesses.
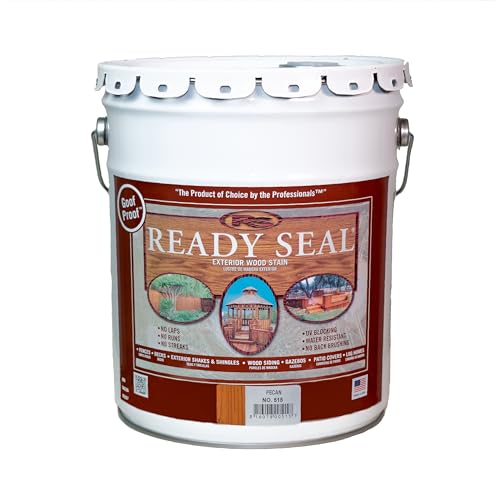
Finishing Touches: Staining and Sealing Your Pallet Creations
A good stain enhances natural beauty while a protective sealant extends longevity. Start by selecting a stain that highlights wood grain and matches the desired aesthetic.
Follow these steps for staining:
- Choose a high-quality wood stain, available in various shades.
- Test the stain on a scrap piece of wood to visualize the outcome.
- Apply the stain using a clean cloth or brush, working in the direction of the wood grain.
- Wait 5-15 minutes for absorption, then wipe off any excess to prevent blotchiness.
- Once the desired color is achieved, let it dry according to the manufacturer’s recommendations.
Sealing is equally important to protect against moisture and wear. Follow these guidelines:
- Select a suitable sealer, either oil-based or water-based, based on project requirements.
- Ensure the surface is clean and free of dust before application.
- Apply the sealant with a brush or roller, ensuring even coverage.
- Follow the recommended drying times before applying additional coats, if needed.
- Consider a light sanding between coats for a smooth finish.
For outdoor projects, look for sealants labeled as UV-resistant, ensuring prolonged exposure protection. Regular maintenance, such as reapplication every couple of years, will keep creations looking fresh.
Lastly, make sure to work in a well-ventilated area, using appropriate safety gear like gloves and masks. Paying attention to these details transforms a simple wooden design into a stunning piece ready to impress.
Ideas for Repurposing Pallet Creations in Different Spaces
Transforming an outdoor area with a stylish lounge offers a chance to enjoy fresh air. Arrange a cluster of cushioned seats made from skids around a low table for relaxed gatherings.

For indoor environments, a wall-mounted bookshelf constructed from disassembled skids provides a rustic touch. This design optimizes vertical space while showcasing books and decorative items.
A bed frame fashioned from lumber can serve as an attractive focal point in a bedroom. Complement it with minimalist nightstands to enhance functionality and aesthetics.
In kitchens, a mobile cart created from planks becomes an ideal storage solution, accommodating utensils and spices. The added mobility allows for easy access where needed.
For entryways, a shoe rack built from skids introduces organization. This project keeps footwear tidy and minimizes clutter.
| Space | Repurposed Idea |
|---|---|
| Outdoor | Lounging area with cushioned seating |
| Indoor | Wall-mounted bookshelf |
| Bedroom | Bed frame with minimalist nightstands |
| Kitchen | Mobile cart for storage |
| Entryway | Shoe rack for organization |
Learning to creatively use these structures caters to various needs, ensuring style and purpose in every corner of the home.
Safety Tips to Consider When Working with Pallets
Wearing safety goggles protects the eyes from splinters while handling wooden structures. Always use gloves to prevent cuts and splinters on hands. A dust mask is recommended during sanding to avoid inhaling particulate matter.
Inspect each wooden unit for signs of damage or mold before starting any project. Discard any that exhibit significant wear, such as breaks or excessive rot. Ensure they are not treated with harmful chemicals; look for the HT stamp indicating heat treatment.
Maintain a clean working area to avoid tripping hazards. Keep tools organized and within reach to minimize distraction during construction. Always follow guidelines for using power tools, ensuring proper safety precautions are in place.
Use clamps to stabilize the pieces while assembling to prevent movement and reduce the risk of injury when cutting or drilling. Always secure any items before use to avoid accidents. Protect fingers from pinch points by keeping hands clear of moving parts.
| Tip | Description |
|---|---|
| Wear Protective Gear | Use goggles, gloves, and a dust mask during work. |
| Inspect Materials | Check for mold, damage, and unsafe treatments. |
| Clean Workspace | Minimize clutter and hazards in the area. |
| Use Proper Tools | Ensure tools are in good working order and used appropriately. |
| Stabilize Pieces | Use clamps to prevent movement during assembly. |
Lastly, ensure proper lifting techniques are employed to prevent strain or injury. Bend at the knees and keep the back straight when lifting heavy sections.