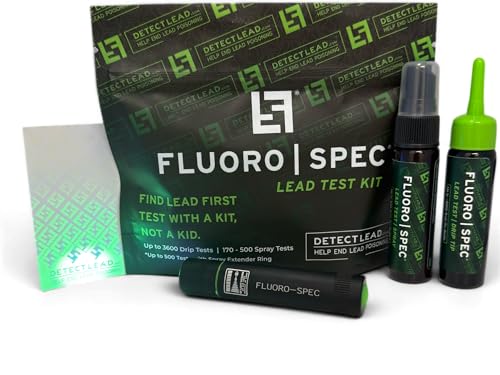
Use an at-home lead detection kit to quickly assess your items. These kits are readily available online and at hardware stores, allowing for immediate results. Follow the manufacturer’s instructions carefully to ensure accurate readings.
For a more thorough evaluation, procure a professional service that specializes in hazardous material inspections. Trained experts utilize advanced equipment to provide detailed assessments and can identify risks that simple kits may miss.
Additionally, observe any peeling or chipping on surfaces, as this often indicates older finishes that may contain harmful substances. If you suspect a decoration is older than 1978, consider it a candidate for professional scrutiny. Safety should always come first, so take necessary precautions if you find suspicious areas or surfaces.

Finally, keep records of any testing or inspections you conduct. This documentation can prove invaluable, especially when restoring or selling your household items in the future.
Testing for Toxic Coatings on Your Items
I recommend using a reliable test kit specifically designed for detecting hazardous coatings. These kits often include swabs that change color upon reaction with harmful substances.
Begin by cleaning the surface of the item thoroughly to remove any dirt or dust. This ensures accurate results. Once clean, take the swab from the kit and follow the instructions carefully.
Apply the swab to a discreet area and wait for the specified time. If the swab changes color, it indicates the presence of dangerous materials. Be sure to refer to the kit’s packaging for interpretation of results.
Additionally, some local health departments or environmental organizations offer testing services. You may want to contact them to see if they can assist you in assessing your item.
Remember to observe safety precautions while handling items suspected of containing harmful coatings, including wearing gloves and a mask if necessary.
If you discover harmful substances, consider consulting a professional for advice on safe removal or refurbishment options.
Identify Signs of Lead-Based Coating on Older Items
Examine the surface closely for any flaking, chipping, or peeling. This deterioration often indicates the presence of harmful substances. Look for wear spots and areas where the top layer has worn away, exposing layers beneath, which may reveal older coatings.
Check Color and Texture
Bright or vibrant colors, especially yellow, red, or blue, are commonly associated with hazardous finishes. In addition, a chalky texture might suggest age and degradation of the finish, further implying a potential risk.
Assess Age and Origin
Consider the era of production. Items crafted before the late 1970s are more likely to contain harmful substances. Also, check the manufacturer’s label or documentation if available, as some brands are known for using dangerous coatings in specific periods.
Gather Necessary Testing Supplies
Begin with a reliable lead detection kit. I prefer those that include colorimetric solutions, which change hue upon contact with harmful substances. Ensure the kit conforms to safety standards.
- High-quality gloves: Protect your hands while handling surfaces.
- Disposable masks: Avoid inhaling any particles while working.
- Moistened cloth: Useful for cleaning the area before analysis to get accurate results.
- Plastic wrap: In case of needing to store samples temporarily.
Maintain a clean workspace to prevent cross-contamination. Keeping the environment tidy ensures that I can trust the results I obtain from my efforts. Always have a notebook handy to record findings and any observations during the process.
Consider using a magnifying glass to examine intricate details. This tool aids in identifying any inconsistencies in the surface that might indicate hazardous coatings.
Having a well-organized selection of these items allows smooth execution of the examination process, instilling confidence in the results derived from the analysis. Every piece of equipment plays a role in preserving accuracy and safety.
Perform a Lead Test with DIY Kits
I recommend using a do-it-yourself kit designed for detecting hazardous substances in your household items. These kits are readily available at home improvement or hardware stores and online retailers. They come with simple instructions and materials that help streamline the process.
Steps to Follow
- Read the instructions included in the kit thoroughly before starting.
- Ensure the surface area is clean and free of dust or debris.
- Apply the testing solution to the designated area, usually by swabbing or rubbing the surface.
- Wait for the indicated time to allow for a chemical reaction.
- Observe the color change, which will indicate whether or not hazardous material is present.
After Testing
- Dispose of any materials used according to local regulations.
- Consult with a professional if the results are positive to discuss remediation options.
- Keep the testing kit for future use or re-testing if needed.
Having a DIY kit on hand enables regular monitoring, ensuring safety within your living environment. Being proactive can significantly reduce exposure risks associated with harmful substances.
Send Samples for Professional Laboratory Analysis
I recommend collecting small samples of the questionable substances from your items and sending them to a certified laboratory for thorough examination. Use plastic bags or clean containers to avoid contamination during transport. Clearly label each sample with necessary details such as date, source, and condition of the item.
Choose a laboratory that specializes in examining toxic materials, ensuring they are accredited and recognized by relevant health authorities. Many labs offer detailed instructions for sample submission, including how to package and where to send your materials. Be sure to include any payment or request forms as instructed to expedite the processing of your samples.
Interpreting Lab Results
Upon receiving your results, review them carefully. Labs usually report concentrations in parts per million (ppm), which helps in understanding the level of hazard present. If levels are above the acceptable limits, seek guidance on next steps for remediation from professionals in environmental safety or property restoration.
Documenting Findings
Keep all documentation from the lab for future reference. This information can be crucial not only for potential remediation but also for resale or insurance purposes. Proper documentation can assist in demonstrating compliance with health regulations.
Interpret Test Results for Lead Presence
Upon receiving results from your analysis, it’s critical to interpret the findings accurately. If using a DIY kit, results will commonly be expressed as a range of detection: below a threshold, detected, or high concentration. Make sure to refer to the kit’s instruction manual for specifics.
If results show a negative outcome, it may mean the presence of hazardous elements is unlikely. Nonetheless, consider retesting after a certain period or if the item shows signs of wear. If a positive result is evident, confirm whether the reading indicates a safe or dangerous level by checking against local regulations or guidelines.
| Result Category | Description |
|---|---|
| Non-detectable | Little to no hazardous content present; regular cleaning and maintenance recommended. |
| Low levels | May pose a risk with frequent exposure; consider refinishing or sealing. |
| High levels | Immediate action required; professional remediation recommended to mitigate risks. |
It’s vital to understand that findings can vary based on sampling method and surface conditions. Inconsistent results from multiple tests may indicate the need for professional evaluation. If ever in doubt, consulting experts in hazardous materials can provide peace of mind and ensure safety measures are met.
Determine Safe Handling and Removal Options
I recommend wearing protective gear such as gloves, goggles, and a mask before engaging with any items suspected to contain hazardous materials. This minimizes direct contact and inhalation of harmful particles.
If I decide to repair or paint over the surface, I ensure using a sealant specifically designed to lock in potential toxins. This can help create a safer environment during and after the project.
For larger items or when extensive removal is necessary, hiring a certified contractor experienced in hazardous materials is advisable. They follow proper safety protocols, ensuring a thorough and safe removal process.
In situations where disposal is required, I verify local regulations regarding hazardous waste. Many areas have designated facilities for properly disposing of contaminated items.
When transporting any materials suspected to be unsafe, I wrap them securely in plastic sheeting to prevent contamination of surrounding areas. This reduces the risk of spreading any harmful substances.
After handling any potentially hazardous objects, I clean the workspace meticulously, using damp cloths to capture dust and particles, preventing them from dispersing into the air.
For ongoing safety, I regularly monitor my home environment. Keeping an eye on any peeling, chipping, or wear can provide early indications that additional assessment may be necessary.


