Begin with a soft cloth to gently wipe the surface and remove any dust or debris. After this step, choose an appropriate solvent based on the type of finish. A mixture of vinegar and water can effectively break down unwanted substances without causing damage.
Apply the solution using a clean, lint-free cloth. It’s essential to work in small sections, allowing the liquid to penetrate the residue. After a few moments, use another cloth to buff the area, ensuring no moisture lingers on the surface.
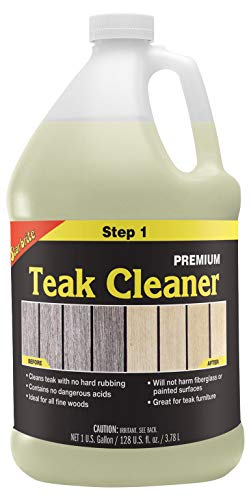
If stubborn remains persist, consider using a commercial cleaner specifically designed for treated surfaces. Always test any product on an inconspicuous area before proceeding with the entire piece. This will help prevent unexpected reactions that could harm the finish.
Understanding Different Types of Wax on Wood
Choosing the right formulation is key for achieving excellent results on porous surfaces. The most common varieties include beeswax, paraffin, and carnauba. Each type has distinct properties that affect application methods and outcomes.
Beeswax
This natural substance offers a rich, warm finish and enhances the grain’s appearance. It creates a moisture-resistant barrier but may require regular maintenance due to its softer nature. To apply, simply melt and rub into the desired surface, allowing it to set before buffing.
Paraffin Wax
Derived from petroleum, this wax presents a harder finish and is often combined with other substances to improve durability. It is a popular choice for crafting and can be applied through heated processes or in a liquid form. Its strong, protective layer requires more intensive removal techniques compared to softer alternatives.
Gathering Necessary Tools and Materials
Prepare by assembling the following items to ensure a smooth process:
- Clean, lint-free cloths: Choose high-quality cotton or microfiber to prevent residue.
- Putty knife or plastic scraper: Soft-edged tools are ideal for removing surface layers without damaging the underlying finish.
- Solvent: Select a suitable option such as mineral spirits, denatured alcohol, or a dedicated surface cleaner to dissolve the coating effectively.
- Soft bristle brush: For finer details and hard-to-reach areas, an old toothbrush or similar brush will suffice.
- Rubber gloves: Protect your skin from solvents and potential irritants during the cleaning process.
- Bucket of warm water: A mild soap solution can aid in overall cleaning after wax removal.
- Sandpaper (optional): Fine-grit paper may help in cases where deeper restoration is required.
Having these tools and materials on hand will facilitate a cleaner and more organized approach to refreshing your wooden pieces.
Choosing the Right Cleaning Method for Your Furniture
Opt for a natural solvent such as mineral spirits or denatured alcohol if you’re dealing with a stubborn build-up on surfaces. Test in an inconspicuous area first to ensure compatibility with your material.
Using a heat gun or hairdryer can effectively soften the coating for easier removal, as long as you maintain a safe distance to avoid damage. A soft cloth is ideal for wiping away the loosened residue.
Consider the Finish
Identify whether the finish is oil-based or water-based. Oil-based finishes typically require more potent cleaners, while gentle solutions work for water-based ones. This discrepancy dictates your approach to cleaning effectively.
Assess the Age and Condition
Older pieces might need a more delicate technique whereas newer items can withstand stronger products. The age influences both the integrity of the surface and your choice of solvent or method.
Applying Heat to Melt Wax Residue
To eliminate residue, I employ a heat source, such as a hairdryer or an iron. If I choose a hairdryer, I position it a few inches away from the surface, using a medium setting. This allows me to melt the buildup without damaging the underlying finish.
With an iron, I place a clean cloth over the area. I set the iron to a low heat setting and gently press it against the cloth. The heat will transfer through the fabric, effectively softening the unwanted substance beneath.
As the product melts, I use a scraper or a soft cotton cloth to gently lift it off. I ensure that I work in small sections and keep the heat moving to avoid overheating any specific area.
After melting and removing the residue, I clean the surface with a suitable cleaner to remove any residual oils or smudges. It’s essential to monitor the temperature closely to protect the finish of the piece being treated.
Using Solvents for Effective Wax Removal
Solvents are a strong solution for eliminating stubborn residues. I recommend using mineral spirits or turpentine, which can effectively break down the build-up without damaging the surface. Apply a small amount of solvent to a clean, soft cloth.
First, test the solvent on an inconspicuous area to ensure compatibility with the finish. If there’s no adverse reaction, apply the cloth to the affected area, allowing it to sit for a few minutes. This dwell time helps the solvent penetrate and dissolve the material.
Gently rub the area in a circular motion. Use a separate clean cloth to wipe away the dissolved residue. Repeat the process as necessary until the surface appears free of any lingering traces.
After removal, it’s essential to condition the surface. Solvents can strip oils, so applying a suitable wood finish or preservative will restore the protective layer and maintain the appearance of your piece.
Cleaning Up After Wax Removal
Thoroughly wipe the surface using a clean, dry microfiber cloth to remove any lingering residue. This helps restore the finish and prevents any dust or particles from settling on the newly cleaned surface.
Final Cleanup Steps
1. Dampen a cloth with a mild soap and water solution. Wipe the area again to eliminate any chemical traces from the previous cleaning methods.
2. Rinse the cloth with clean water, wring it out, and wipe the surface to remove soap residue.
3. Dry the area using a separate, dry microfiber cloth to prevent moisture from penetrating the wood.
Maintenance Tips
To keep the surface in top condition, consider applying a light coat of polish or conditioner suitable for the type of finish on your item. This step can enhance shine and provide added protection.
| Cleanup Step | Description |
|---|---|
| Wipe Surface | Remove residue with a dry microfiber cloth. |
| Soap Solution | Dampen a cloth with soap solution to clean. |
| Rinse and Dry | Use clean water to rinse and dry the surface thoroughly. |
| Apply Polish | Enhance and protect with a suitable polish. |
Restoring the Finish of Your Wood Furniture
For a polished appearance on your wooden pieces, consider these steps to rejuvenate the finish.
- Evaluate the Condition: Examine the surface closely for scratches, dullness, or areas with an uneven sheen. Identifying problem areas will guide the restoration process.
- Choose the Right Product: Select a compatible finish based on the original coating. Options include oil-based products, water-based finishes, or spray lacquers. Test them on a hidden spot to ensure compatibility.
- Prepare the Surface: Lightly sand the entire area with fine-grit sandpaper. This promotes better adhesion of the new finish and removes minimal imperfections. Wipe off the dust with a clean, dry cloth.
- Apply the Finish: Use a high-quality brush or cloth to apply the chosen product evenly. Follow the manufacturer’s instructions regarding application and drying times. Consider multiple thin coats for durability.
- Buff for a Glossy Look: Once the finish has dried adequately, use a soft cloth to buff the surface. This enhances the shine and smoothness.
- Final Touches: Inspect for any missed spots or runs in the finish. Touch up as necessary, ensuring a consistent appearance across the entire surface.
Regular maintenance after restoration, like dusting and occasional polishing, will help retain the refreshed look for years.
Preventing Future Wax Buildup on Wood Surfaces
I recommend choosing a compatible finish for your items, prioritizing products formulated to resist accumulation. Avoid using overlays or adhering products that might trap residue over time.
Regularly dust surfaces with a microfiber cloth to remove particles that attract moisture and grime. Incorporating this simple practice into your cleaning routine can significantly reduce the likelihood of buildup.
Applying protective coatings periodically can also help. Consider using a high-quality furniture lacquer or varnish that seals the surface, which makes it easier to clean without harsh removers.
Limit the frequency of applying new protective layers. Instead, monitor the condition of the surface and only reapply once worn, rather than following a predetermined schedule. This prevents excessive buildup of layers.
Research the ingredients in cleaning products. Avoid those with silicones or other ingredients that can lead to residues, preferring natural alternatives that provide shine without residual layers.
Whenever possible, opt for protective pads beneath items that are frequently moved or placed down. This helps minimize physical contact that can lead to deterioration and residue buildup.
Educate others in the household about the correct care techniques, ensuring that everyone follows the same maintenance practices. This collective effort can maintain the integrity and appearance of the surfaces effectively.
FAQ:
What are some safe methods to remove wax from wood furniture?
There are several techniques to safely remove wax from wood furniture. One effective method is to use a mixture of equal parts vinegar and olive oil. Apply this solution to a soft cloth and gently rub the affected area in the direction of the wood grain. Another method involves using a hairdryer on a low setting to gently warm the wax, making it easier to wipe away with a clean cloth. You can also use a commercial wax remover designed for wood furniture, following the manufacturer’s instructions. Always test any method on an inconspicuous area first to ensure it does not damage the finish.
Can I use household items to dissolve wax on my wooden table?
Yes, you can use common household items to remove wax from your wooden table. One popular option is rubbing alcohol, which can dissolve the wax effectively. Dampen a cloth with the rubbing alcohol and gently rub the waxed area, being careful not to saturate the wood. Another option is using a gentle soap solution, made with warm water and a few drops of dish soap. Apply it with a soft cloth, followed by drying the area with a clean towel. Always use a light touch to avoid damaging the wood finish. It’s crucial to test any solution on a small, hidden area of the furniture first.
Why is it important to remove wax buildup from wood furniture?
Removing wax buildup from wood furniture is important for several reasons. Over time, excess wax can create a dull, cloudy appearance, making the furniture look worn and less appealing. In addition, build-up can attract dirt and dust, which can lead to more extensive cleaning and maintenance issues. By keeping the surface wax-free, you ensure that the wood retains its natural beauty and luster. Furthermore, regular maintenance can help preserve the integrity of the wood and extend the life of the furniture.
Are there any commercial products specifically designed for removing wax from wood?
Yes, the market offers various commercial products explicitly formulated for wax removal from wood furniture. These include specially designed wax removers, cleaners, and degreasers that can effectively break down wax without harming the wood finish. Brands like Minwax and Murphy’s Oil Soap offer solutions that can be applied with a cloth and wiped away. Always make sure to follow the instructions on the product label for the best results and test it on a small, inconspicuous area first. This way, you can ensure it won’t adversely affect your furniture’s appearance.