Select a high-quality wood dye that enhances the natural grain of the material and dries quickly. I recommend testing it on a scrap piece or an inconspicuous area to assess the final color. This helps avoid unexpected results on your main piece.
Before applying the dye, ensure the surface is well-prepared. Clean it thoroughly to remove dust and dirt, and lightly sand it to open the pores. This step allows the color to penetrate deeply, creating a more uniform look.
Use a brush or a cloth to apply the dye evenly, following the wood grain. Multiple thin layers yield better control over the final tone than one thick application. Allow adequate drying time between coats, and assess the shade after each layer to achieve the desired outcome.
Once satisfied with the color, seal the surface with a clear finish to protect the depth of the tone. Opt for a satin or matte finish to maintain a natural look, or glossy for added sheen. A proper seal ensures longevity and enhances the richness of the color.
Strengthening the Color of Your Wooden Pieces
To achieve a richer hue on your wooden items, I apply a pre-stain conditioner before any dye application. This ensures even absorption and prevents blotchiness that is common with these types of materials.
Select a high-quality, oil-based or water-based dye depending on the desired finish and drying time considerations. Always conduct a test on a scrap piece to evaluate the color outcome on the grain before proceeding with the main surface.
Application Technique
For an even distribution of color, I use a foam brush or a clean rag, applying in the direction of the grain. Ensure generous coverage and avoid puddles which can lead to uneven results. Allow sufficient drying time based on the manufacturer’s recommendations. Multiple coats can deepen the tone; ensure the previous layer is fully dry before adding another.
Finishing Touches
Once satisfied with the depth of color, I seal the surface with a clear finish to protect it from wear and tear. Polyurethane or a varnish enhances the appearance while providing durability. Remember, a satin finish can offer a softer look, while gloss enhances the color.
| Product Type | Characteristics |
|---|---|
| Oil-based Dye | Rich color, longer drying time, requires mineral spirits for cleanup |
| Water-based Dye | Quick drying, easy cleanup, may raise the grain |
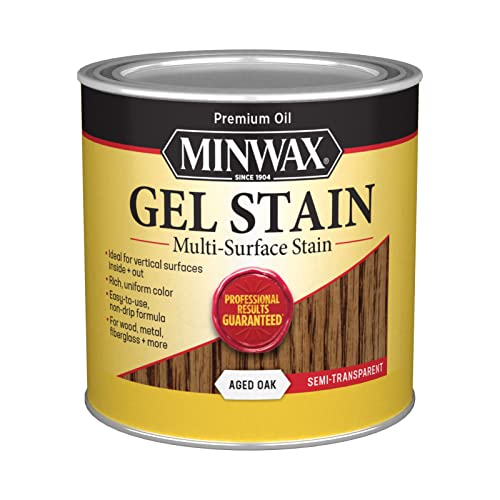
Choosing the Right Stain for Oak
Select a product that complements the grain and texture of the wood. For a rich, deep finish, consider gel formulations that enhance the natural characteristics. Oil-based options provide a warm hue, while water-based versions offer faster drying times and easy cleanup.

- Color Selection: Test different shades on a small, inconspicuous area. Darker hues like mahogany or espresso can provide a luxurious appearance, while walnut offers a classic look.
- Transparency Level: Choose between transparent, semi-transparent, and solid options, depending on the desired visibility of the grain. Transparent versions allow the wood’s natural beauty to shine through.
- Finish Type: Decide between matte, satin, and glossy finishes. Matte finishes create a soft appearance, whereas glossy ones can add a contemporary touch.
Reading the ingredient list is vital. Look for products with low levels of volatile organic compounds (VOCs) to ensure safety during application. I prefer brands that specialize in wood care, as they often offer reliable results.
Consider the intended use of the item. High-traffic areas may benefit from a more durable product, while decorative pieces can utilize lighter options. Always consult usage instructions for optimal application methods.
Take into account drying times and recoat intervals, as these can vary significantly. Planning ahead helps to coordinate the project and achieve a consistent result.
Preparing Oak Furniture for Staining
Remove any previous finishes using a chemical stripper or sandpaper. Start with coarse grit to eliminate stubborn layers, then move to finer grit for a smooth surface. Ensure the wood feels even to the touch. Use a vacuum and a damp cloth to eliminate dust and debris after sanding.
Inspecting the Surface
Check for scratches, dents, or imperfections. Fill any gaps with wood filler that matches the grain. Allow the filler to dry completely before proceeding to achieve a uniform look. Sand the repaired areas lightly, ensuring smoothness blends with the surrounding wood.
Conditioning the Wood
Apply a pre-stain wood conditioner to promote even absorption of color. This step is crucial, especially for a porous species, as it minimizes blotching and ensures a consistent finish. Follow the manufacturer’s instructions for application time, then wipe off any excess before the next step.
Applying the Stain Evenly
I recommend using a high-quality, lint-free cloth or a foam applicator for the best results. Always work in small sections to maintain control and prevent uneven absorption. Apply the product in long, consistent strokes, following the grain of the wood to prevent streaks and blotches.
I find that a brush also works well; however, it’s important to avoid overloading it to prevent drips. Start from one end and work your way to the other, ensuring you blend each stroke into the previous one. If I encounter excess liquid pooling in corners or crevices, I quickly wipe it away with a clean cloth.
After the first coat has been applied, I wait for the recommended drying time, then assess for saturation. If I desire a deeper hue, I repeat the application process, ensuring I maintain the same technique for a uniform finish. Always check how the surface reacts with each layer; sometimes less is more.
Lastly, I take a step back and visually inspect my work from various angles. This helps me ensure there are no missed spots or uneven areas before the final drying phase. This careful approach guarantees a rich and harmonious appearance across the entire piece.
Sealing the Stained Surface
Once the coloration process is complete, sealing the surface is the next critical step. This ensures durability and enhances the richness of the color. I recommend an oil-based polyurethane for its strong protective qualities and ease of application. Apply the sealant using a high-quality brush to avoid bubbles and streaks.
Application Technique
Work in long, even strokes, maintaining a wet edge to prevent lap marks. Allow each coat to dry fully according to manufacturer instructions, typically 24 hours, before lightly sanding with fine-grit sandpaper. This allows the next layer to adhere better and creates a smooth finish.
Final Touches
After the final coat of sealant dries, inspect the surface for any imperfections. If necessary, lightly buff the finish with a clean cloth to achieve a soft sheen. This process will not only protect the wood but will also highlight the depth of the color applied earlier.
Maintenance Tips for Dark Stained Oak
Regular cleaning is crucial. I opt for a soft, damp cloth to wipe surfaces, avoiding harsh chemicals that could damage the finish. Mild soap mixed with water works effectively for deeper cleaning.
Protecting the Finish
Placing coasters and mats under hot or wet items prevents surface damage. I cover tables with a protective sheet during gatherings to avoid scratches and dents from dishes and cutlery.
Reapplication of Protective Coating
Over time, I reapply a clear coat to maintain the protective layer. Applying this every few years, depending on usage, refreshes the surface and enhances the richness of the color without altering its tone.
Routine checks for signs of wear allow me to address issues like scratches immediately. Light sanding followed by a touch-up application can restore the original look without complete refinishing.
For deeper scratches, using a wax filler pencil in a matching shade can camouflage the blemishes effectively. This minor repair keeps surfaces looking pristine and well-maintained.
Common Mistakes to Avoid When Staining Oak
One of the main errors I see is not testing the product on a small, inconspicuous area. This step is crucial to ensure that the final color meets expectations.
- Skipping surface preparation can lead to uneven absorption. Always clean and sand well before applying any treatment.
- Ignoring the type of applicator used contributes to inconsistent results. Use a foam brush or lint-free cloth for a smooth finish.
- Applying too much product at once can result in blotchiness. It’s better to work in thin, even layers, allowing each coat to dry properly.
- Failing to follow the manufacturer’s instructions regarding drying times can ruin the project. Each brand has specific recommendations that should be adhered to for best results.
- Neglecting to seal after the application compromises the durability of the finish. A good sealer protects against wear and moisture damage.
- Choosing a color that doesn’t complement the wood grain can diminish the beauty of the piece. Always consider how the shade interacts with the natural characteristics of the wood.
Additional Tips
Avoid working in high humidity or extreme temperatures, as these conditions can affect drying times and overall appearance.
- Pay attention to the timing of reapplication; too little time can lead to smudges.
- Keep workspace clean; dust or debris can mar the finish during the drying process.


