

First, assess the level of wear and damage by examining all surfaces for rust, cracks, or fading. For metal pieces, make use of a wire brush to remove rust, followed by a rust-inhibiting primer and a fresh coat of paint. For wooden options, sand down rough areas and apply a specialized wood cleaner to revive the finish.
Next, consider protective treatments. Applying a sealant or outdoor varnish can help repel moisture and extend the life of materials exposed to the elements. Fabric upholstery should be cleaned with a solution of mild detergent and water; don’t forget to check for mildew and treat it immediately if detected.
Lastly, keep storage practices in mind. When not in use, covering items or storing them indoors during inclement weather creates a buffer against the elements and keeps your pieces looking fresh for longer. With consistent care and maintenance, outdoor seating can continue to enhance your garden or patio space for years to come.
Revamping Outdoor Seating
Clean all surfaces thoroughly with a mixture of warm water and mild detergent. Use a soft brush or cloth for tough grime. Rinse off with a hose, ensuring no soap residue remains.
Enhancing Wood Structures
For wooden items, inspect for any cracks or signs of rot. Sand down rough patches and apply a wood sealer to protect against moisture. Stain or paint as desired for a refreshed look.
Updating Metal Pieces
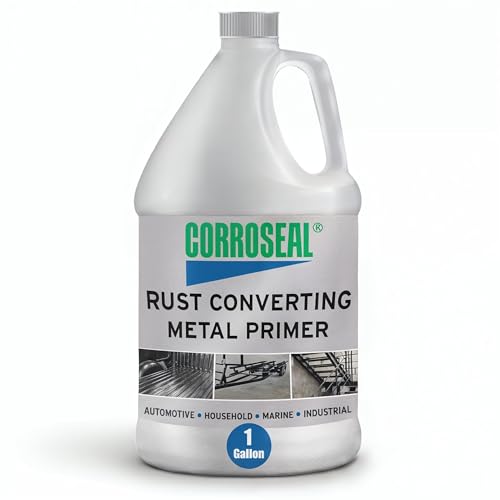
With metal components, remove rust using sandpaper or a wire brush. Apply a rust-inhibitor primer followed by weather-resistant paint. Regular checks for scratches or chips in the finish help maintain appearance.
Assessing the Condition of Your Outdoor Seating
I begin by thoroughly inspecting each piece for signs of wear and damage. Look for scratches, dents, or peeling paint on surfaces. Pay close attention to joints and connections; these areas may be weak spots needing reinforcement.
Next, evaluate the material. For wood, check for rot or splintering. Metal components might display rust, while synthetic options could have fading or cracks. I conduct a scratch test on painted surfaces to determine if a simple touch-up will suffice.
Test stability by gently rocking the chairs or tables. Any wobble indicates a need for further scrutiny. It’s also wise to assess cushions and fabric for stains or tears. If necessary, I consider replacing them for comfort and aesthetics.
Finally, take note of any weather-related damage. Sun exposure can fade colors, while moisture may cause mold. Such evaluations aid in determining the necessary steps to rejuvenate my outdoor seating while ensuring longevity.
Choosing the Right Cleaning Products
I recommend selecting cleaners specifically formulated for the materials used in your outdoor seating. For metal frames, a mild detergent mixed with warm water works effectively. Avoid abrasive cleaners that can scratch the surface.
For Wood Surfaces
Choose pH-balanced wood cleaners. These products maintain the integrity of the wood while removing dirt and mildew. Applying a clear wood sealer afterward enhances protection against the elements.

For Plastic and Resin
A mixture of vinegar and water is excellent for plastic and resin items, providing a natural solution that eliminates grime. Specialized plastic cleaners are also available and can give a polished finish without causing damage.
Removing Old Paint or Finish
Using a quality paint stripper, I carefully apply it to the old coating on the pieces. I prefer products with minimal odor and that are environmentally friendly. After letting it sit according to the manufacturer’s instructions, I scrape off the loose finish with a putty knife. For any stubborn areas, I use a wire brush or steel wool.
To avoid damage, I test the stripper on a small hidden area first. Once the majority of the old paint or stain is removed, I wash the surfaces with a mixture of water and mild detergent to remove any remaining residue. I rinse thoroughly and let the surfaces dry completely before proceeding with further refinishing steps.
In cases of multiple paint layers, I might need to repeat the process. For metal pieces, sanding is often necessary after stripping to ensure a clean, smooth surface. After sanding, I wipe down the metal with a damp cloth to get rid of any dust before I proceed to priming or painting.
Care must be taken to dispose of any waste, including spent paint or stripper, in compliance with local regulations. Proper ventilation during the entire process ensures safety and comfort while I work.
Repairing Damaged Parts and Joints
To address broken components, I ensure I have the right materials ready, such as wood glue or epoxy for wooden pieces, and metal adhesive for metallic structures. If screws or bolts are loose, tightening them is crucial. For wooden frames, I often replace damaged slats with similar wood, ensuring they’re cut to match existing dimensions. I sand the edges for a smooth fit before securing them in place.

Fixing Joints
When joints become wobbly, I check for any visible damage or wear. For wooden constructions, I apply wood glue into the joint before clamping it securely until dry. If a joint is metallic, I inspect for fractures and clean it with a wire brush before applying metal epoxy. Once cured, I ensure smooth movement by using a lubricant where necessary.
Painting and Finishing Touches
After repairs, I often touch up with paint or a protective stain matching the original color. This not only enhances appearance but also adds a layer of protection against future wear. Utilizing a foam brush allows for smoother application, especially in tight spaces. I allow adequate drying time before placing any items back on the surface.
Preparing Surfaces for Refinishing
I focus on cleaning the surfaces thoroughly before applying any new coat. This includes removing dirt, dust, and debris using a mild cleanser and water, followed by a thorough rinse. I use a soft brush for intricate parts to ensure all residues are eliminated.
Once cleaned, I inspect for rough patches or imperfections. Sanding is critical; I prefer medium to fine grit sandpaper. This smooths out the surface and creates a better bond for the new finish. It’s important to sand in the direction of the grain to avoid scratches.
After sanding, I wipe the area with a damp cloth to remove dust particles. I always allow the surface to dry completely before moving on to the next steps. If there are any stubborn areas, a light sanding followed by a clean is sufficient.
I also check for any repairs needed before refinishing, ensuring that the surfaces are fully prepped. If I detect rust on metal components, I treat those with a rust converter or a wire brush to prevent further corrosion.
Taking time to prepare properly sets the foundation for a smooth application process and enhances the longevity of the new finish.
Applying New Paint or Sealer
Choosing high-quality paint or sealant is critical for protection and aesthetics. For metal items, select a rust-resistant spray paint designed for outdoor use. For wooden pieces, look for water-based or oil-based exterior paints or stains, depending on the desired finish.
Preparation Steps
- Ensure the surface is completely dry after cleaning.
- Use painter’s tape to protect areas that shouldn’t be painted.
- Stir the paint or sealer thoroughly to ensure an even consistency.
Application Techniques
Apply in thin, even coats. For spray paint, maintain a distance of 12-18 inches from the surface and use a sweeping motion. For brushes or rollers, cover a small area at a time to avoid drips.
- Start with a primer for metal surfaces for better adhesion.
- Let each coat dry completely before applying the next.
- Follow the manufacturer’s recommendations for drying times.
For sealers, ensure an even application using a brush or cloth. Allow it to cure as per the instructions before using the item again. Regular maintenance will prolong the finish and keep the look fresh.
Choosing Appropriate Cushions and Fabrics
Selecting the right cushions and fabrics is key to enhancing outdoor seating comfort and durability. I focus on the following aspects:
- Material Type: Opt for weather-resistant fabrics like acrylic or polyester. These materials resist fading, mold, and mildew while maintaining their appearance over time.
- UV Resistance: Ensure the fabric has UV protection to prevent color loss and degradation. Checks for labels indicating UV resistance can save future replacements.
- Thickness and Density: Choose cushions with adequate thickness for comfort and support. A minimum of 2-4 inches is ideal for providing proper cushioning during prolonged use.
- Water Resistance: Consider water-repellent coatings or covers. This prevents moisture from soaking in, which helps in maintaining hygiene and extends the lifespan of the cushions.
- Maintenance: Look for machine-washable options. Ease of cleaning saves time and ensures that your seating maintains a fresh appearance.
Incorporate colors and patterns that complement your existing decor. Bold prints bring vibrancy, while neutral tones offer versatility. I prioritize a cohesive look while still allowing for personal style preferences.
Purchasing high-quality cushions might seem pricier initially, but their durability and comfort provide better long-term value. Keeping these factors in mind makes the selection process straightforward and rewarding.
Tips for Regular Maintenance and Care
Conducting regular inspections is key. I check for signs of wear, rust, or any structural issues at least twice a year.
Cleaning Schedule
Establish a cleaning routine to prevent dirt buildup. I recommend gentle washing with mild soap and water every month and deep cleaning every season.
Protective Measures
Utilize protective covers when the items are not in use. This minimizes exposure to harsh weather elements and reduces fading.
| Maintenance Task | Frequency | Product Suggestions |
|---|---|---|
| Inspect for Damage | Biannually | N/A |
| General Cleaning | Monthly | Mild Soap, Soft Brush |
| Deep Cleaning | Seasonally | Specialized Cleaners |
| Apply Protective Coating | Annually | Sealants, Paints |
After cleaning, I dry the surfaces thoroughly to prevent moisture buildup, which can lead to mold or decay.
I also pay attention to joints and connections. If anything seems loose, I tighten or replace fasteners immediately to maintain stability and safety.


