First, ensure you have all necessary materials: quality spray paint designed for outdoor use, sandpaper or a wire brush, a drop cloth, and safety gear including a mask and gloves. This preparation is pivotal for achieving a seamless finish and durability.
Thoroughly clean the surfaces, removing any dirt, rust, or old coatings. I typically use a diluted vinegar solution for rust spots, letting it sit for several minutes before scrubbing. Once the surfaces are clean, I recommend lightly sanding them to enhance the new layer’s adhesion. This crucial step prevents peeling and promotes longevity.
After the prep work, set up your workspace. Position your items in a well-ventilated area, ideally outdoors, to prevent inhalation of fumes. Lay down the drop cloth to protect the surrounding area. I find it beneficial to apply multiple thin coats rather than a single thick one, allowing each coat to dry completely before the next. This method results in a refined and uniform appearance.
Techniques for Refreshing Outdoor Steel Items
Choose a suitable day with low humidity and no wind to ensure optimal application and drying conditions.
Gather necessary items:
- Sandpaper (medium and fine grit)
- Primer suited for metallic surfaces
- Aerosol paint designed for exterior use
- Protective gear (mask, gloves, goggles)
- Drop cloths or newspaper to protect surrounding areas
Begin with thorough cleaning. Use a mixture of soap and water to remove dirt and grease, then let dry completely. Sand down any rust spots or peeling areas to create a smooth surface. This enhances adherence of the new coating.
Apply a primer designed for metallic surfaces. This step is crucial as it prevents corrosion and ensures even application of your chosen color. Allow it to dry according to the manufacturer’s instructions.
Once the primer is dry, shake the aerosol paint can for one minute. Hold the can approximately 12 inches from the surface and apply the paint in thin, even coats. Overlapping strokes ensure uniform coverage. Typically, two to three coats yield the best finish, allowing each coat to dry per instructions between applications.
After the final coat, let the pieces cure for 24 to 48 hours before using them. This allows for a hard, durable finish, enhancing longevity.
Regular maintenance will extend the life of your outdoor decorations. Inspect for chips or rust periodically, and touch up as needed to keep your items looking fresh.
Choosing the Right Paint for Metal
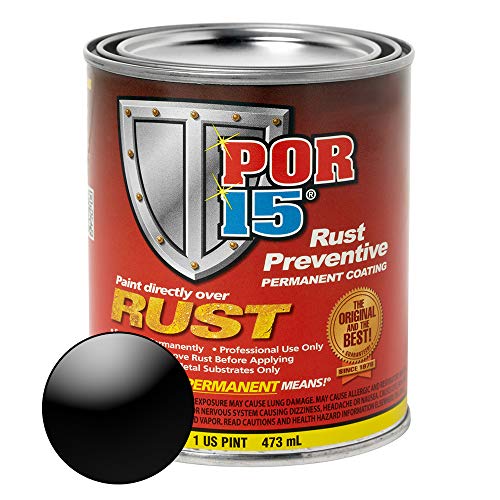
Opt for a paint specifically formulated for metal surfaces. Look for products labeled as rust-preventive or corrosion-resistant, ensuring longevity and durability. Acrylic enamel and spray paints designed for exterior use are excellent choices as they provide a smooth finish and good adhesion.
Types of Paint
Consider using polyurethane-based paints for their strong protective qualities and flexibility. Oil-based options can offer an attractive, glossy finish while resisting chipping and fading. Remember to choose colors that match your desired aesthetic and suit the environment.
Application Tips
Always perform a test on a small area before full application. Lightly sand the surface for better adhesion, and use a primer if necessary to enhance coverage. Ensure the area is well-ventilated during the painting process to avoid fumes accumulation.
Preparing the Furniture Surface for Respraying
Begin by thoroughly cleaning the surface with water and a mild detergent to remove dirt, grime, and any residual oils. A soft brush or sponge can help reach any tricky areas. Rinse the piece with clean water and allow it to dry completely before proceeding.
Next, inspect for rust or imperfections. Sand down any rough spots or rusted areas using a wire brush or sandpaper. Make sure all surfaces are smooth and free from flaking paint to ensure the new coat adheres properly.
Utilizing Primer
Applying a primer is a crucial step. Use a primer suitable for the material you are working with; this prevents corrosion and enhances the paint’s durability. A spray primer can provide an even coat, allowing for easier application in detailed areas.
Final Cleaning
After priming, lightly wipe down the surface with a clean rag to remove any dust or particles. This ensures a pristine canvas for paint application, promoting better adhesion and a uniform finish.
Required Tools and Materials for the Job
Gather the following tools and materials to ensure a smooth experience during your refresh project:
Tools
- Scraper or Wire Brush: For removing rust and old paint.
- Sanding Block or Orbital Sander: To create a smooth surface.
- Masking Tape: To protect areas you don’t want to paint.
- Drop Cloths: To cover the ground and catch any drips.
- Paint Sprayer or Brush: Choose based on the desired finish and comfort level.
- Dust Mask and Safety Glasses: To protect against inhalation of dust and paint particles.
Materials
- Rust-Inhibiting Primer: Ensures better paint adhesion and durability.
- High-Quality Paint: Opt for an exterior acrylic or oil-based product suitable for metal.
- Clear Sealant: For an extra layer of protection against elements.
- Cleaning Solution: Either soapy water or a dedicated metal cleaner.
Having these items on hand will streamline the entire process and enhance the quality of your results.
Step-by-Step Guide to Applying Primer
Begin with a thorough cleaning of the surface. I use soapy water and a scrub brush to remove any dirt, dust, or grease. After rinsing, I ensure it dries completely. This is crucial for proper adhesion.
Choosing the Right Primer
Select a primer specifically designed for the type of material I’m working with. An appropriate choice ensures better bonding with the topcoat. For outdoor elements, a rust-inhibiting primer is ideal to prevent corrosion.
Application Process
1. Shake the primer can thoroughly before use to ensure an even mixture.
2. Using a suitable brush or spray gun, apply a thin, even coat. I keep the spray can about 6-12 inches away from the surface.
3. Allow the primer to dry according to the manufacturer’s instructions, usually between 30 minutes to 1 hour.
4. For added protection, I apply a second coat after the first has dried completely. This step enhances durability and provides a smoother finish.
| Step | Details |
|---|---|
| 1 | Clean the surface thoroughly. |
| 2 | Shake primer and apply a thin coat. |
| 3 | Allow to dry, usually 30 minutes to 1 hour. |
| 4 | Apply a second coat for added durability. |
After applying primer, I always let it cure fully before moving to the next step of the process. This patience pays off with a longer-lasting finish on the outer layer.
Techniques for Applying the Top Coat Evenly
For an immaculate finish, proper technique is key. Begin with a high-quality sprayer or a brush. A sprayer allows for an even distribution of paint, minimizing brush marks or roller lines.
- Maintain Consistent Distance: Keep the nozzle of the sprayer or brush about 8-12 inches from the surface. This distance helps avoid drips and puddles while ensuring an even coat.
- Even Strokes: When using a brush, employ long, smooth strokes. Work from one end to the other, overlapping slightly with each pass to prevent streaks.
- Multiple Thin Coats: Instead of a thick application, apply several thin layers. This method promotes drying without runs and builds a more durable surface.
- Work in Sections: Divide the piece into manageable sections. Complete one area before moving to another; this helps control the application and maintain quality.
- Control Speed: Move at a steady pace. Too fast can lead to bare spots, while too slow can cause uneven thickness.
After application, allow adequate drying time between layers. Follow manufacturer instructions for best results. Inspect the work for any imperfections before concluding the job, as these can be corrected with light sanding and a touch-up.
Tips for Achieving a Durable Finish
To ensure a long-lasting result, choice of paint plays a pivotal role. Opt for a high-quality, rust-resistant formula designed specifically for metallic surfaces. Always check the label for UV protection to prevent fading.
Proper conditions during application are fundamental. Choose a day with low humidity and mild temperatures. This prevents moisture from affecting the drying process and helps achieve a uniform coat.
Apply thin layers rather than thick ones. Thin coats dry faster and adhere better, promoting durability. Allow adequate drying time between each application to avoid issues like bubbling or peeling.
Use a clean, lint-free cloth to maintain a dust-free environment around the workspace. Any contamination on the surface can lead to imperfections and reduce the lifespan of the finish.
Consider applying a clear protective top coat once the color has dried completely. This additional layer enhances durability, providing an extra shield against weather elements and wear.
Finally, store your pieces properly during off-seasons. Keeping them indoors or using protective covers will greatly prolong the life of the finish, maintaining the aesthetic and functionality of the items.
Cleaning and Maintaining Resprayed Outdoor Decor
To keep your newly painted pieces in pristine condition, regularly wipe surfaces with a soft cloth to remove dust and dirt. For stubborn stains, a mild soap solution can be used; rinse thoroughly to avoid any residue.
Avoid abrasive pads or harsh chemicals, as they can damage the finish. Instead, opt for gentle cleaning methods to preserve the top layer and color integrity.
Periodic inspections are essential. Look for signs of wear or chipping; addressing these areas promptly can prevent further damage. Touch-ups with the same paint can blend repairs seamlessly into the existing coat.
During winter or inclement weather, consider covering items or storing them in a sheltered location to shield against moisture and extreme temperatures. A breathable cover helps prevent condensation buildup, which could lead to rust.
For ongoing maintenance, apply a coat of wax or sealant specifically designed for painted surfaces once a year. This enhances sheen and adds a protective layer against elements.
Lastly, if a deeper clean is needed, use a garden hose with a low-pressure nozzle for rinsing. This helps clear loose debris without risking damage to the finish. A thorough check of bolts and joints should also be performed to ensure stability and safety during use.


