Choose a high-quality primer designed for glossy surfaces before applying color to your weathered wood items. This step is crucial for ensuring that the new hue adheres properly and doesn’t suffer from bleeding or peeling later on.
After the primer dries completely, select a shade that complements your interior. Whether you opt for a soft pastel or a bold statement color, ensure you have enough product to apply a minimum of two coats for even coverage and a polished look.
Utilize a synthetic brush for smooth application, making long, even strokes. Avoid the temptation to overload the brush, as too much paint can lead to drips and uneven textures. After the first coat dries, lightly sand the surface with fine-grit paper for that perfect finish before adding the subsequent layer.


Finally, seal your masterpiece with a protective topcoat. This not only enhances the appearance but also adds durability against scratches and everyday wear. Maintain your refreshed pieces with appropriate cleaning products, ensuring they remain stunning for years to come.
Techniques for Refreshing Previously Treated Wood Surfaces
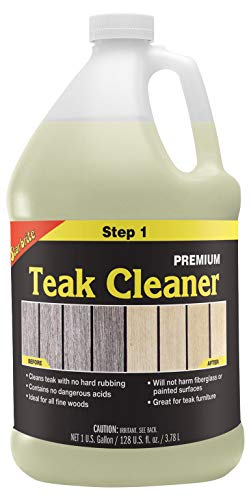
I recommend beginning by thoroughly cleaning the surfaces with a mixture of water and mild soap. This removes dust, grease, and any residues that may inhibit adhesion. Rinse and allow time for complete drying.
Preparation and Priming Steps
Next, sand the surfaces to create a rough texture, encouraging better bonding for subsequent layers. Start with a medium-grit sandpaper (around 120 grit) followed by a finer grit (220 grit) for a smooth finish. Pay special attention to any glossy areas as they may require more effort to scuff.
Applying a high-quality primer designed for use on porous substrates is vital. A shellac-based or stain-blocking primer will provide a robust barrier against tannins. Use a brush or roller to ensure even coverage. Allow sufficient drying time as per the manufacturer’s instructions before proceeding to the next step.
Final Coating Choices
For the final finish, select an acrylic latex or oil-based topcoat suitable for your desired look. Multiple coats may be necessary for optimal results; be sure to sand lightly between coats for a flawless finish. Keep the space well-ventilated during this phase to enhance drying and reduce fumes.
| Step | Description |
|---|---|
| Cleaning | Use water and soap to remove dirt and grime. |
| Sanding | Roughen the surface to promote adhesion. |
| Priming | Apply a quality primer to block stains. |
| Topcoat | Use a suitable finish for durability and appearance. |
With proper preparation and the right materials, you can achieve a finish that transforms your wooden pieces effectively.
Choosing the Right Type of Paint for Stained Pine
For optimal results, I recommend using acrylic latex or oil-based coatings. Acrylic latex options are water-soluble, easy to clean, and provide a durable finish. They also dry quickly, allowing for faster project completion.
Oil-based coatings have their own advantages, such as superior adhesion and durability. They tend to give a smoother finish, which is ideal for achieving a polished look. However, they take longer to dry and require solvents for cleanup.
When selecting a hue, consider using a primer specifically designed for use on surfaces that have been previously treated. These primers can lock in stains and prevent them from bleeding through the final layers.
- Color Depth: Choose shades that complement your space. Light colors can brighten a room, while darker tones add depth.
- Sheen Level: Decide on the gloss level–flat, satin, semi-gloss, or gloss–based on the desired appearance and maintenance requirements.
- Brand Reliability: Opt for reputable brands that have positive reviews. High-quality products often yield better results and longevity.
Check for any specific additives or components in the formulas to ensure compatibility with existing finishes. This attention to detail can significantly impact the overall success of the project.
Testing a small area before proceeding with the entire piece will help determine how the selected product interacts with the existing surface and how it appears once dried.
Preparing the Surface: Cleaning and Sanding Techniques
I always recommend beginning with a thorough cleaning. The first step is to remove any dust, dirt, or grease. A mixture of warm water and a mild detergent works effectively. Use a microfiber cloth or a sponge to wipe down all surfaces, then rinse with clean water. Allow it to dry completely before proceeding.
Once cleaned, sanding is crucial for achieving a smooth finish. I prefer starting with medium-grit sandpaper (around 120 grit) to strip away any existing finish or rough areas. Sand in the direction of the grain using a sanding block or an electric sander for larger surfaces; this ensures an even application later. Pay attention to corners and edges, as they can accumulate residue.
After the initial sanding, switch to a finer grit (about 220 grit) to refine the surface. This step helps eliminate any scratches left by the coarser sandpaper. It’s wise to inspect the surface under good lighting, ensuring that no areas have been missed.
Concluding the process, I always recommend a final wipe-down with a tack cloth or a damp rag to remove all sanding dust. This helps ensure optimal adhesion for the subsequent layers. Following these techniques prepares your piece for the transformation ahead.
Selecting the Appropriate Primer for Stained Wood
Choosing the right primer is crucial for achieving a smooth and durable finish. I recommend using a high-quality stain-blocking primer that is specifically designed for wood surfaces. Look for a formula that explicitly states it can seal in stains and prevent them from bleeding through your topcoat.
Types of Primers
There are two primary categories of primers: oil-based and water-based. Oil-based options offer excellent adhesion and stain-blocking capabilities; however, they require a longer drying time and emit stronger odors. In contrast, water-based primers dry more quickly, have lower VOCs, and are easier to clean up, making them suitable for indoor use.
Application Tips
Prior to applying the primer, ensure the surface is clean and free of dust. Use a high-quality brush or roller for even coverage. If the wood has deep grain or imperfections, consider applying two coats of primer for enhanced protection and a smoother finish. Always follow the manufacturer’s instructions on drying time and recoating intervals to guarantee optimal results.
Applying Paint: Techniques for Even Coverage
For uniform application, I recommend using a high-quality synthetic brush or a foam roller, depending on the surface texture. A brush provides more control for detailed areas, while a roller speeds up the process on flat surfaces.
Begin with thin coats. Applying multiple light layers prevents drips and achieves a smooth finish. Allow each coat to dry completely before adding the next, typically around 1-2 hours for water-based options.
Technique Tips
Use a “W” or “M” motion when applying the substance, ensuring a consistent layer. Overlapping each stroke slightly helps blend the product seamlessly. Avoid pressing too hard; let the tool do the work.
Final Touches
After the final application, allow it to cure for several days before heavy use. This ensures a durable finish that resists chipping and wear.
Understanding Drying Times and Curing Process
The drying time of my chosen finish is my primary focus after applying it. Typically, the initial drying stage takes about 1 to 2 hours, allowing the surface to be ‘touch dry,’ meaning it won’t feel sticky to the touch. However, it’s important to avoid direct contact or adding layers during this phase.
I then allow a longer period for the curing process, which can take from several days to a week, depending on environmental factors like temperature and humidity. Curing is when the finish hardens and bonds to the surface for increased durability. It’s crucial to wait until this stage is complete before using or placing items on the treated piece.
For optimal results, I control the room’s temperature and humidity. Ideal conditions often encourage quicker drying and curing. I aim for temperatures between 70°F and 80°F (21°C to 27°C) with moderate humidity levels. If the environment is too cold or humid, the process may extend and could lead to issues such as bubbling or uneven texture.
To ensure success, I always consult the manufacturer’s recommendations on drying and curing times specific to the product I used. This information can provide clarity on the expected patience needed during this crucial phase. I also avoid rush decisions about applying additional coats or finishing touches until curing is complete to ensure long-lasting results.
Finishing Touches: Sealing and Protecting Your Painted Furniture
I recommend applying a clear sealant once the color application has dried completely. A polyurethane or water-based topcoat works best for durability and ease of use. Aim for at least two to three thin coats to ensure maximum protection.
Before spraying or brushing on the sealant, ensure that the surface is free from dust and debris. Use a fine-grit sandpaper between coats to achieve a smooth finish. This technique not only helps with adhesion but also enhances the overall appearance.
Select a matte, satin, or gloss finish based on your desired look and the functional needs of the piece. For high-traffic areas or surfaces prone to moisture, a more glossed option is preferable for its resilience.
<p.Allow ample drying time recommended by the manufacturer after each application. This step is vital for achieving a hard, protective layer capable of withstanding daily use. Do not rush this process, as inadequate curing can lead to a compromised finish.
After the final coat dries, maintain the surface with a gentle cleaner to prolong its life. Avoid harsh chemicals that could damage the newly sealed layer, as they can dull the finish and reduce its effectiveness.
Maintenance Tips for Long-Lasting Results
Regular upkeep significantly enhances the durability of your refinished piece. Clean the surface routinely with a soft, damp cloth to prevent dust buildup.
- Use mild soap: Occasionally wash with a mixture of water and gentle soap. Avoid harsh chemicals that may damage the finish.
- Avoid direct sunlight: Position your item away from prolonged exposure to sunlight to prevent fading and deterioration of the surface.
- Control humidity: Maintain stable humidity levels in the room to minimize expansion and contraction of the wood.
Inspect the finish every six months for signs of wear. If you notice scratches or dullness, touch up those areas promptly to maintain an even appearance.
- Reapply protective sealant: Depending on usage, consider reapplying a protective layer every year to enhance shine and longevity.
- Use coasters and mats: Always use coasters for drinks and mats for hot items to protect the surface.
When moving, lift the item instead of dragging to avoid damaging the painted surface. For overall aesthetic upkeep, consider rotating the placement of smaller items on the surface occasionally.