Begin with thorough cleaning. Use a gentle soap solution and a soft cloth to remove dust and grease from the surface of your vintage pieces. This step ensures better adhesion of the new coat.
Next, sand the surface lightly. A fine-grit sandpaper (220 grit) will help create a smooth base and improve the bonding of the subsequent layers. Focus on areas with existing imperfections, and always sand in the direction of the grain.
Your choice of primer matters. Opt for a high-quality primer designed for wood to enhance durability and provide a solid foundation for the top layer. Apply it evenly, allowing ample dry time between coats for optimal results.


For the final touch, select a suitable finish. Acrylic and chalk paints offer unique aesthetics, while polyurethane can provide increased durability. Don’t forget to apply multiple thin layers rather than one thick coat; this promotes a smooth and even appearance.
To protect your work, consider sealing with a clear topcoat. This not only adds a layer of protection but also gives your project a polished and professional finish. Keep it well-ventilated during the process to ensure proper drying and avoid unwanted odors.
Transforming Vintage Pieces
Begin with a thorough cleaning using a mixture of warm water and mild detergent. This removes grime and prepares the surface for adhesion. Wipe down with a damp cloth, and ensure it’s entirely dry before proceeding.
Choosing the Right Products
Select a high-quality primer designed for the specific material. For wooden surfaces, a shellac-based primer works well, while a stain-blocking spray might be ideal for laminated pieces. Follow this with a durable finish, such as an acrylic enamel or chalky finish, which offers a smooth application and lasting results.
Application Techniques
Using a foam roller or a synthetic brush yields the best results. Apply thin layers, allowing adequate drying time between coats. To achieve a more polished appeal, lightly sand between layers with fine-grit sandpaper. This step enhances the adhesion of each coat and creates a flawless finish.
For decorative effects, stenciling or distressing techniques can add character. Apply a contrasting color and gently sand the edges for an antiqued look. Finish with a clear topcoat for protection, ensuring longevity and resistance to wear.
Regular maintenance involves gentle cleaning and occasional touch-ups, preserving the charm and functionality of these unique pieces.
Selecting the Right Paint Type for Henry Link Furniture
I recommend opting for a water-based acrylic or latex paint for this type of cabinetry. These formulas provide excellent adhesion and flexibility, ensuring longevity in your finish. They are available in various sheens, allowing for customization based on your design preferences.
If a more polished look is desired, an alkyd or oil-based product is suitable as well. This type typically offers a smoother, more durable surface, perfect for high-traffic areas. However, keep in mind that they require longer drying times and increased ventilation during application.
For a vintage-inspired effect, chalk paint works wonderfully. It adheres well to previously coated surfaces and is easy to distress for a shabby chic aesthetic.
Before committing to any coating, always test on a inconspicuous area to ensure compatibility and finish satisfaction. Make sure to select a primer that matches the paint type you choose, as this will enhance durability and reduce the number of topcoat layers needed.
Lastly, consider the environment where the piece will reside. If it’s in a space prone to moisture, such as a bathroom, a mold-resistant variation is key to maintaining the beauty and integrity of the surface.
Preparing the Surface for Painting
Begin with a thorough cleaning of the item. Use a mixture of warm water and a mild detergent to remove dirt, grease, and any existing wax. Wipe down with a damp cloth and then dry completely.
Sanding
Lightly sand the surface using 120- to 220-grit sandpaper. This step is crucial for enhancing adhesion. Focus on areas with existing finish or gloss, making them rougher for better grip. Always follow the grain to avoid scratches.
Repairing Damage
- Inspect for any scratches, dents, or chips. Fill any significant damage with wood filler, allowing it to dry as per the manufacturer’s instructions.
- Once dry, sand the filled areas smooth to blend seamlessly with the surrounding surface.
- For any minor imperfections, consider using a touch-up marker for wood before proceeding.
After repairs, wipe down again to remove dust particles. Check if the surface feels even and clean, which is key for a successful application later on.
Choosing Suitable Brushes and Tools
Select a variety of brushes to achieve different effects. A good starter set includes:
- Flat Brushes: Ideal for applying a smooth coat and covering large areas efficiently.
- Angled Brushes: Perfect for corners and detailed work.
- Detail Brushes: Necessary for intricate designs and touch-ups.
For an even application and a professional finish, consider these options:
- Foam Rollers: Useful for flat surfaces, providing a smooth finish without brush marks.
- Spray Guns: Excellent for achieving a flawless, even layer, especially on intricate designs.
Tools also play a significant role:
- Paint Tray: Recommended for easier access to your paint and to prevent spills.
- Painter’s Tape: Essential for masking off areas that need to stay uncoated.
- Drop Cloths: Protect your surroundings from drips and spills.
Investing in high-quality brushes and tools enhances the outcome and reduces the effort required during the project. Regularly cleaning brushes ensures their longevity and performance. Happy crafting!
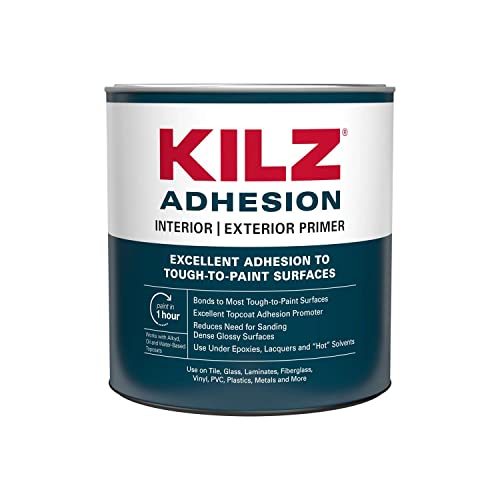
Applying Primer for Optimal Adhesion
I recommend selecting a high-quality primer specifically designed for adhesion on glossy and non-porous surfaces. This first step ensures the finish adheres properly, preventing peeling or chipping later. After prepping the surface, apply the primer evenly with a brush or roller. A foam brush can reach into crevices, ensuring all areas are covered.
It’s best to use a latex-based primer due to its quick drying time and ease of cleanup. Choose a tinted primer that closely matches your final color, which can enhance the depth and vibrancy of the top layer. Allow the primer to dry completely before moving to the next stage. This usually takes about one to two hours, but follow the manufacturer’s guidelines for optimal results.
| Primer Type | Benefits |
|---|---|
| Latex Primer | Quick drying, easy cleanup, good for adhesion on various surfaces. |
| Oil-Based Primer | Excellent for blocking stains, ideal for wood materials, requires solvents for cleanup. |
| Shellac Primer | Outstanding stain blocking properties, quick drying, can seal odors. |
Inspect the primed surface for any imperfections once dried. Lightly sand any rough spots with fine-grit sandpaper to create a smooth finish before applying the second coat, if necessary. This attention to detail enhances the longevity and appearance of the final application, ensuring a successful transformation.
Techniques for Painting Without Streaks
For a smooth finish, I recommend applying thin layers rather than one thick coat. This approach prevents drips and ensures even coverage. Allow each layer to dry completely as per the manufacturer’s instructions before adding the next.

Brush Strokes and Application
When using a brush, I maintain a wet edge technique. I keep a small area wet at all times to avoid visible lines or uneven textures. It’s also optimal to paint in the same direction as the grain of the surface, which helps in achieving a seamless look.
Using Rollers and Sprayers
If using a roller, I choose one with a suitable nap thickness for the surface texture. A thicker nap absorbs more paint, covering imperfections effectively. For sprayers, I ensure consistent distance and speed while moving across the surface to maintain an even application.
| Application Method | Recommended Tools | Tips |
|---|---|---|
| Brush | Synthetic bristle brush | Use narrow brushes for detailed areas. |
| Roller | Medium nap roller | Overlap each pass to avoid streaks. |
| Sprayer | HVLP sprayer | Maintain a consistent motion for uniformity. |
Lastly, I always inspect the surface in different lighting once completed, as this reveals any imperfections needing touch-ups. Consistent technique is key to achieving that flawless finish.
Understanding Drying Times and Curing
After applying a coat of finish, I ensure I understand the drying and curing times specific to the products used. For latex formulations, typically, touch dry conditions are reached within an hour, allowing for light handling. However, full curing can take several days, especially in humid conditions, affecting durability and adhesion.
Factors Influencing Drying and Curing
Temperature is a key player; warmer climates can expedite drying, while cooler environments may prolong it. I keep in mind that humidity levels also impact the drying process–higher moisture can lead to longer wait times. To avoid compromising the final outcome, I allow extra time for each layer to dry fully, even if touch-dry might suggest I can move on.
Testing Readiness
To verify if it’s ready for the next stage, I lightly press my fingertip on an inconspicuous area. If it feels tacky, I wait longer. Once fully cured, the surface should feel hard and dry without any residue. Ensuring complete drying and curing is critical for the longevity of the application, preserving the aesthetic appeal over time.
Finishing Touches: Sealing the Paint
I recommend using a clear sealant to protect the surface after applying color. Choose a water-based polyurethane for a durable finish that resists yellowing over time. Ensure it is compatible with your chosen hue.
Before applying the sealant, wait for the color to cure completely. This usually takes around two to three days, depending on environmental conditions. Lightly sand the surface with a fine-grit sandpaper to promote adhesion.
Apply the sealant using a high-quality foam or synthetic brush to ensure an even coat without brush strokes. Avoid overworking the product; a single, smooth application is sufficient. If needed, a second layer can be added after the first fully dries.
Aim for a satin or semi-gloss finish for a subtle sheen, which is easier to clean and maintain. Ensure proper ventilation while sealing to avoid fume accumulation. Allow the project to cure for at least a week before heavy use.
Regularly check for signs of wear and reapply the sealant as needed to maintain protection and appearance. This simple step can significantly enhance the longevity and aesthetic of your revitalized piece.
Cleaning and Maintaining Painted Surfaces
I recommend using a gentle cleaning solution for removing dust and grime from coated items. A mixture of warm water and mild soap works effectively. Avoid harsh chemicals that could damage the layer.
To maintain the finish, use a soft cloth to wipe the surfaces regularly. Microfiber cloths are optimal for this purpose as they prevent scratches.
For more robust stains, a baking soda paste can be effective. Combine baking soda with a few drops of water, apply it to the stained area, and gently scrub with a soft cloth before rinsing with water.
It’s wise to avoid excessive moisture. Ensure any cleaning solution is damp, not wet, to prevent water damage.
During seasonal changes, check for any wear or chipping on the surface. Touch up areas as needed to keep it looking fresh.
- Store items in a climate-controlled environment to avoid warping.
- Use coasters and placemats to protect surfaces from scratches and heat.
- Avoid placing heavy objects that may dent or scratch the finish.
- Consider using furniture wax or oil to maintain luster and provide additional protection.
Avoid placing directly in sunlight for extended periods, as this can lead to fading.
If any chips occur, touch them up promptly to prevent further damage. Always use the same color and type of product used in the original application.
Troubleshooting Common Painting Issues
If bubbles appear on the surface, it usually indicates moisture trapped beneath the layer. To fix this, make sure to sand down the affected area and apply a primer that prevents moisture infiltration. Allow ample drying time before reapplying a new layer.
For uneven coverage or patchiness, check that the previous coat is completely dry. Use a brush or roller with the appropriate nap length for the texture of the piece. Lightly sand between coats to ensure adhesion.
If the finish is tacky, it might be a result of high humidity or insufficient curing time. Ensure adequate ventilation during the drying process. A fan can help circulate air around the piece.
Fading or discoloration occurs with exposure to sunlight. For better durability, select paints formulated for UV resistance. Additionally, consider applying a clear sealant that protects against fading.
In case of brush marks or streaks, it’s essential to use the right tool. A high-quality synthetic brush works well for smooth finishes. Apply the coating in thin layers and maintain a wet edge while working.
For chipping or peeling, check the surface preparation. Clean the piece thoroughly and remove any old finishes before applying the new product. A bonding primer can greatly enhance adhesion on glossy surfaces.
If you notice an unpleasant odor lingering, ensure enough time for off-gassing, especially if you used an oil-based product. Ventilate the area properly. Adding a few drops of vanilla extract to the final coat can help mitigate strong smells.


