


Begin with a clear vision of the space you want to craft. Gather your materials: lightweight wood, foam board, or cardboard serve as excellent foundations for constructing the miniature elements. A sharp craft knife, a hot glue gun, and fine-grit sandpaper will be your trusty companions in this endeavor. Precise measurements are crucial; scale down real-life dimensions according to the size of your scene.
Once you have your basic materials, sketch out a design plan. For each piece, think about functionality and aesthetics. A simple coffee table could be made from a small piece of wood with legs created from toothpicks or dowels. Paint or stain the surface to add a realistic touch. For upholstered items like chairs or couches, consider using fabric remnants or felt, ensuring to apply a light adhesive to attach them securely.
For added detail, incorporate elements like miniature cushions, books, or small decorative items. Craft these using everyday objects or even paper, adjusting their scale to fit your scene. Personal touches such as tiny artwork or plants can elevate the overall look of your diorama. Every element counts in creating a compelling and cohesive ambiance!
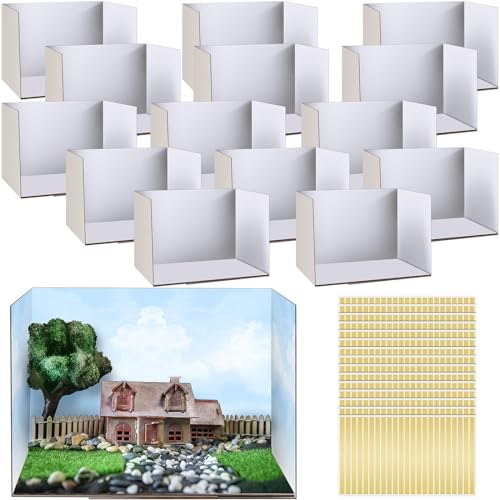
Choosing the Right Scale for Your Diorama
Select a scale that aligns with the dimensions of your scene and the items you’ll include. Common scales for miniature representations are 1:12, 1:24, and 1:48, suitable for showcasing different levels of detail and size constraints.


For example, 1:12 scale offers a realistic portrayal with adequate space for intricate details, making it ideal for showcasing detailed elements. On the other hand, 1:24 scale allows for a more compact setup, enabling the inclusion of several elements without overwhelming the viewer.
It’s essential to consider the intended purpose of the model. If it’s for display, a larger scale might work better. If it serves as a backdrop for another hobby like photography, a smaller scale could enhance the overall composition.
| Scale | Typical Use | Detail Level |
|---|---|---|
| 1:12 | Detailed dioramas for display | High |
| 1:24 | Compact setups, exhibitions | Moderate |
| 1:48 | Backgrounds for photography | Low to Moderate |
Measure your space and ensure that the chosen scale accommodates all components harmoniously. Regularly compare your selected items to guarantee consistency across your creation.
Gathering Materials for DIY Furniture Construction
Choosing the right components is fundamental for the creation of realistic miniature settings. I recommend starting with high-quality light wood such as balsa or basswood due to their easy workability and smooth finish. These materials are ideal for constructing frames and accents without adding excessive weight.
Essential Supplies
Include a variety of adhesives like wood glue, super glue, and PVA glue. Each type serves unique purposes: wood glue offers a strong bond for wooden elements, while super glue is perfect for fragile details. For surfaces, consider using acrylic paints designed for plastic or wood surfaces to achieve a polished look.
Textural Elements
Incorporate textiles like felt or cotton for upholstery, providing realism to living spaces. For flooring, thin cardboard, foam sheets, or textured paper can simulate tiles, carpets, or hardwood. Enhance your build with embellishments like miniature fixtures, handles, or decorative trims, which can often be sourced from craft stores or online marketplaces.
By carefully selecting these materials, I ensure my pieces not only look appealing but also align with the intended aesthetic of the miniature scene.
Building Basic Furniture Shapes with Cardboard
To construct simple forms for your miniature setups, I recommend focusing on basic geometric shapes. Cardboard is an excellent material for this project due to its accessibility and versatility.
Begin with these manageable shapes:
- Boxes: Cut out rectangles to form the base and sides. For a sturdy result, use a double layer of cardboard.
- Cylinders: Roll a strip of cardboard around a pencil or similar tool to create the desired radius. Secure the edges with glue or tape.
- Planks: Use flat rectangular pieces for tables or benches. You can layer multiple pieces for a thicker look.
- Triangles: Useful for roofs or decorative elements, cut equilateral or isosceles triangles to scale.
Measure your shapes carefully to ensure they fit well with the overall scene. For a cohesive appearance:
- Ensure your dimensions correspond to the chosen scale.
- Create a basic layout before gluing components together for adjustments.
- Use a ruler for precise cuts and straight edges, enhancing the overall look.
Once assembled, I often reinforce corners with additional pieces for stability. Use decorative finishes like paint or paper to add realism. Experiment with textures by applying cloth or other materials to mimic upholstery.
Always let your glue dry completely before handling the assembled pieces. This step is critical for maintaining the integrity of your constructs.
Painting Techniques for Realistic Furniture Finishes
I recommend beginning with a primer to ensure that the paint adheres well, especially if working with porous materials like wood. Use a brush or spray can to apply the primer evenly, allowing adequate drying time according to the manufacturer’s instructions.
For achieving an authentic wood grain effect, I often utilize acrylic paints. Mix a base color, such as a light brown, and add varying shades to create depth. A dry-brushing technique works wonders here; lightly loading a brush and gently sweeping it over raised surfaces simulates texture.
When replicating finishes like glossy varnish or matte wood, I use clear coats. Gloss mediums can elevate the realism, while matte varnishes reduce shine for a more subdued appearance. Applying multiple thin layers rather than a single thick one prevents bubbling and ensures a smooth finish.
To mimic the wear and tear of frequently used items, I apply a wash made from diluted paint in a darker hue. This is particularly effective in crevices and joints. After some drying, I use a clean damp cloth to wipe off excess, leaving a subtle stain that accentuates details.
Incorporating techniques such as sponging or stippling adds further character. For example, a sponge can add texture resembling fabric or weathered surfaces, while a stippling brush can create interesting patterns. Experimenting with these methods can lead to unique and captivating results.
Finally, always seal your work with a protective coat. This step not only protects the paint but also enhances color vibrancy and longevity. I have found that using a fine mist spray protects intricate details without disrupting the overall finish.
Adding Texture with Fabric and Paper
I recommend utilizing various fabrics to create depth and interest in small-scale designs. Natural materials like cotton and linen can replicate upholstery, while faux leather or vinyl can mimic more polished surfaces. To attach fabric, I use a strong glue or double-sided tape, ensuring no wrinkles distort the appearance.
For paper, textured options such as cardstock or handmade papers present unique finishes. I often choose patterned papers to represent wallpaper or decorative elements. Layering different textures can also enhance realism; for instance, adding a soft fabric cushion on a paper chair gives a refined look.
Experimenting with mixed media expands possibilities. Combine fabric scraps with paper elements, like using fabric for curtains or tablecloths alongside paper structures. Attention to scale is critical; choose materials proportional to your scene to maintain consistent visual storytelling.
When creating a cozy ambiance, consider fabric swatches for cushions or throws. I cut pieces to size and fray edges for a more authentic effect. The use of fabric remnants in combination with paper can support intricate details without overwhelming the overall design.
Always test colors and textures beforehand. Place materials in context to see how they interact with lighting and other components. A harmonious balance between fabric and paper transforms a simple construction into a captivating piece, enhancing the overall aesthetic of the scene.
Creating Decorative Elements for Enhanced Detail
Incorporating decorative elements elevates the visual appeal of miniatures. Begin with small accessories like vases or picture frames. For vases, use beads or small pieces of colored paper; an old button can stand in for a ceramic pot. Cut tiny rectangles from cardstock and layer them to mimic framed art, painting details afterward.
Add greenery using mock plants from craft stores or make your own with paper or felt. Cut leaf shapes, then glue them to a wire or stick for stems. Consider using moss or dried flowers to create realistic arrangements.
Introduce texture through surfaces. A beaded table or a faux-fur rug can add depth. To simulate a rug, cut a piece of felt into desired shapes and glue on strands of yarn or fabric for a cozy touch.
Incorporate lighting for an immersive effect. Use tiny LED lights or even glow-in-the-dark paint to create lamps or decorative features that enhance ambiance. String lights can also bring warmth to the scene.
Finally, don’t overlook color. Accents in softer hues can complement the main pieces. Use pastel paints or fine markers to add details on objects, like faux wood grains on tables and chairs, to give them a lifelike appearance.
Incorporating Functional Elements Like Drawers and Doors
To introduce functional features in miniature constructions, I opt for lightweight materials like cardstock or thin wood, allowing for ease of manipulation without adding excess weight. For drawers, I create a shallow box structure that slides in and out smoothly. Using small dowels or discs as drawer slides ensures both stability and functionality.
For facilitating the creation of doors, I incorporate a simple hinge mechanism. This can be achieved with small metal or plastic hinges or even using carefully folded cardstock. The door frame needs to align precisely with the opening, ensuring smooth operation. I often reinforce the joints with glue for added durability.
When crafting these elements, I consistently measure and cut with precision to maintain uniformity across features. Adding a small handle, made from toothpicks or beads, enhances realism and provides an intuitive touchpoint for opening. This attention to detail truly elevates the overall appearance of the scene.
Incorporating textures and finishes on these components also contributes to authenticity. For example, a wood grain effect can be achieved through careful painting techniques, which I often layer to add depth. I apply a matte varnish at the end to protect the painted surfaces while maintaining that realistic feel.
Including these elements not only enhances aesthetic appeal but also adds an interactive quality, inviting viewers to engage with the work on a deeper level. The balance between aesthetics and functionality is key; a well-executed drawer or door can transform a static display into a dynamic experience.
Positioning Objects within the Diorama Space
Begin with a clear layout plan, marking key focal points where items will draw the viewer’s attention. Ensure that the arrangement enhances the storytelling aspect of your scene.
Consider these strategies for effective placement:
- Rule of Thirds: Divide the space into thirds both horizontally and vertically, positioning main pieces at the intersections. This creates a dynamic composition.
- Vary Heights: Incorporate pieces of different heights to create visual interest. Taller items can lead the eye upward, while shorter ones ground the scene.
- Balance: Distribute visual weight evenly. Heavy-looking items should be balanced with lighter or smaller objects across the space.
- Layering: Place objects in layers to create depth. Foreground elements should slightly overlap background pieces for a more immersive experience.
Creating Pathways
Designate clear routes for visual flow. Pathways, whether real or implied, guide the viewer’s gaze throughout the setting.
Use the following tips:
- Diagonal Lines: Position elements along diagonal lines to generate movement and direct attention.
- Curved Paths: Introduce curves to soften the presentation. This can mimic natural walkways or flows.
Lighting Considerations
Incorporating lighting can dramatically alter perception. Position light sources to highlight key items while casting gentle shadows, enhancing depth and interest.
Experiment with:
- Spotlighting: Use focused light to draw attention to specific features.
- Ambient Light: Ensure an overall illumination that complements the scene without overpowering details.
Review the positioning periodically as the design evolves. Adjust based on how each element interacts with others, ensuring a cohesive and captivating tableau.
Preserving and Protecting Your Finished Pieces
Applying a clear sealant is key. Choose a spray or brush-on sealant suitable for the materials you used. This layer acts as a barrier against dust, moisture, and fading, ensuring longevity.
Storage Considerations
Store completed items in a temperature-controlled environment. Avoid places with direct sunlight or high humidity to prevent warping or discoloration. Using archival boxes can offer an extra layer of protection.
Regular Maintenance
Dust regularly with a soft cloth to maintain appearance. For more thorough cleaning, use a gentle soap solution, but avoid soaking pieces. Check for any signs of wear or damage periodically, and repair any issues promptly.


