For optimal results, select plywood that is lightweight yet sturdy. Having a thickness of about 1/4 inch works well for small pieces. Use a sharp saw to ensure clean edges for a polished look.
Begin by sketching out the designs you envision for the miniature items. Whether it’s a charming sofa or a chic coffee table, having clear plans will streamline the building process. Use a ruler and pencil for precise measurements.
When cutting the pieces, secure the wood carefully to avoid any movement. Take your time with each cut to maintain accuracy, which will ultimately enhance the overall appearance of the final product.
To connect the parts, consider using wood glue for a durable bond, and reinforce with small nails if necessary. Sand all surfaces thoroughly to achieve a smooth finish before painting or staining.
Incorporate fabric or embellishments to add personality. Choosing colors and textures that complement each other can transform simple creations into stunning focal points.
This hands-on activity not only results in unique decor but also provides a fulfilling experience that can be shared with loved ones.
Creating Tiny Home Essentials
For the perfect miniature items, precise measurements are key. I use thin plywood or balsa wood for lightweight structures. Cut pieces to the desired dimensions, ensuring they fit together snugly. Use a fine-toothed saw for clean edges, and sand them smooth for a polished finish.
Painting and Finishing Touches
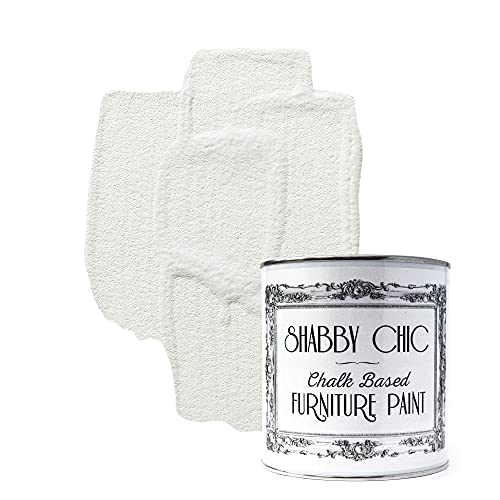
Select water-based acrylic paints for vibrant, safe colors. I apply a primer first to enhance adhesion and durability. Once dry, I carefully layer on the color and seal it with a clear coat for protection. Adding adhesive-backed fabric can simulate upholstery, making it look more realistic.
Accessorizing and Details
Incorporate small details like knobs and handles. I use beads or buttons as stylish embellishments. For a personal touch, custom artwork or photographs printed at a reduced scale can be framed and placed on surfaces. These little additions elevate the overall appearance and charm of the creations.
Selecting the Right Type of Wood for Barbie Furniture
Pine is a fantastic option for creating miniature items due to its cost-effectiveness and ease of use. It can be easily cut, sanded, and painted, making it ideal for detailed projects. The light color also allows for versatile finishing options.
Birch offers a stronger alternative, presenting a smooth finish that showcases craftsmanship beautifully. Its durability ensures that the creations withstand play over time. The fine grain of birch allows for intricate designs without splintering.
Maple stands out for its hardness and resistance to wear, perfect for high-traffic pieces. Its light hue and subtle grain provide a modern touch, easily blending with various color schemes in a miniature setting.
For an eco-friendly approach, bamboo is an excellent sustainable choice. It is lightweight and sturdy while contributing to an environmentally conscious crafting process. Its unique texture can add character to designs.
Spruce, known for its versatility, is another suitable option, particularly when a rustic aesthetic is desired. Its natural finish fits well with a variety of themes and can add warmth to playtime spaces.
Consider the specific needs of each piece, such as the desired weight, stability, and visual appeal. Properly prepared materials will enhance both the durability and the fun of the final products.
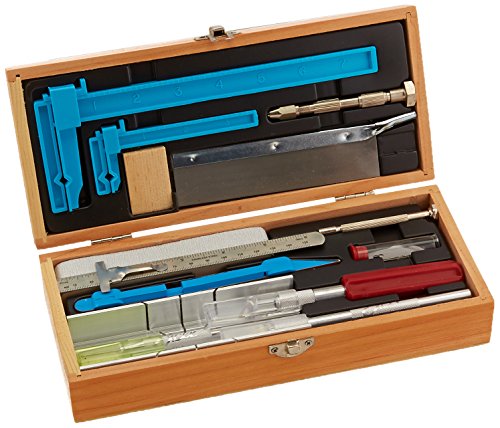
Tools Needed for Crafting Wooden Barbie Furniture
A well-equipped workspace enhances the crafting process. Key items include:
| Tool | Description |
|---|---|
| Measuring Tape | Ensures accurate dimensions for each piece. |
| Pencil | For marking measurements and cutting lines. |
| Saw | A hand saw or jigsaw for precise cuts on smaller pieces. |
| Sandpaper | For smoothing edges and surfaces to prevent splinters. |
| Drill | Needed for making holes for screws or dowels. |
| Wood Glue | Provides strong bonding for joints and connections. |
| Screws | For additional support in assembled structures. |
| Clamps | Essential for holding pieces together while glue dries. |
This selection of tools guarantees a proficient crafting experience. Each instrument plays a significant role in achieving the desired outcome with precision and quality.
Step-by-Step Guide to Building a Barbie Bed
Begin with precise measurements for the dimensions of the sleeping surface. A common size for a doll’s bed is approximately 10 inches wide by 20 inches long. Adjust these to suit personal preferences.
Materials Required
- Plywood or MDF board
- Wood glue
- Wood screws
- Sandpaper (medium and fine grit)
- Acrylic paint or wood stain (optional)
Construction Steps
- Cut two pieces of plywood for the base: 10 inches by 20 inches.
- For the headboard, cut a piece measuring 10 inches wide by 6 inches tall.
- Shape four side pieces for the frame, each measuring 10 inches tall and 0.5 inches thick.
- Assemble the base by attaching the side pieces to the base using wood glue and screws. Ensure everything is square.
- Attach the headboard with screws or glue at the back end of the base.
- Sand all surfaces to eliminate rough edges and splinters.
- If desired, apply acrylic paint or wood stain for a personalized finish. Allow it to dry completely.
For added comfort, consider creating a mattress using foam or fabric. Cut a foam piece to fit the dimensions of the sleeping area and cover it with fabric.
Creating a Barbie Table and Chairs from Wood
To craft a miniature table and chairs, I recommend using pine or plywood for their lightness and ease of manipulation. Gather materials such as sheets of timber, a pencil, a ruler, wood glue, and clamps to secure the pieces during assembly.
First, for the table, I begin with a rectangular top, approximately 8 inches by 4 inches, cutting the piece to size using a saw. For the legs, I find 2-inch square pieces, each about 3 inches long create stability. After cutting, I sand the edges to prevent splinters.
For assembly, I apply wood glue to the top ends of the legs and position them at each corner of the table. Clamping them ensures they stay in place while drying, typically around an hour. Later, I add additional strength by drilling small pilot holes and inserting screws into each leg.
Next, crafting the chairs involves cutting four 2-inch squares for the seat, along with backrests of about 2 inches high. I make two leg pieces for each chair, similar to the table’s but shorter, around 2 inches long. Sanding these pieces smooths any rough edges.
Assembling the chairs follows the same method as the table, adhering the legs at the corners of the seat. I fix the backrest to the rear legs, ensuring a comfortable angle for play. Again, clamps are helpful while the glue sets.
Finishing touches like paint or varnish can enhance the aesthetics of the table and chairs, making them visually appealing. I often opt for a non-toxic option, safe for kids, ensuring the finished items are not just functional but also stylish.
Painting and Finishing Wooden Barbie Furniture
For creating visually appealing mini-home accessories, selecting high-quality paint is crucial. I recommend using non-toxic acrylic or water-based paints, as they are safe and offer a variety of colors. Start with a primer to create a smooth surface that helps the paint adhere better.
Preparation and Application
Before applying any color, ensure the surface is sanded and clean. Use fine-grit sandpaper to smooth any rough edges. After dusting off the sawdust, apply a thin coat of primer. This step not only improves adhesion but also enhances the durability of the finish. Allow the primer to dry completely before proceeding.
Once primed, apply your chosen paint in uniform strokes with a small brush for finer detail or a roller for larger areas. Multiple thin layers yield a more polished look rather than a single thick layer. Between coats, lightly sand again for a smooth finish. Make sure to allow adequate drying time between applications.
Finishing Touches
After the paint has fully cured, consider sealing the wood to protect the finish and enhance longevity. A water-based polyurethane is a great choice for this purpose. Apply it with a clean brush, ensuring even coverage. A second or third coat may be necessary, following the same drying and sanding process between layers. Lastly, giving everything a light buff with a soft cloth after the final coat will add a beautiful sheen.
Tips: Always test paint on a small area first. If using stencils, ensure they are securely placed to avoid bleeding. Store your painted miniatures away from direct sunlight to prevent fading over time.
Making Accessories to Complement Your Barbie Furniture
Creating delightful accessories enhances the overall atmosphere of the play scene. Here’s a list of captivating items to consider crafting:
- Rugs: Cut pieces of felt or fabric to create colorful rugs. Choose vibrant patterns that reflect personal style.
- Pillows: Use scraps of fabric to sew small cushions. Add different textures for variety.
- Picture Frames: Assemble miniature frames from popsicle sticks. Decorate with paint or markers.
- Books: Craft little books using cardstock. Cover them with decorative paper; this adds realism to any setting.
- Flower Pots: Transform bottle caps into cute plant pots. Fill with pebbles and faux flowers for a fresh look.
- Lighting: String battery-operated fairy lights to mimic a charming lighting effect. Drape them creatively around the space.
Experimenting with various materials, such as beads for lamps or paper for artwork, broadens the accessory possibilities. Incorporating personal touches, such as favorite colors or patterns, ensures each piece feels unique and tailored.
Consider combining different styles; a modern vase alongside a vintage book can create an intriguing contrast. Focusing on details enriches the imaginative world and boosts the creative play experience.
Common Mistakes to Avoid When Crafting Dollhouse Accessories
Precision is key. Cutting pieces inaccurately leads to uneven joints, making assembly difficult. Always measure twice and cut once.
Ignoring scale can ruin proportions. It’s tempting to make items larger or smaller based on personal preference, but keeping dimensions consistent creates a more realistic appearance.
Underestimating the importance of sanding results in rough edges. Using a fine-grit sandpaper before assembly enhances smoothness and improves aesthetics.
Neglecting Stability
Overlooking structural integrity can lead to wobbling or collapse. Reinforce joints with wood glue or screws for added strength, especially on larger designs.
Using the wrong finish affects durability and look. Ensure the chosen paint or varnish is safe for children if the items will be handled frequently.
Rushing the Process
Speeding through assembly might seem efficient, but it often results in mistakes. Taking time for each step ensures attention to detail and a polished final product.
Not testing the final items can lead to disappointment. Always evaluate functionality and stability before finalizing, ensuring they meet expectations for playtime use.
FAQ:
What types of wood are best for making Barbie furniture?
When choosing wood for Barbie furniture, balsa and pine are great options. Balsa is lightweight and easy to cut, making it suitable for detailed designs. Pine, on the other hand, is more durable and can withstand rough play. Both types allow for easy painting and finishing, enhancing the overall appearance of the furniture.
How do I create a simple chair for Barbie using wood?
To make a basic chair, start by cutting a piece of wood into a rectangle for the seat, approximately 3 inches by 2 inches. Then, cut four legs from smaller pieces, each about 2 inches long. Attach the legs to the corners of the seat using wood glue or small screws. For the backrest, create a vertical piece about 3 inches high and attach it to the rear legs. Sand the edges to ensure a smooth finish, and paint or decorate as desired to complete the chair.
What tools do I need to make wooden Barbie furniture?
Key tools include a small saw for cutting wood, a sanding block or electric sander for smoothing surfaces, a drill for making holes if using screws, and wood glue for assembly. A ruler and pencil will help with measurements and markings. Safety goggles are also recommended to protect your eyes during cutting and sanding.
Can I paint the wooden furniture, and what paint should I use?
Yes, painting the furniture is a great way to personalize it. Acrylic paints work well on wood and provide vibrant colors. Make sure to apply a primer first for better adhesion, and seal the paint with a clear varnish or sealant to protect it from scratches and wear. Allow each coat to dry thoroughly before applying the next for the best results.
Are there any tips for making the furniture look realistic?
To achieve a more realistic look, consider adding details like small knobs for drawers, using fabric for cushions, or applying stencils for patterns. Pay attention to proportions to ensure the furniture matches the Barbie scale. Using a variety of wood stains can also add depth and character, making the pieces visually appealing and closer to actual furniture designs.
What materials are needed to make Barbie furniture out of wood?
To create Barbie furniture from wood, you’ll primarily need some basic supplies like wood (softwoods such as pine or plywood work well), a saw for cutting, sandpaper to smooth the edges, wood glue for assembly, and paint or wood stain for finishing touches. Additional items like screws or nails may also be helpful for sturdiness, and fabric can be used for upholstery to add a decorative element.