
 Caleb Turner

Regular dusting with a soft, lint-free cloth is my first line of defense against grime accumulation. I avoid using abrasive materials that could scratch the delicate outer layer. Instead, I prefer a slightly damp cloth for deeper cleaning, ensuring that it isn’t soaking wet, as excess moisture can warp the structure.
When dealing with stains, I quickly address them using a gentle mixture of mild soap and water. I apply it sparingly and wipe it off immediately, followed by a dry cloth to prevent moisture retention. For more stubborn stains, a little vegetable oil or specialized polish can effectively restore the shine without compromising the finish.
I make it a point to keep these items away from direct sunlight and heat sources, as they can cause fading and cracking. Consistent temperature and humidity control in my living space also help maintain their integrity over time.
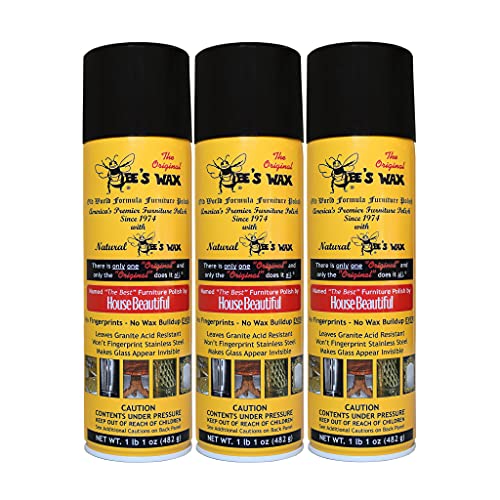
Once every few months, I apply a high-quality wax or polish to enhance the shine and provide a protective barrier. A light coat goes a long way, spreading evenly and buffing gently to retain that sleek appearance.
Care Tips for Veneered Surfaces
Dust your surfaces regularly with a soft microfiber cloth to prevent abrasive particles from scratching the finish. I prefer using a damp cloth occasionally, but I ensure excess moisture is wrung out to avoid water damage.


Cleaning Agents
Avoid harsh chemicals. Instead, I opt for a mild soap solution or specialized cleaners designed for laminate surfaces. Testing any product on a small hidden area first is my go-to approach.
Temperature and Humidity Control
Maintaining stable humidity levels is key. I use a humidifier in dry seasons to prevent warping. Additionally, I steer clear of placing my pieces near heat sources, like radiators or direct sunlight, which can cause cracking over time.
| Do’s | Don’ts |
|---|---|
| Use coasters under drinks. | Avoid using abrasive scrubbers. |
| Check for loose edges and re-glue if necessary. | Don’t expose to extreme temperatures. |
| Apply furniture wax occasionally for shine. | Never soak the surface with water. |
By following these guidelines, I feel confident in prolonging the life and appearance of my crafted pieces.
Choosing the Right Cleaning Products for Veneer
I recommend using pH-balanced cleaning solutions specifically designed for wood surfaces. These formulations prevent damage, preserving the finish while removing dirt and grime.
Opt for natural cleaners such as a mixture of vinegar and water. This solution effectively cuts through residue without harsh chemicals. Ensure to use it sparingly–a slightly damp cloth works best to avoid excess moisture.
Microfiber cloths are unbeatable for dusting and polishing. They capture particles without scratching the surface, maintaining the original sheen.
Avoid abrasive cleaners and scrubbing pads; these can ruin the veneer finish. Similarly, steer clear of ammonia-based products, which can be too harsh.
For stubborn stains, I find using a mixture of olive oil and lemon juice can help. Apply it carefully, and buff with a soft cloth, bringing back the shine without damaging the surface.
Lastly, always test new cleaning products in an inconspicuous area before applying them widely. This precaution ensures compatibility and protects against unforeseen reactions.
Daily Care Tips for Veneer Surfaces
Wipe down surfaces with a soft, lint-free cloth daily to remove dust and prevent build-up. For a quick clean, dampen the cloth slightly–avoid soaking it to protect the finish.
Moisture Control
Keep humidity levels moderate. Excess moisture can cause warping, while too little may lead to cracking. Aim for a humidity range of 30-50% in your living space.
Spot Cleaning
For spills, act immediately by blotting with a clean cloth. Avoid rubbing, which can damage the finish. If needed, use a mild soap solution, ensuring all residue is wiped away with a damp cloth afterward.
Dealing with Scratches on Veneer Furniture
I recommend addressing scratches immediately to prevent further damage. For minor scuffs, I find that a soft cloth slightly dampened with water can help. Gently rub the area in a circular motion. This often lifts surface dirt, making scratches less noticeable.
Using Wax or Polish
If the scratch persists, applying a quality furniture wax or polish can help disguise it. I prefer products that match the finish of the wood. Apply a small amount onto a clean cloth and rub it over the scratch. This not only camouflages the mark but also adds a protective layer.
Wood Stain Markers
For deeper scratches, I utilize wood stain markers. Select one that closely matches the color of the surface. Apply the marker directly to the scratch, following up with a light touch of furniture polish once it dries. This method can restore the original appearance effectively.
Preventing Moisture Damage to Veneer
To safeguard against moisture harm, I utilize coasters or mats under drinks and flower vases. This simple action creates a barrier, preventing condensation or spills from penetrating the surface.
Humidity Control
Maintaining a stable humidity level in the environment is crucial. I invest in a dehumidifier or humidifier as needed. Aim for indoor humidity between 30% and 50% to reduce risks of warping or peeling.
Surface Protection
- I apply a protective wax or sealant regularly to form a moisture-resistant layer.
- Avoid placing hot items directly on the surface; use trivets or heat pads instead.
- Periodically check for any signs of moisture accumulation, such as swelling or discoloration.
By implementing these strategies, I effectively minimize potential moisture-related damages, ensuring longevity and appearance remain intact.
Best Practices for Polishing Veneer Furniture
I recommend using a high-quality, non-abrasive polish specifically designed for natural wood products. Apply the polish sparingly on a microfiber cloth, ensuring not to saturate the fabric. A small amount goes a long way in enhancing the shine without damaging the surface.
It’s best to work in the direction of the grain. This technique helps avoid swirl marks and uneven finishes. Use gentle pressure while buffing to bring out a brilliant luster. Regular polishing every few months can significantly improve the surface’s appearance and protect it from wear.
For optimal results, consider combining polishing with occasional deep cleaning. This removes built-up grime that may dull the finish, allowing for a more effective shine when polished. Always follow the manufacturer’s instructions for any product used and test it on an inconspicuous area first.
If fingerprints or smudges appear, a simple solution of water and mild soap can take care of it, followed by a light polish afterward. Avoid harsh chemicals or abrasive scrubbers that could scratch the glossy finish.
Keep in mind that over-polishing can lead to a waxy buildup, which may cloud the surface. I prefer a routine approach, checking each piece for its shine and adjusting the frequency of polishing accordingly. This keeps the surfaces looking their best without risking damage.
Storing Veneer Furniture Correctly
Place items in a climate-controlled environment, maintaining a temperature between 60°F and 75°F. Fluctuating temperatures can cause warping and cracking.
Use breathable covers when storing to prevent dust accumulation while allowing airflow. Avoid plastic wrapping, as it can trap moisture and lead to mold growth.
Placement Tips
- Keep away from direct sunlight to prevent fading and discoloration.
- Avoid damp areas; humidity levels should remain between 30% and 50%.
- Store upright to prevent pressure that could cause physical damage.
- Use padded protection like blankets or foam for cushioning when stacking items.
Regular Checks
Inspect the stored pieces every few months for signs of damage or pests. Early detection allows for easy resolution before problems escalate.
Consider placing silica gel packets around to absorb excess moisture in enclosed spaces to guard against humidity-related issues.
Identifying and Repairing Veneer Delamination
First, check for signs of separation or bubbling at the edges or surfaces. If you notice any areas where the thin layer has lifted, it’s crucial to act quickly to prevent further damage.
For minor delamination, apply a few drops of wood glue under the lifted area using a syringe or a small brush. Carefully press down the veneer and wipe away any excess glue with a damp cloth to avoid residue. To secure it in place, place a weight on top for a few hours or until the adhesive fully sets.
If the damage is more severe, consider using clamps. Gently squeeze the edges together without applying too much pressure, which could cause additional damage. Insert a piece of parchment paper between the clamp and surface to protect the finish.
In cases where the veneer is cracked or broken, you might need to patch the area. Cut a new piece of matching veneer slightly larger than the damaged section. Optionally, taper the edges of the patch for a better fit. Secure it with glue and press it into place, again using a weight or clamps to hold it until dry.
If discoloration remains post-repair, using a suitable wood stain can help blend the patched area with the surrounding surface. Choose a stain that matches the original tone, applying it with a fine brush for precision.
Finally, once repairs are complete and dried, consider applying a protective finish to enhance durability. This will help safeguard against future delamination and maintain the beauty of the surface.


