The most effective way to ensure outdoor seating remains stable is by adjusting the legs. Start by inspecting each leg individually for unevenness and use simple shims or small pieces of wood to fill any gaps. This can instantly reduce wobbling and enhance comfort.
It’s important to measure the height differences accurately. Using a level tool can help you identify where adjustments are necessary. Be sure to place the tool on the surface of the table or chair, taking note of any discrepancies. Once identified, cut shims to the required thickness for precise leveling.
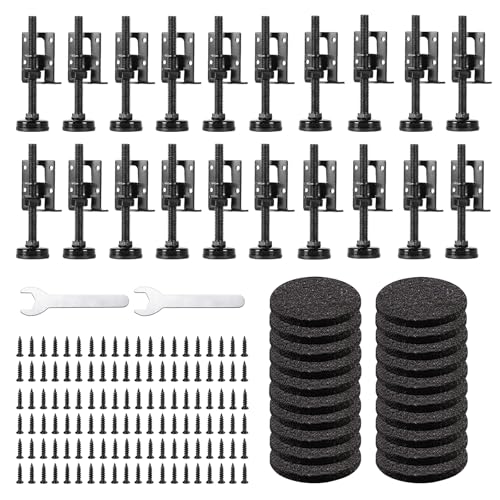
If adjustments with shims are insufficient, consider using adjustable leg glides. These allow for a more refined adjustment process. Simply twist the glide to increase or decrease the height of the leg until equilibrium is achieved. This solution provides a long-term fix for uneven surfaces.
Adjusting Your Outdoor Seating
To achieve stability, utilize adjustable pads beneath each leg of your seating pieces. These can compensate for uneven ground and provide a solid base. When selecting pads, consider rubber or foam options for their grip and durability.
Using Leveling Jacks
In areas with significant slope, installing leveling jacks can be an effective solution. These tools allow for precise adjustments, ensuring your chairs and tables maintain an even stance. Position jacks at the corners for optimal results.


Ground Preparation Techniques
Another approach involves modifying the ground beneath your pieces. Adding small gravel or compacted sand can create a more level surface. Ensure the area is properly compacted to prevent future settling that could disturb stability.
Assessing the Current Level of Your Outdoor Surface
I recommend using a long, straight plank or bubble level to check the flatness of your outdoor area. Place the plank across different sections to identify any high or low spots. For a precise measurement, ensure the level rests on the surface. Any significant discrepancies will become apparent during this process.
An alternative method involves pouring a small amount of water onto the surface and observing its flow. Water will naturally settle in low areas, providing a visual indication of unevenness. After assessing the surface, mark problematic spots with chalk or stakes for future reference when making adjustments.
If your outdoor area has tiles or pavers, inspect the joints and alignment. Misaligned pieces may create an illusion of unevenness, so ensure they fit tightly. For gravel or dirt surfaces, check for compacted areas, which can affect overall stability and flatness.
<pUsing these techniques, I can pinpoint where adjustments are necessary, allowing me to create a stable environment for seating and tables. Regular assessments can help maintain functionality and comfort in outdoor spaces.
Choosing the Right Tools for Leveling Furniture
For effective adjustment of outdoor seating and tables, I recommend having specific tools ready. A basic toolkit should include the following:
Essential Tools
| Tool | Purpose |
|---|---|
| Leveling Tool | Determines if surfaces are even, helping to identify needed adjustments. |
| Shims | Simple wedges or blocks used to raise seating legs or tables to match height. |
| Adjustable Feet | Allows for raising or lowering specific furniture components for better alignment. |
| Rubber Mallet | Pounds shims into place without damaging the material. |
| Measuring Tape | Ensures precise measurements when adjusting or replacing components. |
Having these tools will greatly enhance the precision of the adjustment process. Whenever I work on uneven settings, I also find it useful to keep a notepad nearby to jot down measurements or specific adjustments needed. This not only streamlines the process but also helps avoid miscalculations.
Additional Equipment
If you want to go a step further, consider these optional items:
| Tool | Purpose |
|---|---|
| Laser Level | Projects a straight line for a more accurate setup over longer distances. |
| Wood Blocks | Provides a sturdy foundation for uneven legs when shims are not sufficient. |
Investing in a few additional tools can make adjustments easier and more efficient. By selecting appropriate instruments, I can ensure that all pieces are stable and secure, enhancing the overall comfort of my outdoor area.
Using Furniture Levelers: A Step-by-Step Guide
Begin with gathering the necessary items: furniture levelers, a measuring tape, and a wrench or screwdriver for adjustments. These tools will make the process straightforward and efficient.
Step 1: Identify Uneven Legs
Inspect each piece of seating or tables for legs that may be shorter or longer than the others. Placing them on a flat surface allows for easy identification of discrepancies in height.
Step 2: Attach Levelers
For furniture that comes with pre-drilled holes, simply insert the levelers into the appropriate locations. If the construction lacks these features, mark where adjustments need to happen, and use a drill to make needed holes. Screw in the levelers firmly, ensuring a snug fit to avoid wobbling during use.
After all levelers are attached, double-check the height of each piece against one another using your measuring tape, making fine adjustments as necessary for optimum stability. This ensures a comfortable experience while dining or lounging outdoors.
Adjusting the Height of Table Legs with Spacers
To modify the height of your table legs effectively, consider using spacers that come in various materials such as rubber, plastic, or wood. These can provide a quick solution to uneven surfaces without extensive alterations.
Materials Needed
- Spacers (rubber, plastic, or wood)
- Measuring tape
- Leveling tool
- Adhesive (optional)
- Screwdriver (if attaching)
Steps to Adjust Height
- Measure the height difference: Check the unevenness using a leveling tool across the table surface.
- Choose appropriate spacers: Based on measurements, select spacers that will eliminate the height gap effectively.
- Install the spacers:
- If using adhesive, attach the spacer securely to the base of the leg.
- For screw-on spacers, align them with existing holes or drill new ones if necessary.
- Recheck the level: After installation, use the leveling tool again to confirm the table sits evenly.
Adjusting the table legs in this way can enhance both stability and comfort. If needed, keep spacers on hand for future adjustments or for other items in your outdoor setting.
DIY Solutions for Uneven Ground Situations
Use pavers or stepping stones to create a stable base for items like tables and chairs. Lay them down where the surface dips, ensuring they’re level with surrounding areas.
Adjustable Feet
Consider purchasing adjustable feet for your seating arrangements. These components allow fine-tuning for any height discrepancies, making them practical for varied terrains.
Wooden Shims
Wooden shims are useful for temporary adjustments. Insert them under the legs of individual pieces to compensate for gaps and maintain stability. Cut them to fit as needed, ensuring a snug placement.
A mixture of sand and gravel can provide a firm foundation. Creating a base layer can help mitigate uneven surfaces while adding some drainage capability. Compact the mixture well to prevent settling.
Testing Stability: Ensuring Comfort and Safety
I always prioritize testing stability after completing adjustments. To check the balance, I sit down on chairs and lean against tables to assess how they react. If they wobble or feel unsteady, further adjustments are necessary. I make it a practice to observe how smoothly the chairs slide across the surface, ensuring there’s no sticking or dragging that could lead to discomfort.
Using a Leveling Tool
Employing a small leveling tool enhances accuracy. I place it on the tabletop and use it as a reference point. If the bubble isn’t centered, I know precise modifications are needed. This method saves time and helps me avoid guesswork.
Test with Guests
Inviting friends or family to join the space allows me to receive honest feedback on comfort. Their insights often reveal issues I might overlook, ensuring a pleasant experience for everyone. I pay attention to how they position themselves and if they express any discomfort.
Regular checks are vital, particularly after heavy use or extreme weather changes. I find that routine testing keeps everything stable and secure, significantly enhancing both enjoyment and safety in the area.
Maintaining Level Furniture Through Seasonal Changes
To ensure stability year-round, I regularly monitor the ground conditions beneath my outdoor seating and tables with the changing seasons. This proactive approach prevents unwanted wobbling and tilting.
During wet seasons, I notice increased soil compaction or settling. It’s beneficial to elevate furniture by using adjustable feet or pads that create distance from waterlogged ground. I look for materials that resist moisture, thereby maintaining integrity over time.
In winter, frost-heaved surfaces often cause unevenness. To combat this, I check for shifted soil or rising stones after thawing. Using levelers or shims becomes necessary to adjust any discrepancies that arise after heavy snow melts.
- Inspect the foundation before winter hits.
- Apply gravel or sand in low spots to promote drainage.
- Cover surfaces with protective tarps during harsh weather.
Spring is a great time for adjustments. I typically assess and make any necessary changes once the ground dries out. I keep a set of shims or adjustable feet on hand for immediate fixes, ensuring comfort throughout the warmer months.
In summer, heat can cause certain materials to expand or contract. I regularly check pressure and stability, especially for synthetic products that may react more drastically to temperature changes. Timely adjustments prevent discomfort during gatherings.
The effectiveness of my outdoor arrangements hinges on a routine inspection aligned with these seasonal changes. I stay ready to respond to variations, creating a consistently inviting atmosphere for relaxation and entertainment.


