For securely affixing substantial items to vertical surfaces, begin with selecting the correct anchors. Choose metal wall plugs or toggle bolts for drywall, as these provide the required support. For wooden surfaces, use lag screws, ensuring they penetrate the studs for strength.
Before starting the installation, locate the studs behind the drywall using a stud finder. Mark their positions clearly. This will guide you in placing the fasteners accurately, minimizing the risk of collapse. Additionally, for even weight distribution, assess the dimensions of the object and consider multiple mounting points.
Prepare the chosen object for attachment by attaching appropriate hardware. Heavy units may require specific brackets or plates that can be drilled into the back. Level everything before tightening each screw to ensure an even presentation. Lastly, never hesitate to consult or hire a professional if there are any uncertainties about weight or installation methods.
Safe Installation of Weighty Items
Ensure you locate the studs behind the surface. Use a stud finder to pinpoint these structural components, as they provide the best support.
Choose appropriate anchor systems for the load. For substantial pieces, toggle bolts or heavy-duty wall anchors are recommended, offering the strength needed to hold significant weight.


Measure and mark carefully before drilling. This minimizes mistakes and ensures proper placement. I recommend using a level to guarantee that your item is perfectly aligned.
- Select the right hardware based on the weight and size of the item.
- Drill pilot holes to prevent the material from splitting.
- Install the fasteners securely, making sure they are tightened well.
Consider adding additional support if the piece has multiple sections. This helps distribute the weight more evenly, minimizing stress on any single point.
- Regularly check the stability of the installation over time.
- Avoid overloading shelves or units that are designed for lighter items.
- Use brackets for added security, especially for larger or taller pieces.
Test the setup by gently applying pressure after installation. This ensures it is secure before placing any items on it.
Choosing the Right Wall Material for Heavy Items
Seek out sturdy structures like concrete or brick for reliable support. These materials naturally bear significant weight without additional reinforcements. If working with drywall, use specialized anchors such as toggle bolts or molly bolts. These enhance load capacity and ensure secure placements.
Assess the overall condition of the surface. Check for any signs of wear, damage, or rot, as these will compromise stability. If using older plaster walls, similar to drywall, utilize appropriate anchors. Consider the placement of studs behind drywall, as they provide the most robust support.
Softwood surfaces may require additional precautions. Reinforcing with plywood or other backing boards can distribute weight and improve holding power. Always test mounts once installed to confirm their integrity before placing any items on them.
In case of hollow-core materials, keep in mind that they are less reliable under pressure. Employ brackets that can spread the load across a broader area, minimizing the risk of failure. Always adhere to weight limits specified for any mounting hardware used.
Finally, consult local building codes to ensure conformity with safety regulations. This guarantees a secure and proper setup that stands the test of time.
Determining the Weight Capacity of Your Wall
To ensure safe installation, first, I assess the type of structural elements in my space. Studs provide the best support for mounting; I locate them using a stud finder, which identifies the position of these vertical supports behind my surface.
Next, I calculate the load-bearing capacity of these studs. Typically, a standard 2×4 stud can handle around 50-100 pounds when supported correctly, but this can vary based on the direction of the load and how the weight is distributed. I confirm the orientation of the studs; they should ideally run vertically for optimal support.
If the surface is drywall or similar, I consider using toggle bolts or anchor screws, allowing me to distribute weight efficiently. For more significant loads, I might span multiple studs when securing brackets or mounts, creating a more reliable foundation.
Additionally, I verify the condition of the framing; any signs of rot, water damage, or degradation mean I need alternative mounting solutions. Ensuring the integrity of the structural elements is paramount before proceeding with any attachments.
I also look into local building codes or regulations, as they may provide guidance on the weight limits for installed elements. Understanding these guidelines helps me make informed choices regarding my installations.
Finally, I always overestimate the weight capacity to accommodate any unforeseen stressors. This practice ensures long-term safety and stability for any objects I decide to suspend from my surfaces.
Selecting Appropriate Wall Anchors and Fasteners
I recommend using the right anchors and fasteners tailored to the materials and weight of the items being mounted. Here’s a concise guide on specific types that are most effective:
- Toggle Bolts: Ideal for hollow drywall. These expand once inserted, providing robust support. Make sure to choose a size that can take the load of your object.
- Masonry Screws: Best suited for concrete or brick. Pre-drilling is necessary, and using a hammer drill will make the process smoother.
- Drywall Anchors: Plastic or metal options work well. They are easy to install and can hold moderate weights. Look for those rated for higher loads if needed.
- Lag Screws: Perfect for securing directly into wooden studs. Pre-drilling a pilot hole will prevent splitting the wood.
- Plastic Expansion Anchors: These are practical for lightweight items and can be used in drywall or masonry. Always check the weight ratings.
Confirm the length of your screws or anchors. They should penetrate deeply enough to reach the structural material behind the surface for effective support.
Don’t forget to assess the diameter of the fasteners; larger screws distribute weight more evenly, reducing the chance of failure. In addition, utilizing multiple anchors can help in distributing weight more effectively across the surface.
Finally, match the anchor style with your toolset. Some may require specific drilling techniques or tools, so ensure compatibility to achieve the best results.
Measuring and Marking Locations for Mounting
Accurate measurements are the cornerstone of a successful installation. I always begin by determining the desired height for mounting. Typically, this is around 54 to 60 inches from the floor for the center of the piece, but I adjust based on personal preferences and room proportions.
Tools Required
I use the following tools for precision:
- Measuring tape
- Pencil
- Level
- Stud finder (if appropriate)
Steps for Measurement and Marking
Follow these steps to ensure perfect placement:
- Measure the width of the item to determine its center. Mark this point lightly on the wall.
- Use a level to draw a horizontal line at the desired height, intersecting the center point.
- If necessary, use a stud finder to locate any wooden beams behind the surface. Mark these locations as they will offer more support.
- For additional assurance, I often use a second level vertically from the horizontal line to double-check alignment.
| Measurement | Action |
|---|---|
| Height from Floor | Mark desired mounting height |
| Width of Item | Find and mark center point |
| Location of Studs | Mark stud locations |
| Level Alignment | Draw reference lines to ensure straightness |
With these steps and tools, precise marking ensures that the installation will be stable and visually appealing. Ensuring I have everything in place before proceeding makes the project go smoothly.
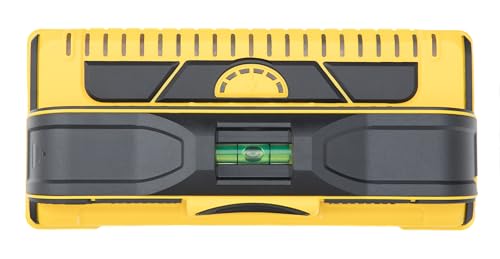
Using a Stud Finder for Secure Installation
I recommend using a stud finder to pinpoint the location of the structural supports behind your vertical surfaces. This tool helps in identifying where to position your apparatus to ensure a secure attachment point for your item.
Types of Stud Finders
There are two main types of stud finders: magnetic and electronic. Magnetic units detect screws and nails in the stud, while electronic models sense changes in density to locate studs. I prefer electronic finders due to their accuracy.
Steps to Use a Stud Finder
1. Calibrate the Device: Ensure the stud finder is calibrated according to the manufacturer’s instructions to improve accuracy.
2. Scan the Surface: Move the device horizontally along the target area. It will signal when it detects a stud.
3. Mark the Position: Once you identify the edges of the stud, mark the center with a pencil for precise drilling.
| Type | Pros | Cons |
|---|---|---|
| Magnetic | Inexpensive, no batteries needed | Less accurate, may miss smaller fasteners |
| Electronic | High accuracy, depth detection | More costly, requires batteries |
Utilizing a stud finder in this manner ensures that your attachment points are secure and capable of supporting significant weight. This step is critical for preventing damage to your structure and maintaining safety.
Preparing the Furniture for Wall Hanging
First, ensure that the item is cleaned and free from any dust or debris. This prevents unwanted marks on the wall once it is mounted. Next, disassemble any parts that could hinder the installation process, such as shelves, legs, or hardware. This reduces the weight and simplifies maneuvering during the setup.
Check for any pre-existing mounting brackets or hardware on the back of the piece. If present, make sure they are secure and suitable for wall attachment. If there are no mounting options, consider installing heavy-duty brackets. Select brackets that can comfortably support the weight and size of your item.
If the piece has rough edges or sharp corners, it may be beneficial to sand these down to avoid damage to the wall or injury during installation. Additionally, if any finish or paint on the surface is chipped or peeling, repair these areas to maintain a polished look upon installation.
Finally, ensure any cables, cords, or accessories are organized and out of the way. This minimizes the risk of tangling or damage and contributes to a cleaner appearance once the item is installed.
Step-by-Step Guide to Actual Hanging Process
I prepare tools and materials required:
- Drill or screwdriver
- Level
- Tape measure
- Marker or pencil
- Safety goggles
Next, I ensure that I coordinate with a partner for assistance during installation. This makes maneuvering simpler and safer.
1. I align the mounting bracket or plate with the marked spot on the surface.
2. Using a level, I confirm that the bracket is straight before marking additional holes for screws.
I proceed to drill holes at the marked points, ensuring they are appropriate in size for the selected anchors. Protecting my eyes is a priority during drilling.
3. After the holes are prepared, I install wall anchors, following the manufacturer’s instructions regarding depth and type.
I then attach the bracket securely to the surface, checking that all screws are tightened firmly. I double-check with a level to confirm that it’s aligned properly.
4. Now, I lift the mounted item into position, ensuring it engages with the installed bracket correctly. It helps to have someone support the weight during this process.
5. Finally, I conduct a stability test. I apply slight pressure to ensure it holds securely before stepping back to evaluate the visual placement.
Safety Tips and Common Mistakes to Avoid
Always check the weight limits of the fasteners before proceeding. This ensures the support used can handle the load and prevents accidents.
Verify that the mounting surface is appropriate. Use a stud finder to locate studs, which provide a more secure anchor than drywall alone.
Double-check measurements before drilling. Reassessing placements reduces errors that can lead to misalignment and weak installation.
Use multiple anchors for larger pieces. This distributes weight and stabilizes the object, minimizing the risk of it coming loose.
Ensure that any electrical wiring or plumbing isn’t in the area where you’re planning to drill. Damage could lead to hazards and costly repairs.
Consider the design of the item being affixed. Asymmetrical shapes may require additional supports to prevent tipping or swaying.
Don’t overlook the importance of regular maintenance checks. Periodically inspect the hardware to ensure everything remains secure and intact.
Avoid using only small or lightweight anchors for substantial items. They may seem sufficient but often fail under greater weight or stress.
Watch for wall imperfections. Cracks or damage can compromise the installation’s integrity, requiring repair before mounting begins.
If unsure about the installation process, consult with a professional. Seeking advice can safeguard against potential missteps and enhance the overall outcome.


