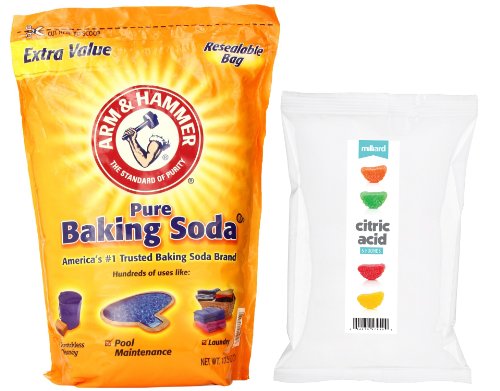
I recommend immediately addressing the issue using a combination of vinegar and baking soda. Mix equal parts of white vinegar and water in a spray bottle and apply it to the affected area. Allow the solution to sit for about 5-10 minutes to neutralize the scent, then blot it with a clean cloth.
After that, generously sprinkle baking soda over the dampened region. This substance will absorb any lingering odors. Leave it for several hours or, ideally, overnight for maximum effect. Once done, vacuum the area to remove the baking soda.
If the scent persists, a solution of hydrogen peroxide can be beneficial. Mix one part hydrogen peroxide with two parts water, and apply cautiously, as it can lighten some finishes. Again, blot and allow it to dry completely.
Finally, ensure proper ventilation during this process. Opening windows or using a fan can help expedite drying and eliminate odors effectively.


Identify the Affected Areas of the Furniture
Examine each section of the item closely, focusing on surfaces where liquids may have seeped. Inspect the legs, corners, and any crevices or joints where moisture could accumulate.
Visual Inspection
Look for discoloration or sticky residue as indicators. A darkened area or any change in the wood’s sheen often points to a problem spot. Pay special attention to areas where pets typically rest or play.
Smell Test
Conduct a careful sniff test around the item. Areas with lingering odors should be marked for further treatment. It’s crucial to accurately identify these spots to effectively target cleaning efforts.
Using a flashlight can help highlight subtle blemishes on the surface. Keeping track of all identified areas ensures that each one receives appropriate attention during the cleaning process.
Gather necessary cleaning supplies
I recommend collecting the following items for effective cleanup: a mixture of vinegar and water, baking soda, a soft cloth or sponge, an enzymatic cleaner specifically designed for pet odors, and a spray bottle. These solutions tackle both discoloration and lingering scents.
Ensure you also have a vacuum handy for initial debris removal. A pair of rubber gloves can protect your hands during the process. A bowl or container may help you mix solutions with ease.
Consider utilizing a microfiber cloth, as it can lift stains without scratching surfaces. If needed, a soft-bristled brush will assist in scrubbing without damaging the finish. Having these supplies ready will streamline the cleaning process.
Lastly, test any solution on a hidden area to prevent unintended damage. Proper preparation is key for a successful cleanup.
Blot the stain immediately after discovery
Upon noticing the issue, act swiftly to minimize damage. Use a clean, absorbent cloth or paper towel, folding it to create a thicker layer that can absorb more liquid. Gently press down on the affected area without rubbing, as this can spread the liquid further. Change the cloth or paper towel frequently until no more moisture is lifting from the surface.
Consider using a cloth dampened with water for this step, as it can assist in lifting some of the residues. Always start blotting from the outer edges of the stain and move toward the center to avoid enlarging the area. Dispose of the saturated cloth properly to prevent any re-soiling risk.
Once I’ve blotted the surface dry, it’s crucial to allow it to air dry completely before proceeding with further cleaning methods. This prevents trapping moisture, which may lead to permanent damage or lingering odors.
Create a Cleaning Solution for Wood
I mix a solution using equal parts of white vinegar and water. This combination effectively neutralizes odors and cleans surfaces without damaging the finish.
Ingredients
| Ingredient | Quantity |
|---|---|
| White Vinegar | 1 cup |
| Water | 1 cup |
| Optional: Dish Soap | 1 teaspoon |
For tougher cases, I add a teaspoon of mild dish soap to assist in breaking down any grime. After combining the ingredients in a spray bottle, I shake it gently to mix. This solution can be sprayed lightly on the affected areas without saturating the surface, followed by a soft cloth to wipe it down.
Usage Tips
Always test on an inconspicuous part of the area first. If the blend works well, proceed to treat the entire blemished section. For stubborn spots, I let the solution sit for a few minutes before wiping it away. This method helps lift stubborn residues while eliminating odors more effectively.
Apply the solution and scrub gently
After preparing the cleaning mixture, I apply it directly to the stained area with a soft cloth or sponge. It’s crucial to saturate the spot slightly without soaking the surface. The goal is to dissolve the remnants for easier removal.
Next, I use gentle circular motions to scrub the area. This light scrubbing helps lift any trapped particles without damaging the finish. I ensure I’m not applying excessive pressure, as I want to maintain the integrity of the surface.
Steps to Follow:
- Work in small sections to avoid spreading any residue.
- Keep a second clean cloth on hand for wiping away excess solution.
- Rinse the cloth regularly in clean water to avoid reintroducing dirt.
In case of stubborn odors or stains, I may repeat the application process. Persistence can be key to achieving a fresh scent and restored appearance. After scrubbing, I let the area dry completely to assess if further treatment is necessary.
Neutralize Odors with Natural Remedies
I use a mixture of baking soda and white vinegar to effectively tackle lingering odors. I sprinkle baking soda generously over the affected area and allow it to sit for several hours, preferably overnight. This acts as a natural absorbent. Afterward, I lightly spray the area with a solution of equal parts water and white vinegar. The acidity of vinegar helps neutralize any remaining scent.
Another effective solution involves using lemon juice. I mix lemon juice with water and apply it to the stained region using a soft cloth. This not only helps in masking the odor but also leaves a fresh scent. I ensure to wipe off any excess moisture afterward to prevent damage.
Activated charcoal is also beneficial. I place a small bowl of activated charcoal near the affected spot for a few days. It absorbs odors efficiently and works without leaving any residue.
Additionally, I employ essential oils like lavender or tea tree. I dilute a few drops in water and use a spray bottle to mist the area lightly. This offers a pleasant aroma while counteracting unwanted scents.
Prevent Future Accidents with Proper Training
Establish a consistent routine for bathroom breaks to minimize indoor incidents. Take your pet outdoors at regular intervals, especially after meals, playtime, or prolonged periods of activity. This will help create a habit that encourages proper elimination outside.
Use Positive Reinforcement
Reward your companion with treats, praise, or playtime immediately after they relieve themselves outside. This association with positive outcomes reinforces good behavior. Be patient and persistent; consistency is vital to achieving long-term success.
Recognize Signs
Learn to identify specific cues your furry friend exhibits when they need to go outside, such as circling, whining, or heading towards the door. Being proactive ensures you can guide them to the appropriate spot promptly, reducing the likelihood of furniture mishaps.


