


To give your cabinets or desks a fresh look, opt for a high-quality adhesive designed specifically for paper applications. This choice ensures durability and ease of application, making the process straightforward. Before starting, clean the surface thoroughly to remove any dust or grease, creating the optimal environment for adhesion.
Once the surfaces are prepped, measure and cut sheets accurately. Leave a little extra at the edges to accommodate any trimming later. Carefully apply the adhesive, ensuring an even layer across the area. Then, position your paper, smoothing it down from the center to the edges to eliminate air bubbles and ensure a flawless finish.
After placement, trim any excess material using a sharp blade to achieve clean edges. For added protection, consider applying a clear sealant that complements the design. This not only enhances the appearance but also shields the surface from scratches and moisture.


Installation Steps for Decorative Paper on Cabinets
Begin by ensuring the surface is clean and free from dust or grease. Use a mild cleanser and a cloth to wipe down the area thoroughly. Allow it to dry completely before proceeding.
Next, gather necessary supplies: a unique covering of your choice, adhesive specifically formulated for this type of material, a utility knife, a smoothing tool, and a measuring tape.
Measure the dimensions of the surface you want to enhance. It’s crucial to cut the covering slightly larger than the surface area to allow for adjustments. Use a straight edge for precision.
Apply adhesive evenly on the back of the decorative paper. I prefer to work in sections, ensuring that I get full coverage without over-saturating. If the adhesive allows repositioning, be cautious and take advantage of it for perfect alignment.
- Position the material onto the selected area, starting from one edge. Be careful not to trap air bubbles. Use the smoothing tool to gently push from the center outwards.
- Trim excess edges using a utility knife for a clean finish.
- Seal the edges with additional adhesive if needed to prevent peeling.
Finally, let everything cure according to the adhesive’s instructions. Avoid using the cabinet for at least 24 hours to ensure a solid bond. Enjoy the transformed look of your cabinetry!
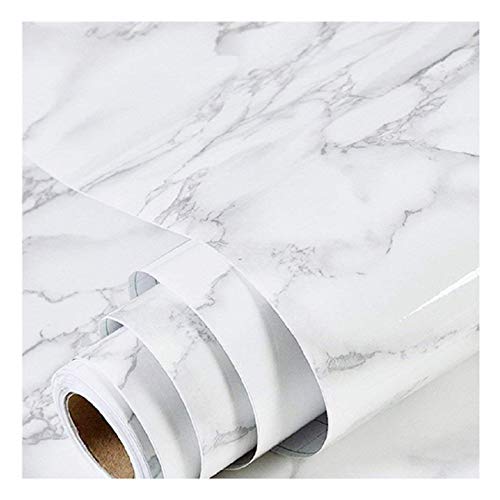
Choosing the Right Wallpaper for Furniture
Prioritize selecting a design that complements the existing style of your space. For modern aesthetics, geometric or abstract patterns work well. If your area leans towards a classic vibe, florals or damask designs are ideal.
Considerations for Material
Opt for vinyl or texture-rich options for durability and ease of cleaning, especially on surfaces prone to wear. If you’re looking for a more luxurious feel, fabric-based coverings can add warmth and depth.
- Select materials with a finish suitable for the intended use.
- Ensure the chosen texture can withstand environmental factors if applicable.
Color Coordination
Match hues with your color palette to create harmony in the room. Bright or bold colors can serve as statement pieces. Conversely, softer shades may promote tranquility.
- Use color swatches to visualize how the prints will interact with your existing decor.
- Avoid overwhelming combinations; stick to two or three main colors.
By assessing design, material, and color, the right choice becomes clear, enhancing both functionality and aesthetics in your renovation project.
Preparing the Surface for Wallpapering
To ensure a smooth application, I recommend thoroughly cleaning the surfaces. Use a mild detergent mixed with water to remove dust, grease, or any residues. Rinse with clean water and allow it to dry completely.
Surface Repair
Inspect the area for any imperfections that could interfere with the adhesion. Fill in cracks or holes using a suitable filler. Once dry, sand the repaired spots to align them smoothly with the surrounding areas.
Sanding and Priming
- Lightly sand the entire surface with fine-grit sandpaper to create a texture. This will enhance bonding.
- Apply a primer designed for the material you are working with. Ensure it is compatible with the decorative covering you plan to use.
- Allow the primer to dry thoroughly following the manufacturer’s recommendations.
Make sure the environment is at the correct temperature and humidity level for best results. Checking these factors can prevent future peeling or bubbling in the decorative layer. By preparing properly, you’ll achieve a seamless and long-lasting finish.
Gathering Necessary Tools and Materials
To achieve a successful transformation of surfaces, I ensure I have the following items ready: a sharp utility knife for precise cutting, a measuring tape for accuracy, and a smoothing tool to eliminate air bubbles and creases.
Additionally, I prepare an adhesive specific for wallpaper application; this can be pre-mixed or a paste depending on the type I choose. A clean cloth or sponge is essential for wiping away excess glue during the process.
Other Important Supplies
Make sure to gather a straight edge, which aids in making clean, straight cuts. A roller brush can also be useful for even application of the adhesive. Lastly, I keep a drop cloth on hand to protect surrounding areas from spills or messes.
Preparation Tools
I include a sandpaper block or sponge to smooth the surface before starting. A primer may be required if the material of the surface is glossy or textured, ensuring better adhesion. Verify that I have all necessary tools within reach to maintain a seamless workflow.
Measuring and Cutting Wallpaper Accurately
I find precise measurements are key to achieving a polished look. Use a tape measure to get accurate dimensions of the surfaces you’re covering. Always measure width and height at multiple points, especially on uneven surfaces, and take the longest measurements for cutting.
Marking Cut Lines
After measuring, it’s best to mark the cut lines on the back side of the paper using a straightedge and a pencil. This will ensure clean, straight lines. Double-check your marks before cutting to avoid unnecessary waste. Consider adding a little extra length to each piece to allow for mistakes or adjustments during the application process.
Cutting Techniques
Use a sharp utility knife or a rotary cutter for clean cuts. A cutting mat underneath will protect your workspace. Always cut on a flat, stable surface. For curved or intricate edges, scissors may be more effective. Regularly change blades to maintain cutting quality.
Before you begin fixing the paper, I recommend laying out all cut pieces on the surface to visualize how they fit together. This pre-arrangement helps to avoid mismatches and ensures a cohesive design.
Applying Adhesive: Techniques and Tips
I recommend using a high-quality, clear adhesive suitable for paper application. For precise application, I prefer a foam roller or a brush, allowing for even coverage without bubbles. Start by applying the adhesive sparingly to the surface for better control.
Keep a small bucket of water and a cloth nearby. If excess glue gets on the surface, I quickly dab it with a damp cloth to avoid sticky residue. A smoothing tool such as a utility knife or plastic smoother helps eliminate air pockets. I always work from the center outward.
For vertical surfaces, it’s best to apply adhesive to both the substrate and the back of the material. This ensures a strong bond and prevents lifting over time. I suggest letting the adhesive sit for a few minutes before placing the material for optimal tackiness.
During application, I align the edges carefully and use a straight edge to maintain a clean line. A slight overlap is okay, as I trim excess later for a polished finish. Constantly check for alignment as I progress; slight adjustments are more manageable while the adhesive is still wet.
For intricate areas, like corners and curves, I use a scissors or a craft knife to create relief cuts. This allows the material to conform better to the shape without wrinkling. Patience here pays off in achieving a seamless look.
Properly Positioning Wallpaper on Furniture
Begin by aligning the top edge of the material with the top of the surface. This ensures a clean and straight start. Use a level or straight edge to confirm that the alignment is correct before fixing it down.
Next, gently press the material against the surface, working from the top downward and side to side to eliminate air bubbles. This method also helps maintain the straightness of the application.
For corners and intricate details, crease the material slightly at the edges and trim excess carefully. Ensure that the pattern continues seamlessly across edges to achieve a cohesive look.
Adjustments may be necessary during the application process. If you find areas that are misaligned or if bubbles form, peel back gently, reposition, and reapply. Always check for a snug fit along seams and edges.
After the application, use a smoothing tool to press down firmly along the surface, enhancing adhesion and ensuring a flawless finish. Pay attention to high-contact areas to guarantee long-lasting adherence.
| Step | Description |
|---|---|
| 1 | Align material top edge with the furniture top |
| 2 | Press down to eliminate air pockets |
| 3 | Trim excess carefully around corners |
| 4 | Reposition if needed, checking for alignment |
| 5 | Smooth the material for adhesion |
Smoothing Out Bubbles and Wrinkles
I recommend addressing bubbles and wrinkles immediately after applying the decorative surface. Using a plastic smoothing tool, start from the center and work towards the edges. This technique pushes air and excess adhesive out, resulting in a smoother finish.
Tool Selection
Choose tools that won’t damage the material. Here are some reliable options:
| Tool | Purpose |
|---|---|
| Soft Roller | Gently smooths surfaces without scratching |
| Plastic Scraper | Effective in eliminating bubbles and maintaining contact |
| Painters’ Tape | Can hold down edges temporarily while smoothing |
Dealing with Persistent Bubbles
If some air pockets remain, use a sharp utility knife to make a small incision in the bubble. Inject a tiny amount of adhesive with a syringe or a thin brush, then press the area down gently. Follow up with a smoothing tool to ensure it lays flat.
Sealing and Protecting the Finished Surface
To enhance durability, I recommend applying a protective sealant after finishing your project. Opt for a clear, water-based polyurethane to allow the design to shine through while providing a robust layer of protection. Apply at least two coats, allowing for thorough drying between applications.
Application Techniques
Use a high-quality brush or roller for an even finish. Ensure each coat is applied in a thin layer to avoid drips and bubbles. Allow each layer to cure adequately, typically around 24 hours before using the piece.
Maintenance Tips
Once sealed, regular maintenance is key. Wipe the surface with a damp cloth and avoid harsh chemicals that may degrade the seal. Reapply sealer every few years, or sooner if the surface shows signs of wear, to keep the finish looking fresh and vibrant.


