To achieve a dimensional look on surfaces, select a high-quality texture paste or modeling compound. Ensure the consistency is thick yet spreadable for optimal application. I prefer using a palette knife for precise control, allowing me to manipulate the texture evenly across the chosen area.
After preparing the surface by cleaning and priming, apply the paste liberally to a stencil of your choice. Secure the stencil firmly to avoid unwanted movement. For even results, use a dab-and-lift motion with the knife, making sure to cover every exposed part of the stencil.


Once lifted, allow the texture to dry completely. This step is crucial; insufficient drying time can lead to smudging if further paint or finishes are applied too soon. Afterward, you can enhance the design with paint or a glaze, adding depth and character to the finished piece.
Choosing the Right Materials for Raised Stenciling
I recommend selecting a thick, acrylic paint that can hold texture and adhere well to surfaces. The viscosity of the paint is key; it should be dense enough to create defined shapes without running. Look for brands that are designed for dimensional applications, as they provide the best results.
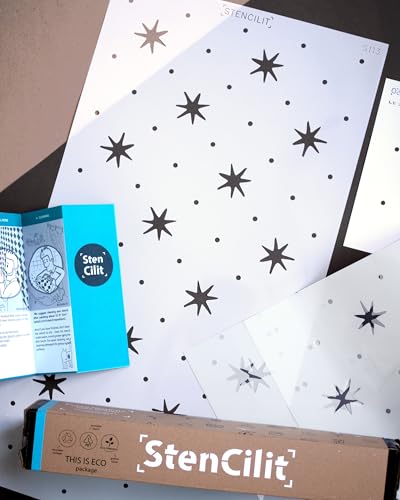
A high-quality stencil material is vital. Use mylar or heavy-duty plastic stencils, as they resist bending and can create clean edges. Ensure they are reusable; this will save time and money for future projects.
For tools, a stencil brush with firm bristles or a palette knife works best. A brush allows for controlled application, while a palette knife can help spread the paint for a raised effect. Make sure to have both on hand based on your design preferences.
Don’t forget about a reliable adhesive spray or tape. This keeps your stencils in place and prevents paint from bleeding under the edges. Look for options that won’t damage the surface beneath.
Lastly, a protective topcoat can enhance durability. A clear, matte sealant will keep the finish intact and add longevity to your design. Choose one that is compatible with the paint you use to avoid any reactions.
Preparing the Surface for Stenciling
Clean the area thoroughly. Use a mild detergent and water solution to remove dust, dirt, and grease. Ensure the surface is completely dry before proceeding.
Sand any rough patches. This step is crucial for ensuring an even application. Use a fine-grit sandpaper to smooth out the surface and eliminate any imperfections.
Patch any holes or dents. For minor imperfections, fill with wood filler or an appropriate patch compound. Allow adequate time to dry and sand smooth for a flawless finish.
Apply a primer if necessary. If the item has a dark or stained finish, using a primer will help create a neutral base. Choose a primer compatible with your chosen paint type.
Ensure the environment is suitable. Optimal conditions include a dry, well-ventilated space away from direct sunlight. This helps in avoiding dust and debris settling on the fresh surface.
Gather your tools and materials beforehand. Having everything organized helps streamline the process. Prepare brushes, sponges, or whatever method you’ve decided on for application.
Test your paint and application method on a small, inconspicuous area. This ensures compatibility and allows for adjustments before committing to the visible area.
With everything prepared, you’re ready to proceed with your design, ensuring a professional appearance and lasting results.
Selecting and Designing Your Stencil Pattern
Choosing a pattern that resonates with your personal style is vital. Look through design catalogs or explore platforms like Pinterest for inspiration. Focus on themes that complement the space, whether it’s floral, geometric, or abstract designs. Ensure the scale of the pattern fits the dimensions of the surface you’ll decorate; large motifs work well on expansive areas, while intricate designs are suited for smaller spaces.
Experimenting with the layout is key. Create a mockup by using a piece of cardboard or paper to visualize how the pattern will look. Consider mixing different motifs for a layered effect, but strive for balance to avoid a cluttered appearance.
| Design Aspect | Recommendation |
|---|---|
| Theme | Align with the existing décor |
| Scale | Match pattern size with surface dimensions |
| Color Scheme | Choose hues that harmonize with surrounding colors |
| Layout | Test arrangements using cardboard before finalizing |
| Mixing Patterns | Combine themes carefully for a coherent look |
Take time to refine the design before committing. A successful composition enhances the character of the piece without overwhelming it. Once satisfied, prepare to bring your vision to life through the application process.
Applying the Base Coat Before Stenciling
I begin by ensuring that the surface is clean and smooth, free from dust or grease. A well-prepared foundation enhances adhesion and the overall outcome. I choose a high-quality primer or paint that suits the material of the piece. If it’s wood, a latex primer works well, while for metal or plastic, an oil-based primer is preferable.
To achieve a uniform appearance, I apply the base coat with a roller or a wide brush for larger areas, using even strokes to avoid streaks. I also keep a smaller brush handy for corners and intricate details. Typically, I opt for a color that complements the final design but ensure it’s slightly lighter or neutral to allow the overlay to stand out.
For optimal results, I allow adequate drying time recommended by the manufacturer before proceeding with the next layer. This waiting period is crucial; it prevents any lift or damage to the base layer when I begin applying the design. Depending on the product used, drying times can vary, so staying attentive to these details is helpful.
If I’m aiming for a textured look, I lightly sand the dried base coat with fine-grit sandpaper to create a little tooth, enhancing the grip of subsequent layers. After sanding, I clean off any dust to ensure a perfect bond with the following materials.
This meticulous preparation stage ensures that the design application goes smoothly and the final result is as striking as envisioned, free from smudges and imperfections.
Mixing and Applying the Raised Stenciling Medium
I mix the medium according to the manufacturer’s instructions, ensuring the consistency is thick enough to hold its shape but smooth enough for easy application. Typically, I start with a base comprised of 1 part texture paste and 1 part paint. Adjust the ratio if necessary; I aim for a creamy, spreadable texture. If it feels too dense, a few drops of water can help achieve the desired consistency.
Color Selection
Selecting the right colors enhances the dimensional effect. I opt for shades that contrast well with the base coat but also complement the overall color scheme. Often, I mix a metallic or pearlescent finish into my paste to add depth, making sure to test the combination on a scrap piece first.
Application Technique
<pUsing a palette knife or a stencil tool, I evenly apply the mixture over the stencil, pressing gently to ensure it fills in all crevices. I focus on maintaining an even pressure, avoiding excess medium pooling beneath the stencil edges. Once covered, I carefully lift the stencil straight up to prevent smudging. I let the design dry completely before proceeding to any additional steps, ensuring a clean finish.
Positioning the Stencil Accurately on the Furniture
I ensure precise placement of the design by following a systematic approach. First, I measure and mark the area where the pattern will be applied. A measuring tape is vital for achieving symmetry and balance.
Next, I use painter’s tape to outline the expected design placement. This helps visualize the final outcome. I recommend putting the stencil in the center of the designated area for a balanced look.
To secure the stencil while I work, I opt for spray adhesive or low-tack tape. This prevents shifting during the application of the texture medium.
- I check for alignment by stepping back to view the stencil from different angles, ensuring it sits evenly along the surface.
- If applicable, I utilize a level for horizontal designs to avoid any slant.
For intricate designs, I recommend working in smaller sections. This ensures better control and accuracy, preventing mistakes that could ruin the overall appearance.
Once satisfied with the positioning, I double-check all corners and edges, ensuring no gaps exist that could interfere with the final look. Careful attention to placement significantly enhances the finished piece.
Techniques for Building the Raised Texture
I recommend using a medium that can create a substantial texture. Begin with a gel or paste that is specifically designed for three-dimensional applications. Apply with a palette knife to achieve a smooth, even layer. Keep the thickness between 1/8 inch to 1/4 inch; too thick may crack, while too thin could lead to a less pronounced effect.
For detailed patterns, a stencil brush works well. Dip it lightly in the medium and apply with a stippling motion. Avoid overloading the brush to prevent drips; this ensures precision in the design. If intricate lines are part of the chosen pattern, consider using a piping bag fitted with a fine tip for a cleaner application.
Allow the texture to cure completely before the next step, typically for 24 hours. Check for any imperfections and lightly sand with fine-grit paper if necessary. A light wipe with a damp cloth will remove dust before proceeding to the next phase of your project.
Experiment with layering for depth. Once the initial layer has set, apply additional layers, but always allow each to cure thoroughly. This technique brings the design to life and enhances the visual impact. Additionally, mixing different mediums, like sand or small beads, into the paste can create varied textures, thus enriching the finished product.
Finishing Touches and Sealing the Stenciled Design
After achieving the desired texture and pattern, I focus on sealing to protect my design. Select a clear, non-yellowing sealant suitable for the base material of the piece. I prefer using a spray sealant for an even application, but brush-on formulas work well, too, especially for larger areas.
Before sealing, ensure the raised sections are completely dry. I usually wait at least 24 hours after the final texture application before proceeding. To begin, I lightly sand the raised areas with fine-grit sandpaper to smooth any rough edges, ensuring a clean finish. I clean the surface using a damp cloth to remove any dust created during sanding.
Applying the Sealant
I apply the sealant in thin, even coats to maintain the integrity of the design. If I’m using a spray can, I hold it about 10-12 inches from the surface, applying the sealant in sweeping motions. For brush-on products, I use a soft brush to prevent excess buildup in the crevices of the pattern.
After the first coat dries, I lightly inspect the surface. If needed, I apply a second coat, ensuring the first is completely cured. This extra layer adds durability and longevity to the finish.
Final Inspection
Once the final coat dries completely, I examine my work for any uneven spots or imperfections. It’s acceptable to sand again lightly if necessary, followed by another sealant coat. This meticulous attention to detail enhances the overall appearance and protects my artistry from wear and tear.
By sealing the design effectively, I guarantee its beauty while ensuring my piece remains practical and ready for everyday use. Proper finishing not only elevates aesthetics but also extends the life of my masterpiece.


