Begin with organizing all components. Lay out each piece–cushions, frames, and supports–to have a clear overview. Check your manual; it provides specific instructions tailored to your set. Align parts with their corresponding connectors.
Next, use the appropriate tools. For most items, a simple screwdriver and wrench will suffice. Ensure all screws and bolts are tight to guarantee stability. If your design includes interlocking sections, fit them snugly to prevent shifting during use.
After construction, focus on comfort. Arrange cushions thoughtfully, considering both aesthetics and usability. Regularly inspect each piece for wear or looseness, maintaining their look and safety. Enjoy your outdoor oasis!
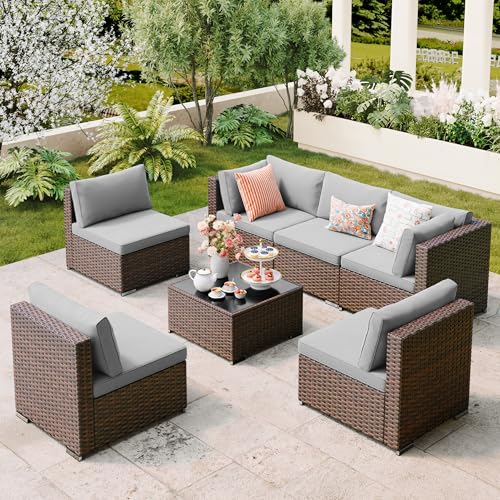
Assembly Steps for Wicker Outdoor Seating
First, lay out all components and tools to ensure nothing is missing. Check if you have the necessary screws, bolts, and an Allen wrench for the process.


For seating units, join the side panels to the back panel, aligning pre-drilled holes. Use screws to secure them tightly, but don’t overtighten to avoid bending the material.
Next, attach the seat base. Position it parallel to the side edges and fix it using the remaining screws. Ensure it’s evenly supported before moving to the next step.
If you’ve a cushion or pillow, insert the foam into the covers, and then attach them to the backrest. Velcro or ties typically secure these, so make sure they fit snugly.
Tabletops usually connect with brackets or metal clips. Align the tabletop with the base and secure it, ensuring no gaps. Check stability before placing any items on it.
Once all pieces are secured, inspect for any loose screws and tighten if necessary. It’s wise to give the entire structure a gentle shake to confirm everything holds firm.
Finally, if applicable, apply any protective coatings or treatments as instructed in the product guidelines. Let it dry completely before putting it to use outdoors.
Choosing the Right Tools for Assembly
Selecting the optimal tools streamlines the setup process and enhances the overall experience. A cordless drill and a set of suitable bits are vital for handling screws and bolts efficiently. A ratchet socket set or a wrench set is necessary for tightening and loosening fasteners without damaging the materials.

Additional Essentials
A tape measure ensures accurate measurements, which is crucial for proper alignment of components. Safety goggles should be worn to protect your eyes from debris during assembly. A sturdy work surface facilitates a comfortable and organized workspace, reducing the likelihood of misplaced items and enhancing productivity.
Optional but Helpful Tools
Having a rubber mallet can assist in gently fitting pieces together without harming delicate surfaces. A level is useful for ensuring that assembled items are balanced and appear aesthetically pleasing. Lastly, a utility knife aids in trimming any packaging or materials that may obstruct the assembly process.
Unpacking and Organizing Your Furniture Pieces
Begin with checking the boxes for any damage during transport. Set aside any protective materials for later use. Open each package carefully to avoid scratching or damaging components. It’s advisable to have a dedicated area for unboxing, allowing for ample space and a clear view of what you have.
Sorting Components
As you remove each part, categorize them into groups, such as seats, backs, armrests, and legs. This helps streamline the assembly process and ensures nothing is overlooked. Use a flat surface for organization. I recommend using labeled containers or trays to keep smaller items like screws and washers in order.
Inventory Checklist
| Item | Quantity | Status |
|---|---|---|
| Seat Cushion | 2 | Checked |
| Frame Piece | 4 | Pending |
| Legs | 4 | Checked |
| Screws | 20 | Pending |
This method is beneficial for keeping track of parts, ensuring you do not start assembly missing critical components. After reviewing the checklist, proceed to verify that the items match the assembly manual. This process saves time and avoids frustration while constructing your new outdoor seating.
Identifying Assembly Parts and Components
I recommend laying out all pieces to easily identify and count components. Each set typically includes frames, cushions, screws, and sometimes additional accessories like covers or connectors. Ensure all items are available by checking the provided list in the manual.
Frame and Seating Elements
Focus first on the main structural pieces. Look for the main frame sections and seat bases. They often come in distinct shapes and sizes–like two long side panels and connecting pieces. Make sure you can distinguish the arms and backrests if applicable.
Fasteners and Accessories
Screws, bolts, and nuts usually come in separate bags. Organize these parts by type and length for convenience. If there are spacers or washers, group those together as well. A few sets may also include extra components for future repairs.
Step-by-Step Guide to Chair Assembly
Begin by laying all components on a flat surface. Ensure I have everything needed for constructing the seats before proceeding.
1. Attach Seat Legs
- Locate the four legs and corresponding screws.
- Align each leg with the pre-drilled holes on the seat.
- Insert screws and tighten securely using a screwdriver.
2. Secure Backrest
- Find the backrest piece and the connecting hardware.
- Position the backrest against the rear of the seat.
- Using the correct bolts, fasten the backrest to the seat frame.
3. Add Armrests (if applicable)
- Retrieve the two armrests and their attachment pieces.
- Align each armrest with the designated sections on the sides.
- Screw them into place, ensuring a snug fit.
4. Final Checks
- Inspect all connections for tightness; ensure there is no wobbling.
- Test the chair’s stability by gently applying weight.
The assembly of each chair should now be complete. Repeat the process for additional seats as necessary.
Assembling Tables: A Detailed Approach
For constructing the tabletop, I gather the pre-cut surface and the support framework. I begin by positioning the support upside down, ensuring the brackets align with the designated locations on the underside of the top. Using a power drill, I fasten screws into each bracket.
Next, I focus on attaching the legs. I match each leg with its corresponding bracket, ensuring a stable connection. With the right screwdriver, I secure each leg tightly, preventing any wobbling. I check all connections before flipping the table upright to avoid issues later.
Once the table is upright, it’s crucial to inspect the stability. I gently shake each leg to confirm they all touch the ground evenly. If there’s any imbalance, I adjust the screws accordingly, ensuring a solid base.
The final touch involves adding the decorative elements, if provided, that enhance the table’s aesthetic. I follow specific instructions for these pieces, ensuring a polished look while maintaining structural integrity. Before placing any items on it, I allow the assembly to sit for a while, ensuring everything is secure and properly aligned.
Securing and Fastening Components Properly
Ensure every component is secured tightly to enhance stability and longevity. Utilize the following methods for effective fastening:
Using the Correct Fasteners
- Choose screws or bolts that suit the material thickness. For wooden elements, use wood screws; for metal parts, opt for self-tapping screws.
- Inspect the length of fasteners to avoid protrusions. A good rule is a minimum of 1.5 times the thickness of the material being joined.
Applying Adhesive Wisely
- Consider a high-strength adhesive for joints that require additional support in addition to mechanical fasteners.
- Clean surfaces before applying adhesive to ensure a strong bond. Allow adequate drying time per manufacturer instructions to maximize strength.
Tighten all connections uniformly to prevent stress concentrations that might weaken the structure. Regularly check the integrity of tightened parts, especially after initial use, as some components may settle.
Checking for Stability and Durability Post-Assembly
I recommend placing the assembled pieces on a flat surface to assess stability. Gently shake each item to see if any wobbling occurs. If instability is detected, check for loose screws or fittings that might require tightening.
Next, examine the joints and connections. Ensure that all components align correctly and are adequately fastened. This inspection helps avoid premature wear and enhances long-term use.
After securing the fasteners, I like to test the weight capacity of chairs and tables. Carefully apply pressure or sit on the chairs to ensure they hold weight without creaking or shifting. This practice reveals any potential weaknesses in construction.
Additionally, it’s advisable to look for any signs of damage or defects in the material. Inspect for cracks, splits, or discoloration that could indicate durability issues. Addressing these concerns early can prevent further complications down the line.
Finally, periodically repeating this stability check, especially after moving the items or subjecting them to harsh weather conditions, ensures enduring performance. This added diligence keeps everything in optimal condition.
Tips for Maintenance and Care After Assembly
Regular cleaning with a mild soap solution and a soft cloth keeps the surfaces bright. Avoid harsh chemicals as they may cause damage.
Protection from the Elements
Whenever possible, use covers to shield items from rain, snow, and UV rays. This prevents fading and weathering. If outdoor exposure is unavoidable, consider storing pieces in a dry place during extreme weather conditions.
Checking for Wear and Tear
Inspect joints and connectors periodically for signs of loosening or rust. Tightening screws and replacing damaged components enhances the longevity of the setup. If wicker strands show signs of fraying, repair or replace them promptly to maintain structural integrity.
| Maintenance Task | Frequency |
|---|---|
| Cleaning with soap and water | Monthly |
| Check screws and joints | Every 3 months |
| Apply protective coating | Annually |
| Cover for protection | As needed |
Maintaining a schedule for these tasks ensures longevity and enjoyment of the outdoor seating. Taking small steps goes a long way in enhancing both appearance and function.
Common Mistakes to Avoid During Assembly
Avoiding the following pitfalls can significantly streamline the building process and enhance the longevity of your seating and tables.
Skipping Instructions
Ignoring the assembly manual is often the first mistake. Always refer to the provided guide, as it contains crucial details specific to your items. Follow the steps in the prescribed order.
Forgetting to Sort Parts
- Sorting parts before starting can save time. Lay everything out and categorize bolts, screws, and panels to easily access them during assembly.
- Make sure all components are present. A quick inventory check can prevent frustration later.
Over-tightening Fasteners
Excessive torquing can lead to structural damage. Tighten screws just enough to hold components securely without forcing them, which may cause cracking or warping.
Neglecting Stability Checks
- After putting everything together, test for stability. Rock the pieces gently to identify any wobbles or loose joints.
- If instability is present, check connections and adjust as necessary.
Ignoring Protective Packaging
Saving protective materials for future use is wise. Keeping the original packaging can help prevent scratches and damage when relocating or storing items.
Skipping Maintenance Steps
Once fully constructed, don’t overlook care instructions. Regular upkeep practices can prolong the life of various elements while maintaining their appearance.