For anyone dealing with unwanted green growth on their patio pieces, I recommend using a simple mixture of water and vinegar. Combine equal parts of both in a spray bottle. After applying it directly to the affected areas, let it sit for about 15 minutes before scrubbing with a soft brush.
Another option involves utilizing baking soda. Create a paste by mixing baking soda with a bit of water. This paste can be applied generously to the areas plagued by the green growth. Allow it to dry for several hours, then rinse with water for a fresh look.
Regular maintenance is key. After each use or at least once a month, I suggest wiping down your items with a damp cloth to prevent build-up. Ensuring they dry completely will help ward off any future issues.
Eliminating Green Growth
Mix equal parts of white vinegar and water in a spray bottle. Apply this solution generously to the affected area. Let it sit for at least 30 minutes to break down the organic matter.
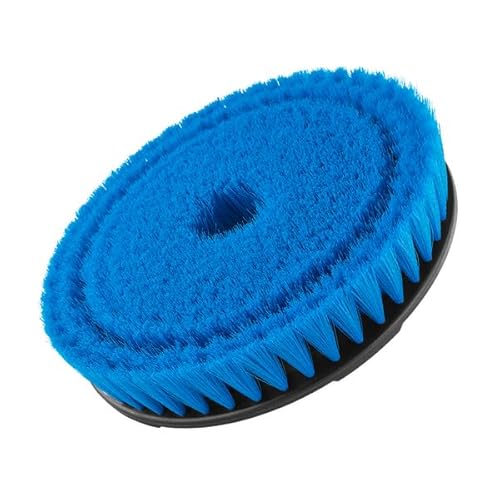
Use a stiff bristle brush to scrub the surface gently. This method avoids damaging the material and ensures thorough cleaning.
Rinse with a garden hose to wash away residues. For stubborn patches, consider repeating the vinegar application or using a diluted bleach solution of one part bleach to ten parts water, ensuring proper ventilation and protection for skin and eyes while handling.
After cleaning, let the item dry completely in direct sunlight. To prevent future growth, maintain a clean environment free from moisture and debris.
- Consider using a sealant post-cleaning to inhibit new growth.
- Regular maintenance can minimize reappearance.
Identify Types of Moss on Furniture
Begin by examining the coloration and texture of what has developed on the surfaces of your patio items. Different types can vary significantly in appearance, helping you determine the appropriate cleaning approach.
Common Varieties
Here are several types to look out for:
| Type | Description |
|---|---|
| Sheet Moss | Thin, green mats covering surfaces, often appearing velvety and dense. |
| Cushion Moss | Bushy, soft clumps that may create a rounded appearance with a vibrant green color. |
| Star Moss | Star-shaped green structures, giving a unique texture and look to furniture. |
| Spanish Moss | Gray-green strands that might resemble hair, often hanging and draping. |
Recognizing these types aids in selecting the right method and products for effective cleaning. For instance, thicker varieties may require more vigorous methods, while delicate types may benefit from gentle approaches to avoid damage.
Choose the Right Cleaning Solution
Selecting an appropriate cleaning solution is crucial for effective treatment. I recommend considering the following options based on the material of your outdoor items:
- For Wood: A mixture of warm water and mild dish soap works well. Alternatively, use a wood-safe cleaner specifically designed for outdoor use.
- For Metal: Vinegar is an excellent choice. Combine it with water for added effectiveness. Ensure it’s suitable for the metal type to avoid corrosion.
- For Plastic: Mild bleach solutions can eliminate organic growth. Mix one part bleach with ten parts water for a safe application.
- For Fabric: Use a fabric-safe mold and mildew cleaner. Always test on a small area first to ensure no damage occurs.
Always wear gloves and a face mask while using chemical solutions to avoid skin irritation and inhalation of fumes.
Test the chosen formula on an inconspicuous area before full application to ensure compatibility with the surface.
For stubborn spots, repeated treatments or a stronger solution may be necessary, but be mindful of the manufacturer’s instructions regarding the materials.
Prepare Outdoor Furniture for Cleaning
Clear the surrounding area of any obstacles, including furniture and decorative items. This creates ample working space and prevents any accidental damage during the cleaning process.
For surfaces made of wood, metal, or plastic, gently scrub away any loose debris with a dry brush. This helps in identifying areas that need more attention and ensures the cleaning solution can penetrate effectively.
Inspect the items for signs of wear, cracks, or structural issues. Take note of any damage as it may require special care or repair before thorough cleaning.
| Preparation Steps | Description |
|---|---|
| Clear Area | Remove surrounding items to create a clean workspace. |
| Brush Off Dirt | Use a dry brush to eliminate loose particles from surfaces. |
| Inspect for Damage | Check for any cracks or wear that may need attention. |
| Gather Supplies | Collect necessary cleaning tools and solutions for use. |
Gather necessary tools such as a brush, cloths, sponge, and a bucket. Ensure that you have a suitable cleaning solution that matches the material of your items. Always test the solution on a small, inconspicuous area first to confirm it won’t cause any adverse effects.
Apply Cleaning Solution to Affected Areas
I recommend applying the chosen cleaning mixture directly to the areas where the unwanted growth persists. Use a spray bottle or a soft cloth to ensure even distribution of the solution across the surface. For stubborn patches, a sponge or soft brush can help to work the cleaner into the material.

Technique for Application
Begin at one corner and gradually move across, allowing the solution to penetrate the affected regions. It’s critical to let it sit for at least 10-15 minutes before scrubbing. This waiting period enables the agent to break down the unwanted growth effectively.
Post-Application Care
After the solution has had sufficient time to act, I suggest using a soft-bristled brush to gently scrub the surface. Be cautious with pressure to avoid damaging the finish. Rinse thoroughly with clean water to remove any residue from the cleaning product. After rinsing, allow the surface to dry completely to prevent future accumulation.
Scrub Surfaces Safely
For effective removal of unwanted growths, I use a soft-bristle brush to avoid scratching delicate surfaces. It’s vital to apply gentle pressure while scrubbing, ensuring I cover all affected areas without damaging the finish. Utilizing a circular motion helps lift dirt and debris efficiently.
After selecting the appropriate cleaning solution, I apply it generously on the targeted areas. Allowing it to soak for a few minutes makes scrubbing easier. I always keep a bucket of fresh water nearby for rinsing the brush frequently, minimizing the spread of spores while working.
I have found that working on a cloudy day or during the cooler hours helps prevent the cleaning solution from drying too quickly, allowing for a more thorough clean. After scrubbing, I rinse the surfaces thoroughly with water to remove any residue from the cleaning agents.
To ensure no harm is done to the environments surrounding my outdoor pieces, I take care not to let any runoff from the cleaning process affect nearby plants or grass. Protecting the surrounding area is a key part of my cleaning routine.
Rinse Furniture Thoroughly After Cleaning
I rinse all surfaces thoroughly with clean water to ensure no residue of the cleaning solution remains. This step prevents any potential staining or damage from chemicals that may linger. I typically use a garden hose or a pressure washer on a low setting for wider areas, paying extra attention to crevices and joints where debris might accumulate.
After rinsing, I always check for any missed spots by surveying each piece from different angles. If I notice any areas still appear dirty, I repeat the cleaning process on those spots before rinsing again. This attention to detail helps maintain the integrity and appearance of the items.
Once I’ve rinsed everything, I let the pieces dry completely in a shaded area, avoiding direct sunlight which can warp or fade the materials. Ensuring that the surfaces are left clean and dry contributes to prolonging their lifespan and keeping them looking fresh.
Dry Furniture Properly to Prevent Regrowth
Ensure all surfaces are completely dry after cleaning. I utilize a combination of sun and airflow to accelerate the drying process. If possible, place the items in direct sunlight for several hours. This not only helps to eliminate any remaining moisture but also creates an inhospitable environment for spores.
Emphasize ventilation by positioning the chairs and tables in a breezy area. If leaving them exposed isn’t feasible, use fans to circulate air around the pieces. This technique aids in hastening drying while minimizing the risk of future infestations.
Check for Remaining Moisture
I carefully inspect the crevices and seams where water can accumulate. Even a slight dampness can lead to recurrence, so I ensure every corner is dry before storing or covering the items. You can use a soft cloth to absorb any lingering dampness.
Consider Seasonal Storage
If I know that rainy seasons are coming, I prefer bringing my items indoors or utilizing protective covers designed for outdoor seating. These covers not only shield the surfaces from moisture but also restrict airflow, further inhibiting any chance of new growth.
By taking these precautions, I can protect my belongings effectively and enjoy them for longer periods, without the hassle of future cleanup efforts.
Implement Maintenance Tips to Prevent Moss
Regularly inspect your seating and tables for moisture accumulation. Ensure proper drainage by positioning items away from water sources.
- Utilize furniture covers during inclement weather to minimize exposure.
- Choose elevated placements on patios or decks to enhance airflow around surfaces.
- Apply a sealant designed for outdoor materials, creating a protective barrier against unwanted growth.
Keep surrounding areas clean by clearing away organic debris, such as leaves and twigs. Schedule routine maintenance, which includes:
- Wiping down surfaces weekly to prevent residue build-up.
- Inspecting for signs of excess moisture, particularly in shaded spots.
- Using a pressure washer with care, ensuring not to damage the material but effectively removing any beginnings of growth.
Consider rearranging furniture periodically to ensure all areas receive adequate sunlight. Incorporating plants that repel undesirable organisms may also help keep surfaces clear.


