To breathe new life into your composite timber items, begin with thorough cleaning. Use a mixture of warm water and mild soap to remove dirt and grease, followed by a damp cloth to wipe away any residue. Avoid soaking the material, as excessive moisture can cause warping.
Next, address any scratches or dents by applying a wood filler that matches the color of your piece. After it dries, sand the area gently with fine-grit sandpaper for a smooth finish. This step not only repairs imperfections but also prepares the surface for refinishing.
Select a premium paint or stain designed for composite surfaces to enhance its appearance. When applying, utilize a brush or foam applicator for even coverage, working in small sections. Allow each coat to dry completely before adding additional layers, adhering to the manufacturer’s guidelines for optimal results.
For a polished final touch, consider using a sealant to protect the surface. This will create a barrier against potential damage while sealing in the color. Maintain your revitalized pieces by cleaning them regularly and avoiding exposure to direct sunlight, which can lead to fading.
Restoration of Manufactured Timber Items
Pay close attention to the surface condition before starting any task. Begin by cleaning with a soft cloth and a mild detergent solution to remove dirt and grease.
Assessment of Damage
- Identify scratches: Small scratches can often be polished out; larger ones may require filler.
- Check for water damage: Look for dark spots which indicate moisture penetration and address accordingly.
- Inspect joints: Ensure stability by checking for loose connections or peeling.
Repair Techniques
- For minor scratches, use a furniture polish or a wax crayon that matches the finish. Apply it carefully to blend the affected area.
- To fix larger scratches or dents, fill them with wood filler and sand the area smooth after it dries.
- Reinforce joints: Use wood glue for loose parts, applying clamps until the adhesive sets.
After repairs, consider applying a protective finish. A clear varnish or a polyurethane coat will safeguard against future wear.
Assessing the Condition of Your Pressed Wood Furniture
I examine the surface for visible damage such as scratches, dents, or stains. Surface imperfections can often indicate deeper issues.
Next, I check the structural integrity by lightly shaking each piece to identify any looseness or wobbling in joints.
Additionally, I inspect the edges and corners for chipping, as this can suggest wear or poor handling.
It’s crucial to evaluate any peeling or bubbling of the veneer, which might signify moisture damage.
For pieces with drawers or doors, I ensure they open and close smoothly. Resistance can indicate misalignment or swelling.
I also consider the overall aesthetic. If the finish appears dull or discolored, it may need refreshing.
- Look for signs of mold or mildew, particularly in humid environments.
- Check for any unusual odors that might signal damage.
- Inspect underneath for any signs of insect infestation.
- Look for separation of layers, especially around seams or joints.
Documenting all findings helps in planning the subsequent steps for restoration.
Gathering Necessary Tools and Materials
Collect the following items before beginning the project: a soft cloth for cleaning, mild detergent, and warm water. I also recommend having a sponge or scrubbing pad for tougher grime.
Acquire sandpaper in varying grits; 120 and 220 grit are ideal for smoothing surfaces. A tack cloth will assist in removing dust after sanding. The next step is to secure a good quality primer that adheres well to synthetic surfaces.
Choose paint or a stain that suits your design aesthetic and is designed for laminate surfaces. For larger areas, a paintbrush is sufficient, while a foam roller can ensure a smooth finish. Don’t forget sealant to protect the final coat.
Lastly, be sure to have gloves and a mask on hand for safety during the application process. A drop cloth will protect your work area from spills and splatters.
Removing Old Finish and Cleaning the Surface
Begin with a thorough examination of the piece to determine the type of finish applied. Most reactive solvents work well on lacquer and varnish, while denatured alcohol is suitable for shellac. Use a chemical stripper if the finish is stubborn or heavily layered. Follow the manufacturer’s instructions carefully for safe and effective usage.
Tools Required
Gather the following items:
- Chemical stripper
- Plastic scraper or putty knife
- Paintbrush
- Rags
- Denatured alcohol (for shellac)
- Sandpaper (various grits)
Step-by-Step Process
Apply the stripper using a paintbrush, ensuring an even coat over the surface. Wait for the recommended duration until the finish starts to bubble or lift. Carefully scrape away the loosened finish with a plastic scraper to avoid damaging the substrate. Repeat as necessary until a clean surface is achieved.
If shellac is present, moisten a rag with denatured alcohol and wipe the area until the old finish dissolves. Rinse the surface with a clean, damp cloth to remove any residue from the solvents used.
After the finish is removed, sand the surface starting with a medium grit sandpaper and follow with fine grit for a smooth finish. Always sand in the direction of the grain to prevent scratches.
Finally, clean the entire area with a damp cloth to eliminate dust and debris before moving on to the next stages of the restoration.
Repairing Damaged Areas on Pressed Wood
For minor scratches and dents, I use wood filler to restore the surface. I apply it with a putty knife, ensuring it’s slightly overfilled to account for shrinkage as it dries. Allow it to cure completely before sanding down to a smooth finish in line with the surrounding area.
For Larger Damages
In cases of significant damage, such as gouges or missing sections, I often opt for a piece of similar material. I cut it to fit the damaged area, ensuring a snug fit. I then bond the new piece using wood glue, applying clamps to hold it securely until the adhesive sets.

Surface Preparation and Finishing Touches
Once repairs are complete, I ensure the surface is sanded smoothly. I start with a finer grit sandpaper to blend the patched areas seamlessly with the rest of the outer layer. After sanding, I clean the surface with a damp cloth to remove dust.
| Damage Type | Repair Method |
|---|---|
| Minor Scratches | Wood filler |
| Dents | Wood filler |
| Gouges | Additional material patch |
| Missing Sections | Replacement piece |
Finally, I finish the area with a stain or paint that matches, ensuring all repairs blend in unobtrusively. A final coat of sealer protects the entire surface, giving it a fresh look and extending its lifespan.
Choosing the Right Paint or Stain for Refurbishing
Select a paint or stain that suits the aesthetic you desire. For a modern look, opt for a matte or satin finish, while a glossy finish can provide a more classic appearance. Consider using water-based products for quick drying and easy cleanup.
Types of Products
For a solid color, acrylic or latex paints offer durability and a wide palette. If you prefer to showcase the grain, wood stains enhance the natural texture and can vary from light to dark finishes. Test samples on a hidden area to ensure the chosen color aligns with your vision.
Surface Preparation
Before applying any product, ensure the surface is primed appropriately, especially if opting for a lighter shade over a darker base. A good primer prevents bleed-through from the old finish and provides better adhesion for the new coating. Follow up with fine sanding to create a smooth surface before painting or staining.
When applying paint, use a high-quality brush or roller to achieve an even coat. For stains, a cloth or sponge can help control the amount applied and create a more consistent finish. Wipe away excess after application to avoid blotches.
Lastly, consider the environment where the item will be used. If exposed to high humidity, use moisture-resistant finishes to ensure longevity. Prioritizing the right product will significantly enhance your project’s results.
Applying New Finish: Techniques and Tips
Using a high-quality primer is crucial. It helps to create a smooth surface and improves adhesion of the new coat. I recommend applying primer with a foam roller to avoid brush strokes and achieve an even finish.
Choosing Application Tools
Select between brushes or spray guns based on the desired finish. For intricate details, a brush is ideal. A spray gun offers a faster and more uniform application, but requires practice for best results.
Finishing Techniques
For painting, use long, even strokes and pay attention to overlapping edges to prevent inconsistencies. In the case of staining, apply with a cloth in circular motions, ensuring an even absorption and wiping off excess promptly. Always follow the manufacturer’s instructions regarding drying times between coats.
Consider lightly sanding between coats for better adhesion and a smoother finish. Use fine-grit sandpaper and be gentle to avoid damaging the underlying layer. Multiple thin coats yield a better result than one thick application.
Allow the final coat adequate time to cure before using the item. This step ensures durability and prevents premature wear. Ventilated spaces are ideal for drying, as fresh air helps the finish set properly.
Adding Protective Coatings to Increase Longevity
I apply a protective layer to enhance durability after completing the restoration process. First, I choose between polyurethane, lacquer, or a water-based acrylic finish. Polyurethane provides a robust barrier, whereas lacquer dries quickly and offers a smooth surface. Water-based finishes are low in odor and easier to clean up, making them a practical option.
Before applying, I ensure the surface is entirely clean and free of dust. This step prevents imperfections in the finish. I typically use a fine-grit sandpaper to lightly scuff the surface, which helps the coating adhere better.
I apply the protective coating using a high-quality brush or a foam applicator for a smooth finish. It’s essential to work in thin layers, allowing each coat to dry completely before adding the next one. Generally, I aim for at least two to three coats for optimal protection. Between coats, I lightly sand the surface with fine-grit sandpaper, which improves adhesion and creates a refined appearance.
If I want a glossy finish, I select a high-gloss product. For a more subtle look, a satin or matte finish is suitable. After the final coat, I allow the piece to cure adequately, usually for a few days, before placing it in a high-use area. This step ensures that the protective layer is fully set, maximizing the lifespan of the item.
Regular maintenance entails cleaning with a damp cloth and occasional reapplication of the protective coating, especially in high-traffic areas. By following these steps, the restored item remains robust and visually appealing for years.
Styling and Personalizing Your Refurbished Furniture
Begin with a clear vision of how you want your upgraded piece to fit into your existing decor. Color choice plays a crucial role; I often opt for shades that either complement or contrast with surrounding elements. Neutral tones can create a calming effect, while bold colors can act as a statement piece.
Consider adding stencils or decals to introduce patterns without overwhelming the surface. Using painter’s tape, I carefully outline shapes for a clean finish. Another method is applying wallpaper as a back panel in cabinets or drawer insides for unexpected flair.
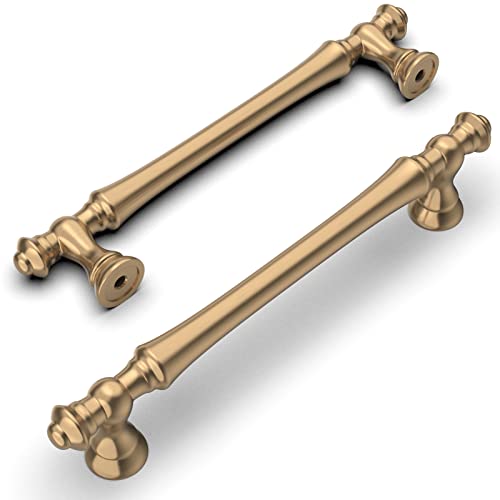
Hardware can dramatically change the look of the item. Swapping out standard knobs for unique ones, whether vintage or modern styled, transforms usability and aesthetics. Ensure the new hardware matches the scale of the piece for a harmonious appearance.
Textiles also enhance personalization. I love using soft, patterned fabrics for cushion covers or draping throws across the piece for added texture. These accessories can be easily changed with seasons or trends.
Artwork or plants nearby can further establish a cohesive look. Incorporate items that reflect personal interests, including photographs or small sculptures, to create a more inviting atmosphere.
Lastly, don’t shy away from experimenting with arrangements. Moving items around can inspire fresh perspectives on decor, allowing the upgraded furniture to shine in new ways. Adjusting placement can bring balance and functionality to the space.