


Begin with a clear vision of the piece desired. Sketch the concept, including dimensions and functional requirements. This visual guide will serve as a roadmap throughout the crafting process.
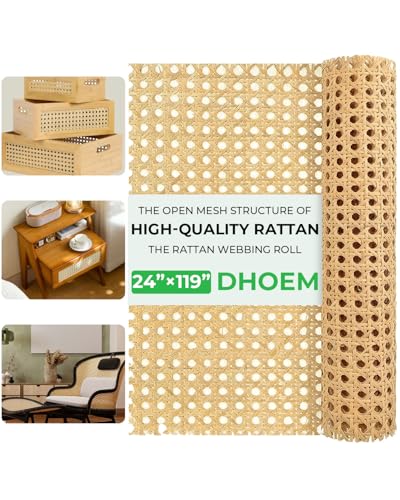
Select high-quality materials based on durability and aesthetic appeal. Consider hardwood options like oak or walnut for longevity and a timeless look. If a lighter feel is preferred, bamboo or birch can provide an attractive alternative.
Utilize precise tools for dimensions and cuts. A table saw and router ensure clean, sharp edges, while a drill is essential for assembling components securely. Maintain a focus on accuracy to elevate the final result.

Think creatively when it comes to finishes. A unique stain can enhance the wood grain, while paint opens the door to personal expression. Seal with a protective topcoat to safeguard against wear.


Integrate innovative features tailored to individual needs. Hidden storage or adjustable components can add functionality that sets a creation apart. Engage with the user’s lifestyle for the best outcomes.
Choosing the Right Materials for Custom Creations
Selecting materials involves balancing aesthetics, durability, and cost. Focus on the following aspects:
- Wood Types: Hardwoods like oak, maple, and walnut provide strength and visual appeal. Softwoods such as pine are lighter and more affordable but less durable.
- Finishes: Choose finishes that enhance wood grain while providing protection. Oils and varnishes seal surfaces, while stains can alter color.
- Upholstery Fabrics: For seating options, look for wear-resistant fabrics like leather, canvas, or synthetic blends. Velvets and silks offer luxury, but require careful maintenance.
- Metal Accents: Steel or aluminum can add modern touches and structural support. Ensure materials are treated against rust if used in humid environments.
- Eco-Friendly Options: Bamboo and reclaimed wood are sustainable choices. Consider certification labels like FSC to ensure responsible sourcing.
Consider the functional requirements of each piece. For outdoor items, select weather-resistant materials like teak or treated metal. For indoor settings, focus on materials that match the overall design scheme and personal preferences.
Conduct tests, such as scratch resistance or colorfastness, before finalizing choices. Obtain samples to evaluate textures and finishes in your environment. This practice helps in envisioning how materials interact within the intended space.
Measuring Your Space for Custom Fitting
Accurate measurements are critical for ensuring a perfect fit for your tailored pieces. Start with a reliable measuring tape, ideally one that extends at least 25 feet. This will allow you to capture even the most expansive areas without difficulty.
Steps for Measuring
- Identify the space: Determine the exact area where the item will reside. Clear away any obstructions to visualize the full space.
- Measure length and width: Record the overall length and width of the intended location, ensuring to measure from wall to wall at multiple points. This accounts for any irregularities in the room.
- Check height: Measure the vertical space if your design includes tall structures. Consider ceiling height and any light fixtures or HVAC units that may affect the design.
- Account for depth: For seating or cabinets, measure how far into the room the piece can extend without obstructing pathways.
- Assess surrounding furniture: Note the dimensions of existing items nearby to help determine necessary spacing and arrangement.
Tips for Precise Measurements
- Use a notepad or smartphone app to record measurements accurately.
- Double-check each measurement to prevent errors.
- Include details like window placements or outlet locations in your notes.
- Consider creating a scaled sketch of the area to visualize placement.
Maintaining accuracy in measurements enhances the efficiency of the crafting process, leading to a more satisfying outcome. This foundational step ensures that your custom pieces blend seamlessly into your environment, enhancing both functionality and aesthetics.
Designing your piece: Sketching vs. Digital Tools
I prefer starting with sketching for initial concepts because it allows for quick iterations and exploration. A simple pencil and paper are powerful tools; they enable spontaneity and creativity without the constraints of software. I find that sketching helps me visualize ideas and shapes without overthinking. Plus, it’s often faster to communicate my vision to clients using hand-drawn drafts.
Once I have a clear direction, I transition to digital tools for refinement. Software like SketchUp or AutoCAD offers precision and the ability to manipulate complex designs easily. I rely on these platforms to create accurate measurements, generate 3D models, and visualize how the piece will exist within the intended space. This digital transition is crucial when it’s time to work on technical specifications and material requirements.
Combining these methods creates a balanced approach–sketching for raw creativity and digital tools for detailed execution. It’s important to choose the right method depending on the stage of the design process. For brainstorming, sketches are my go-to, whereas for finalizing dimensions and materials, I lean heavily on digital options.
Selecting Hardware and Fittings for Durability
Opt for high-quality metal components such as hinges, drawer slides, and handles. Stainless steel is an excellent choice due to its resistance to corrosion and wear, while solid brass offers a classic aesthetic with durability. Look for hardware rated for heavy use, ensuring it can withstand daily operations.
Evaluating Finish and Coating
Choose pieces with a protective finish like powder coating, which resists scratching and tarnishing. For a more classic look, solid brass fittings tend to age gracefully, developing a patina over time. Make sure that all components are treated for humidity and temperature stability, especially in high-moisture areas like kitchens or bathrooms.
Weight Capacity and Load Ratings
Pay attention to the weight limits specified by manufacturers, particularly for drawer slides and shelving brackets. Selecting hardware that exceeds expected weight loads will contribute to longevity. Reviews and load-testing data can provide insights into the real-world performance of different fittings.
When choosing screws and anchors, consider the material of the base structure. Wood requires different fasteners than metal or wall-mounted units. Using the right screws will prevent stripping and ensure a solid hold. The use of wood glue in conjunction with mechanical fasteners can enhance strength, particularly in joints.
Invest time in assessing compatibility of all components with your design. A cohesive look with matching finishes contributes to the overall aesthetic while ensuring functionality and sturdiness. Prioritize sourcing from reputable suppliers known for their craftsmanship and reliability.
Techniques for Sustainable Woodworking Practices
Utilizing reclaimed wood is an excellent choice for minimizing environmental impact. This involves sourcing timber from old buildings, discarded furniture, or other structures. Ensure the wood is properly processed to remove any contaminants.
Implementing a waste management strategy during production is crucial. I categorize my offcuts and shavings for recycling or repurposing, which reduces landfill contributions. An organized workspace allows for more efficiency and less waste.
Choosing non-toxic finishes is another way to promote sustainability. Options like natural oils, waxes, and water-based stains significantly reduce harmful VOC emissions. It’s worth testing on scrap pieces first to gauge compatibility with the wood species used.
| Technique | Description |
|---|---|
| Reclaimed Wood | Using wood from old structures to minimize new timber consumption. |
| Efficient Waste Management | Sorting and repurposing offcuts and shavings to reduce waste. |
| Non-toxic Finishes | Opting for environmentally friendly finishes to reduce VOC emissions. |
| Sustainable Sourcing | Choosing suppliers who prioritize responsibly harvested wood. |
Implementing efficient energy practices, such as using LED lighting and energy-efficient machinery, aids in reducing carbon footprint during the crafting process. This approach aligns with the goal of minimizing environmental impact while still producing quality items.
Lastly, partnering with local artisans encourages community support and reduces transportation emissions. This fosters a shared economy and strengthens regional craftsmanship.
Assembling Your Custom Piece: Tools and Tips
Invest in a quality set of tools for assembly, including a cordless drill, a miter saw, and a level. These essentials ensure precision and help maintain structural integrity.
Hand Tools
Include clamps to hold pieces securely while you work. A good set of screwdrivers and a hammer will also be indispensable for tightening joints and adjusting fittings. Consider using wood glue alongside mechanical fasteners for added strength.
Workspace Preparation
Clear your workspace to allow for easy movement and access to materials. Lay out all components beforehand to visualize the assembly process. Keep a detailed checklist of steps to streamline the workflow and avoid confusion.
Test fit the parts before final assembly to check for any adjustments needed. This approach saves time and prevents errors that may require disassembly later. Reinforce joints with dowels or biscuits for additional support, increasing durability over time.
Finishing touches: Staining and sealing wood
For enhancing the appearance and durability of wood pieces, I recommend focusing on staining and sealing as your final steps. Applying a stain first allows me to enrich the wood’s natural grain and color, providing a deeper, more customized look. It’s vital to choose a stain compatible with the wood species; for example, oak absorbs stain differently than pine. I prefer oil-based stains for their rich finish and longer working time.

Before staining, preparing the surface is crucial. I sand the wood thoroughly, starting with a coarse grit and finishing with a fine one. This step eliminates imperfections and promotes even absorption of the stain. After sanding, I wipe down the surface with a damp cloth to remove any dust, ensuring a clean base for the application.
When applying stain, I use a clean cloth or a brush, depending on the desired finish. I usually work in manageable sections, applying the stain liberally, then wiping off the excess after a few minutes to achieve the depth I want. Testing on a scrap piece or inconspicuous area always helps gauge the final appearance before committing.
Once the stain has dried completely, sealing the surface becomes essential. I opt for a clear topcoat, which protects against moisture, scratches, and general wear. Polyurethane provides a robust finish, while water-based sealers dry faster and are easier to clean up. For a natural look, I often use a matte finish; however, I might choose a glossy or satin finish for a more polished appearance.
Applying the sealer requires a similar approach to staining. I ensure the surface is dust-free, then using a clean brush or foam applicator, I spread the sealant evenly. Multiple coats can significantly enhance durability, so I typically apply at least two, allowing adequate drying time between applications. A light sanding between coats promotes better adhesion and a smooth finish.
Monitoring the project for any imperfections after sealing is also beneficial. If needed, I can sand down and touch up specific areas to maintain consistency across the surface. Finally, letting the entire piece cure fully before use guarantees that both the stain and sealant perform their best, protecting the wood for years to come.
Personalizing Your Pieces with Unique Designs
Incorporate personal elements that reflect individual taste and style. Choose themes or motifs that resonate with your preferences. For instance, if you appreciate nature, consider integrating organic shapes or botanical patterns into your creation.
Incorporating Custom Elements
Add unique features such as engraved details, inlays, or painted accents. Engravings can tell a story or commemorate an event, while inlays using contrasting wood species can create striking visual interests. Think of the colors and shapes that will enhance the overall design.
Seeking Inspiration
Explore various art forms, architecture, and cultures for design ideas. Visiting local artisan markets or galleries can spark creativity. Collect samples or images that capture your imagination and create a mood board to visualize your concept. Breaking away from traditional designs can yield truly one-of-a-kind results.
Maintenance Tips for Long-Lasting Custom Creations
Regular dusting with a soft, lint-free cloth prevents grime buildup and maintains the natural beauty of the wood. For deeper cleaning, use a solution of mild soap and water, applying it gently with a damp cloth. Avoid harsh chemical cleaners that can damage finishes.
To protect against scratches and dents, always use coasters and placemats. Felt pads under objects can also help in preventing surface damage. Additionally, place items with heavy weight evenly to avoid any undue stress on the structure.
Humidity control is critical for preserving integrity. A humidity level between 40% to 60% is ideal. Consider using a humidifier or dehumidifier in your space as needed.
Reapply protective finishes such as oils or wax periodically. Depending on usage, every 6-12 months is a good timeframe. This not only enhances the appearance but also adds a layer of protection against wear.
Always check joints and connections for signs of loosening and retighten as necessary. This simple maintenance step can significantly prolong the lifespan of your creation.
Lastly, ensure that your items are not placed in direct sunlight or near heat sources to prevent warping and fading. A little care goes a long way in preserving the unique beauty of your handcrafted piece.
| Maintenance Task | Frequency |
|---|---|
| Dusting | Weekly |
| Deep Cleaning | Monthly |
| Reapply Finish | Every 6-12 months |
| Check Joints | Bi-annually |
FAQ:
What are the first steps to take when planning bespoke furniture?
Before creating bespoke furniture, it’s important to establish a clear vision of what you want. Begin by considering the purpose of the piece: how it will be used and what space it will occupy. Measure the area where the furniture will be placed to understand size limitations. Additionally, think about style preferences, such as modern, rustic, or traditional, and collect inspiration from magazines, websites, or existing furniture designs. This foundational planning will guide your choices throughout the project.
How do I choose the right materials for my custom furniture?
Selecting materials for bespoke furniture is critical in determining its durability, aesthetic, and overall look. Common materials include solid wood, plywood, metal, and upholstery fabrics. Consider factors like the function of the piece and the environment it will be in; for example, hardwoods are ideal for longevity, while softer woods might be better for decorative items. Additionally, take into account maintenance and care associated with different materials. Research various options and consult with suppliers to find the best fit for your design.
Can I design my own furniture, or do I need to hire a designer?
Designing your own furniture is entirely possible if you have a particular idea and some basic skills. Many artisans or DIY enthusiasts take on custom projects by sketching their creations or using design software. However, hiring a designer can benefit those who prefer professional input on functionality, aesthetics, and construction techniques. A designer can help refine your ideas and ensure that the final product is both beautiful and practical. Ultimately, the choice depends on your comfort with the design process.
What tools are necessary to build bespoke furniture?
Building bespoke furniture requires a range of tools, both hand and power. Essential hand tools include saws, hammers, chisels, and measuring tapes. Power tools such as drills, sanders, and table saws can significantly speed up the process and improve precision. Safety equipment like goggles and gloves should also be prioritized. If you’re just starting, you may want to invest in essential tools over time as you gain experience. Understanding how to use these tools safely and effectively is key to successful furniture making.
What are the costs associated with commissioning bespoke furniture?
The costs of commissioning bespoke furniture can vary widely based on several factors, including materials selected, the complexity of the design, and the skill level of the craftsman. On average, bespoke furniture can range from a few hundred to several thousand dollars. Factors that influence pricing include the type of wood, finish, hardware, and labor involved in the custom build. Always get quotes from multiple craftsmen and compare what each includes before making a final decision.
What are the key steps to creating bespoke furniture?
Creating bespoke furniture involves several key steps. First, you need to determine the purpose of the piece and the available space. Taking accurate measurements is crucial. Next, sketch out the design, considering style, materials, and functionality. Selecting high-quality materials is essential for durability and aesthetics. Once the design and materials are finalized, it’s time to construct the furniture, which may involve woodworking, upholstery, or other finishing techniques. Finally, applying the appropriate finishes, like varnish or paint, can enhance the appearance and protect the material. Remember to regularly step back and assess your work at different stages to ensure the final product meets your vision.
How can I customize bespoke furniture to suit my personal style?
Customizing bespoke furniture is an exciting part of the design process. Start by gathering inspiration from various sources, such as magazines, websites, or social media. Think about your personal preferences in color, texture, and style—whether you lean towards a modern aesthetic or prefer a more rustic look. You can incorporate unique elements like custom colors, intricate carvings, or specific hardware to create a one-of-a-kind piece. Additionally, consider the functional aspects that reflect your lifestyle, such as storage solutions or adjustable components. Collaborating with a skilled craftsman can also help bring your ideas to life while ensuring the piece remains practical and durable.